You can download and install the
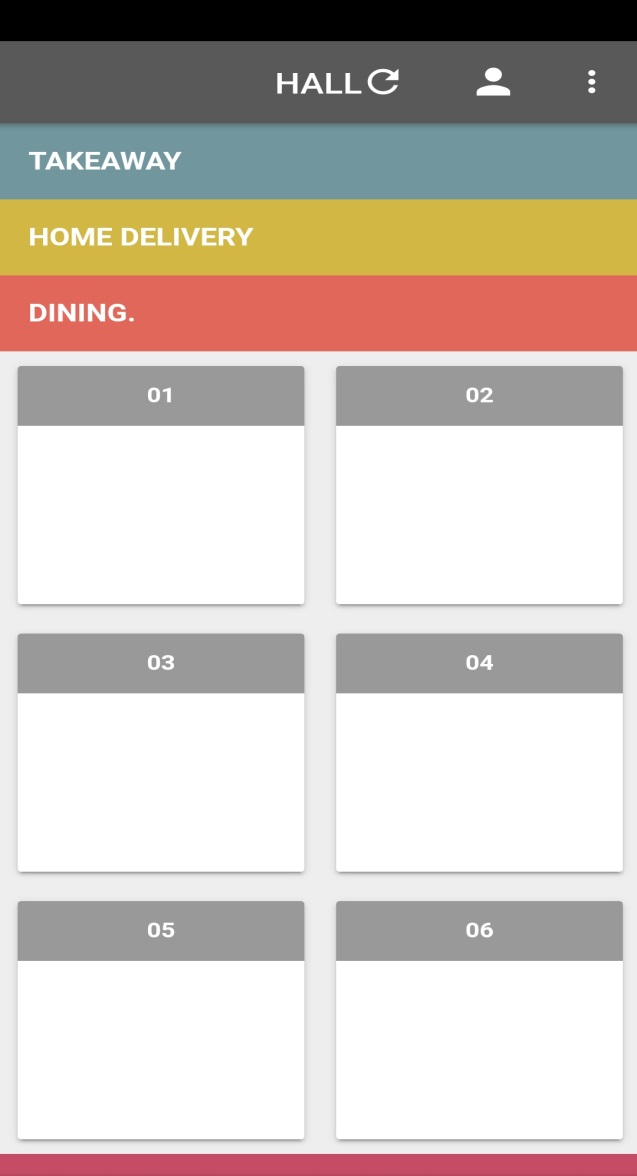
Poketpos App from Google Play Store. When you launch it, you
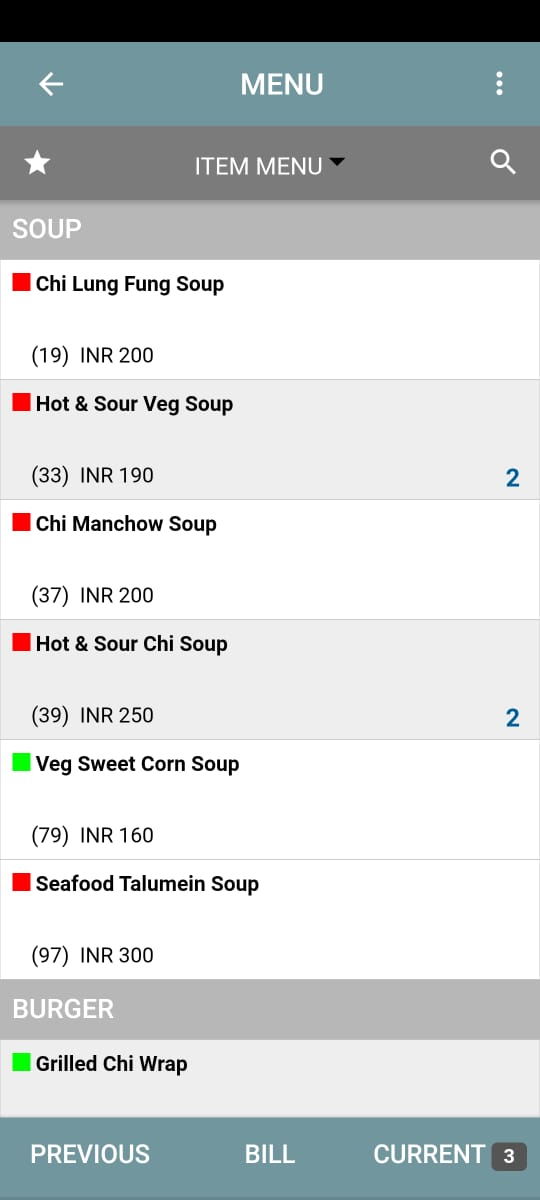
will view a Sample Menu that comes preloaded with different
ordering option. You can navigate your way through the
different options.
Your data security is our
responsibility. Our data centres are manned by the world's top
cloud service providers and are compliant with all
international, standard governance procedures and policies.
Moreover, all communication with our cloud servers is encrypted
and therefore fully secure. We also ensure that our cloud
portal can only be launched via the secure HTTP protocol
(https).
If you have purchased the cloud
backup license, your data will be automatically backed up to
our Cloud Server. You can download all your data from your back
office portal at any time. If you have not purchased the Cloud
backup license then the data is stored in the device memory by
default and cannot be recovered by us if your device crashes.
Go to Play Store. You can search for the PoketPOS app and install it. Alternatively, you can install the PoketPOS app by clicking on the link given below:
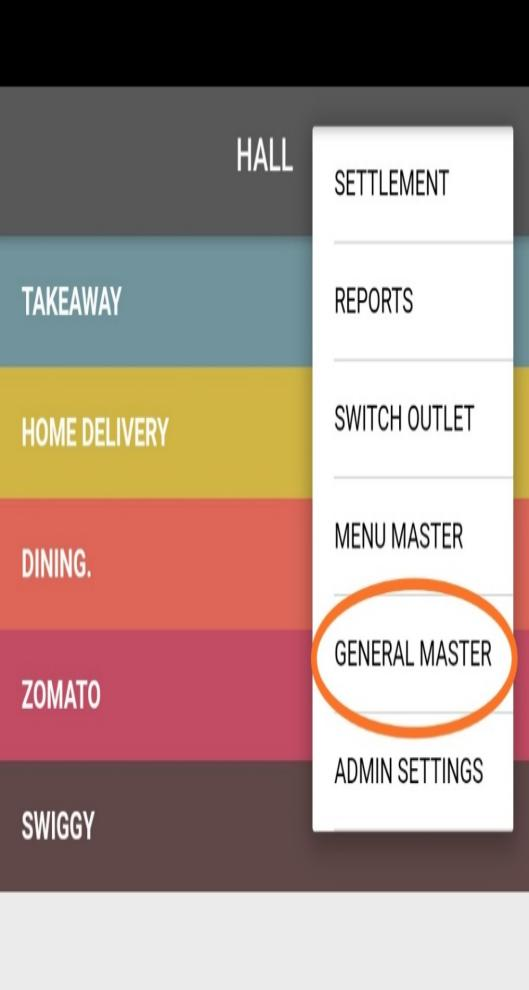
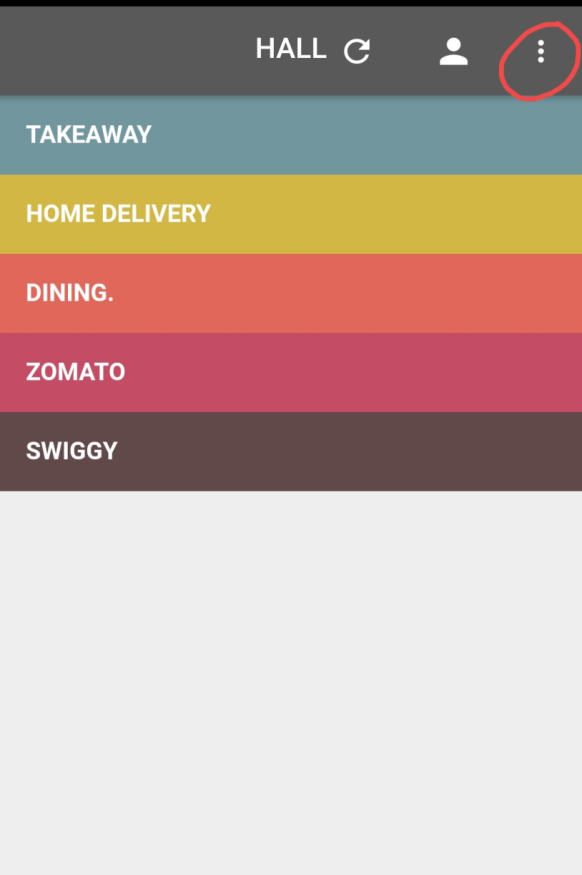
In the Main menu, select the options tab situated at the top right hand corner on the screen.
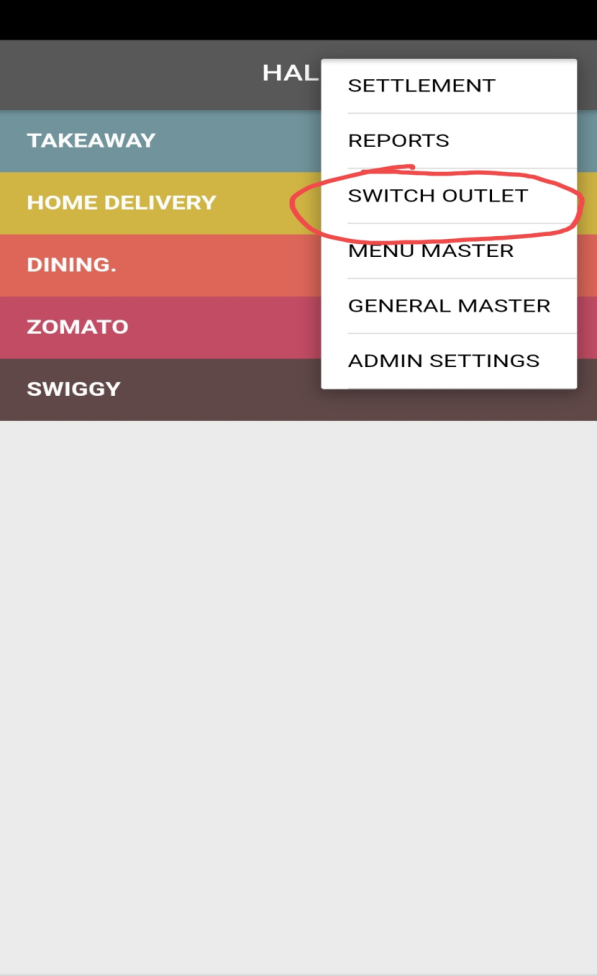
From the drop down menu, select 'General Master'
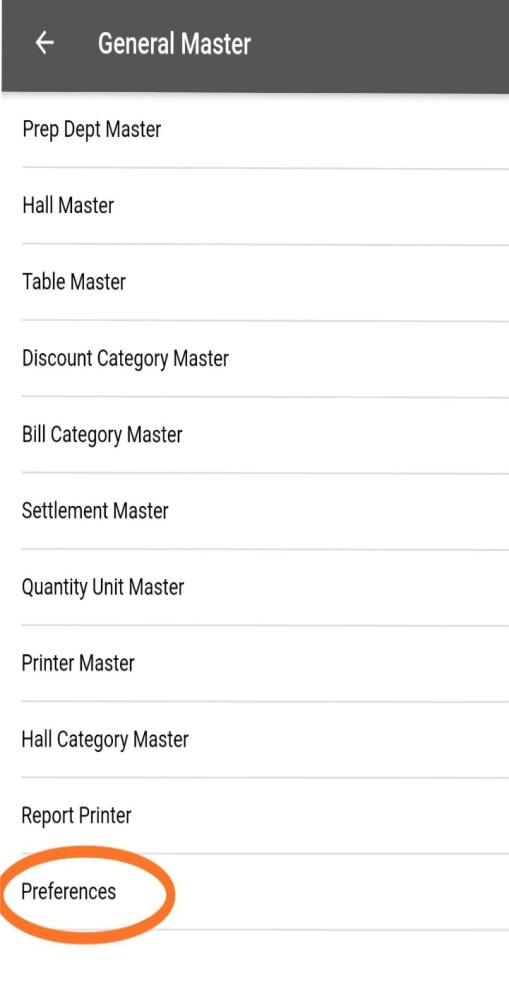
From the next drop down menu, select 'Preferences'
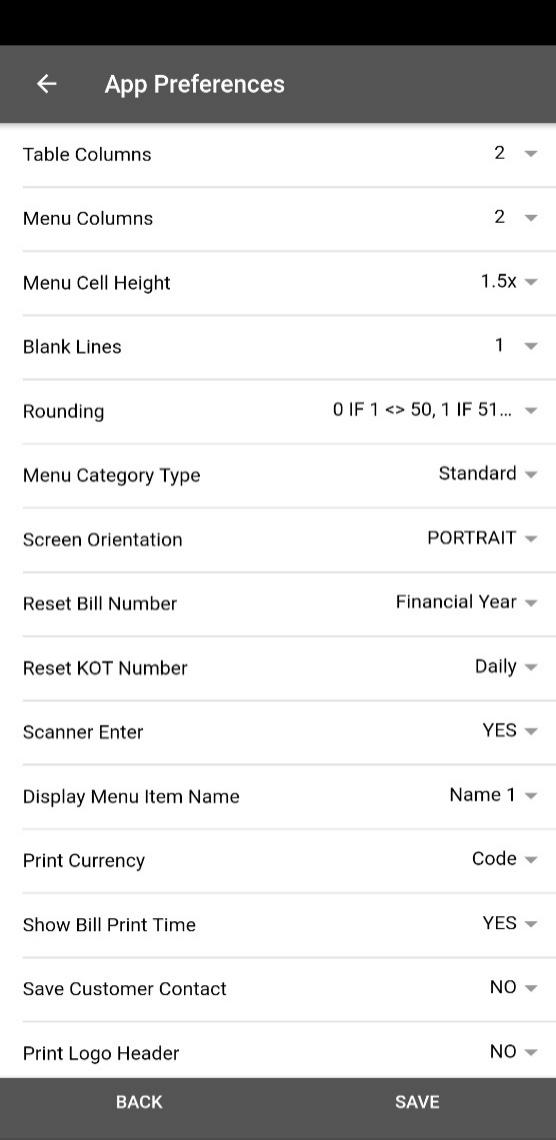
The screen will show the "App Preferences"
Select your preferences and click on 'Save'
In 'Table Columns', you can decide on the number of tables that will be displayed in one row
In 'Menu Column', you can decide on the number of Menu items that will be displayed in one row
In 'Menu Call Height', you can decide on the height settings for the items to be displayed. (e.g. 0.5X, X, 1.5X, 2X)
In 'Blank Lines', you can decide on the minimum number of lines to be shown in the invoice
In 'Rounding', you can decide on the rounding up settings of the bill
In 'Menu Category Type', you can decide on the category of the menu that is to be displayed (e.g.: Standard)
In 'Screen Orientation', you can decide on the screen settings depending on the display (e.g.: Portrait or Landscape)
In 'Reset Bill Number', you can reset the numbering of the bill every day, every month, yearly, or based on the financial year.
In 'Reset KOT Number', you can reset the bill number to either daily, monthly, yearly, or based on the financial year.
In 'Scanner Enter', you can choose 'Yes' if a scanner is used to read the 1D or 2D barcode
In 'Display Menu Item Name', the menu can be saved in English (Name 1) or in any other language (Name 2).
In 'Print Currency', you can choose the billing to be done in any currency though the default is Indian Rs.
In 'Show Bill Print Time', you can select 'Yes' if you want the time to be printed while saving the bill.
In 'Save Customer Contact', you can select 'Yes' if you want the details of the customer to be saved. Further on saving these details, there is another option by which you can also decide if the details need to be saved in the local device Contact App.
In 'Print Logo Header', you can select 'Yes' if you want to print the logo on top of the bill. This option is available only with Epson printers.
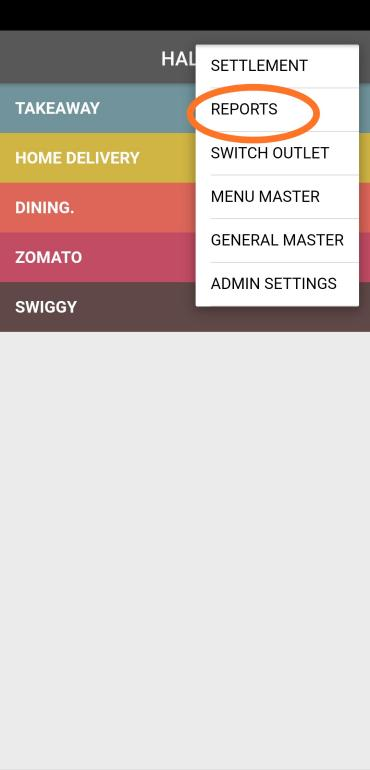
In the Main menu, select the options tab situated at the top right hand corner on the screen
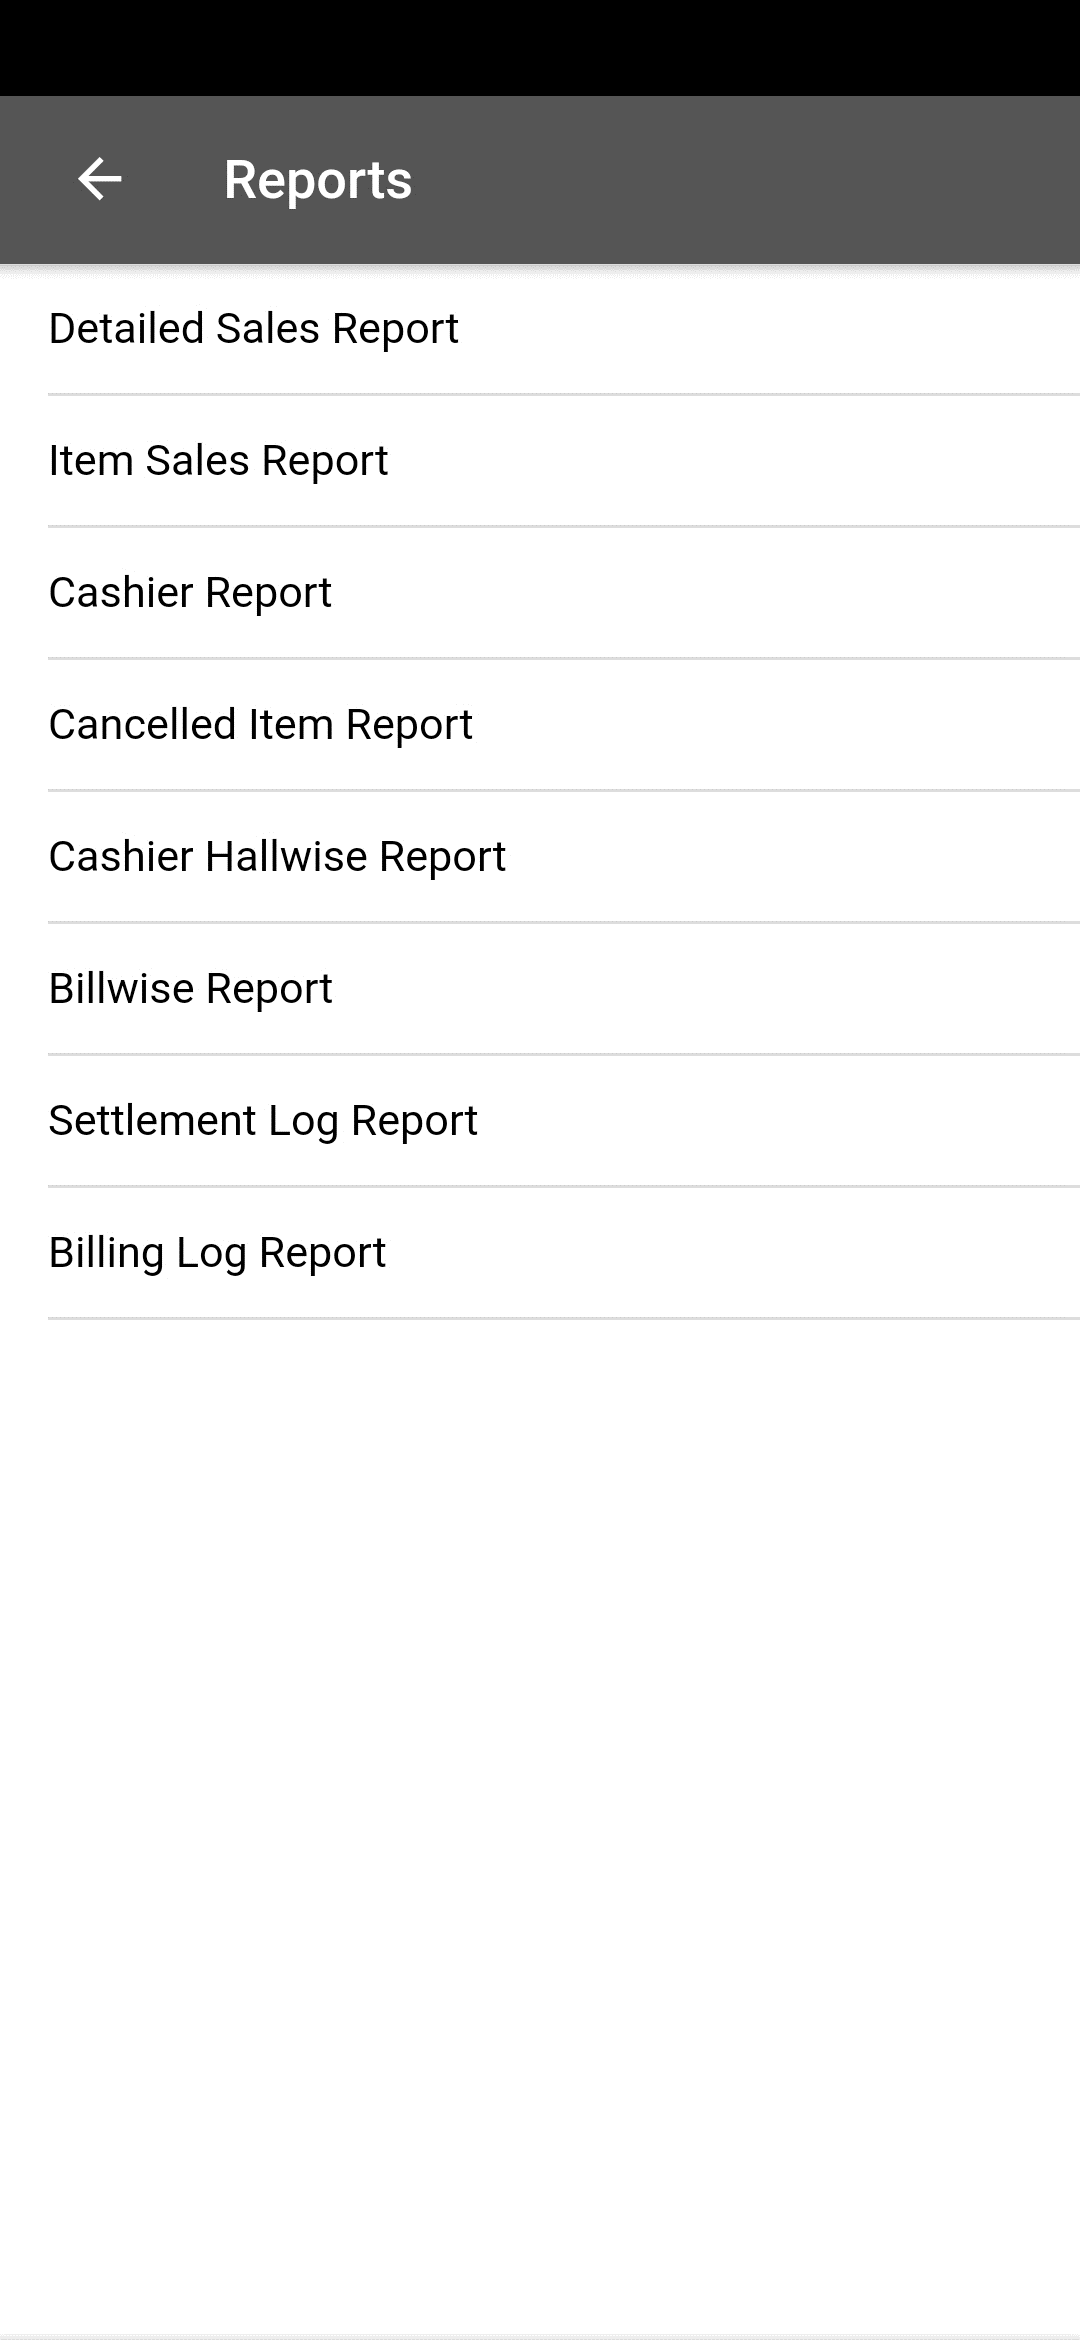
From the drop down menu, select 'Reports'
You will get a list of reports that can be generated. You can select the report, the date range, and set other requisite filters.
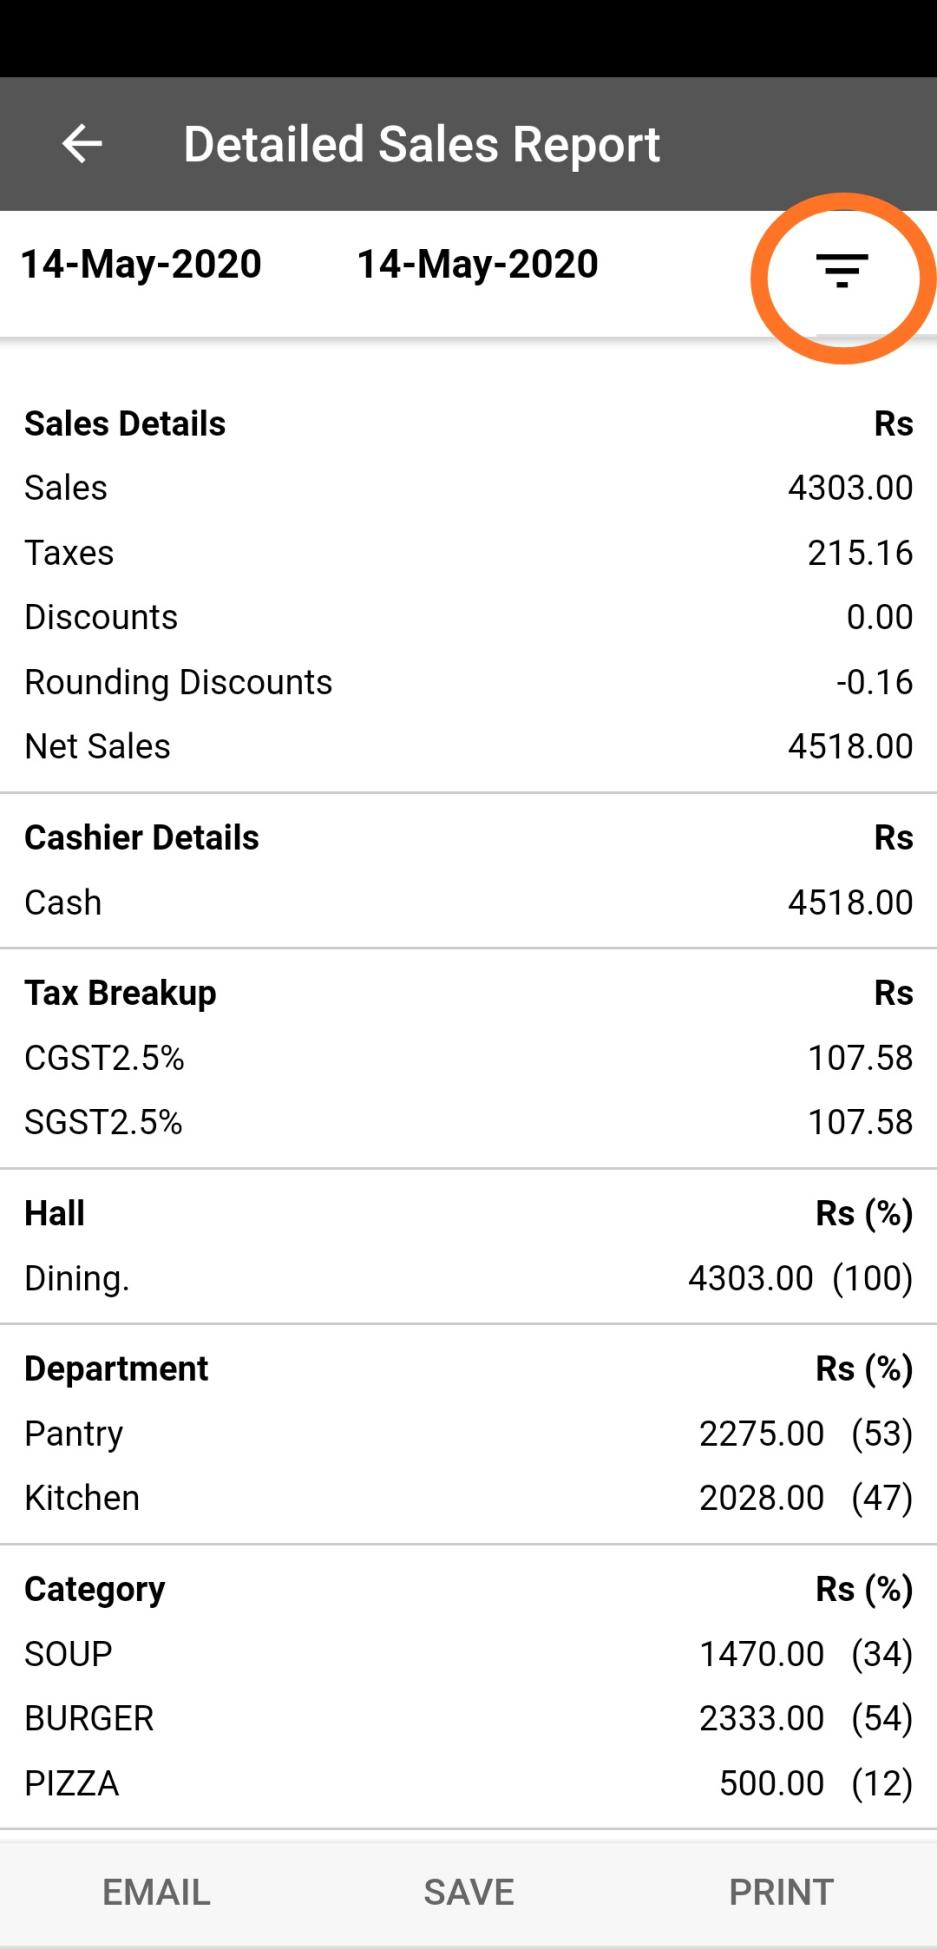
After selecting a particular type of report, you can click on the three horizontal lines on the top right hand corner to generate a month wise or week wise report. The reports can be saved, e-mailed, or printed. To do this, click on the appropriate option at the bottom of the screen.
Admin Settings are allocated to the Owner or Admins
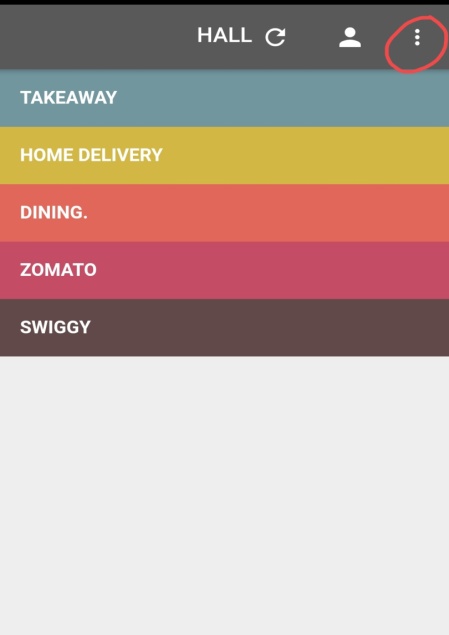
In the Main menu, select the options tab situated at the top right hand corner on the screen.
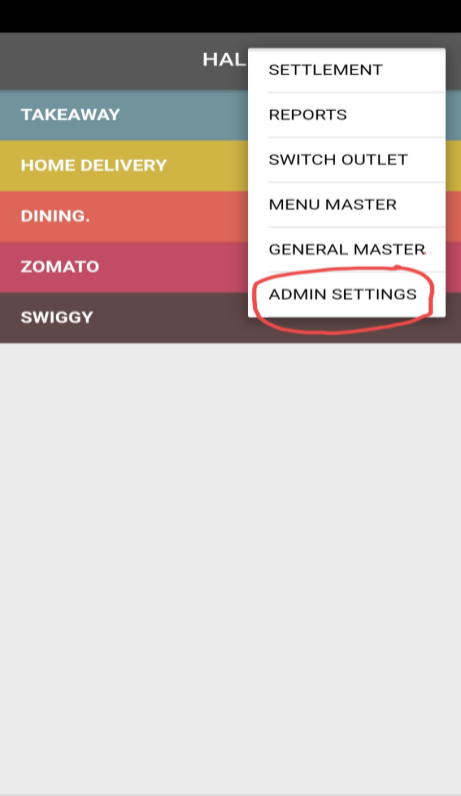
From the drop down menu, select 'Admin Settings'
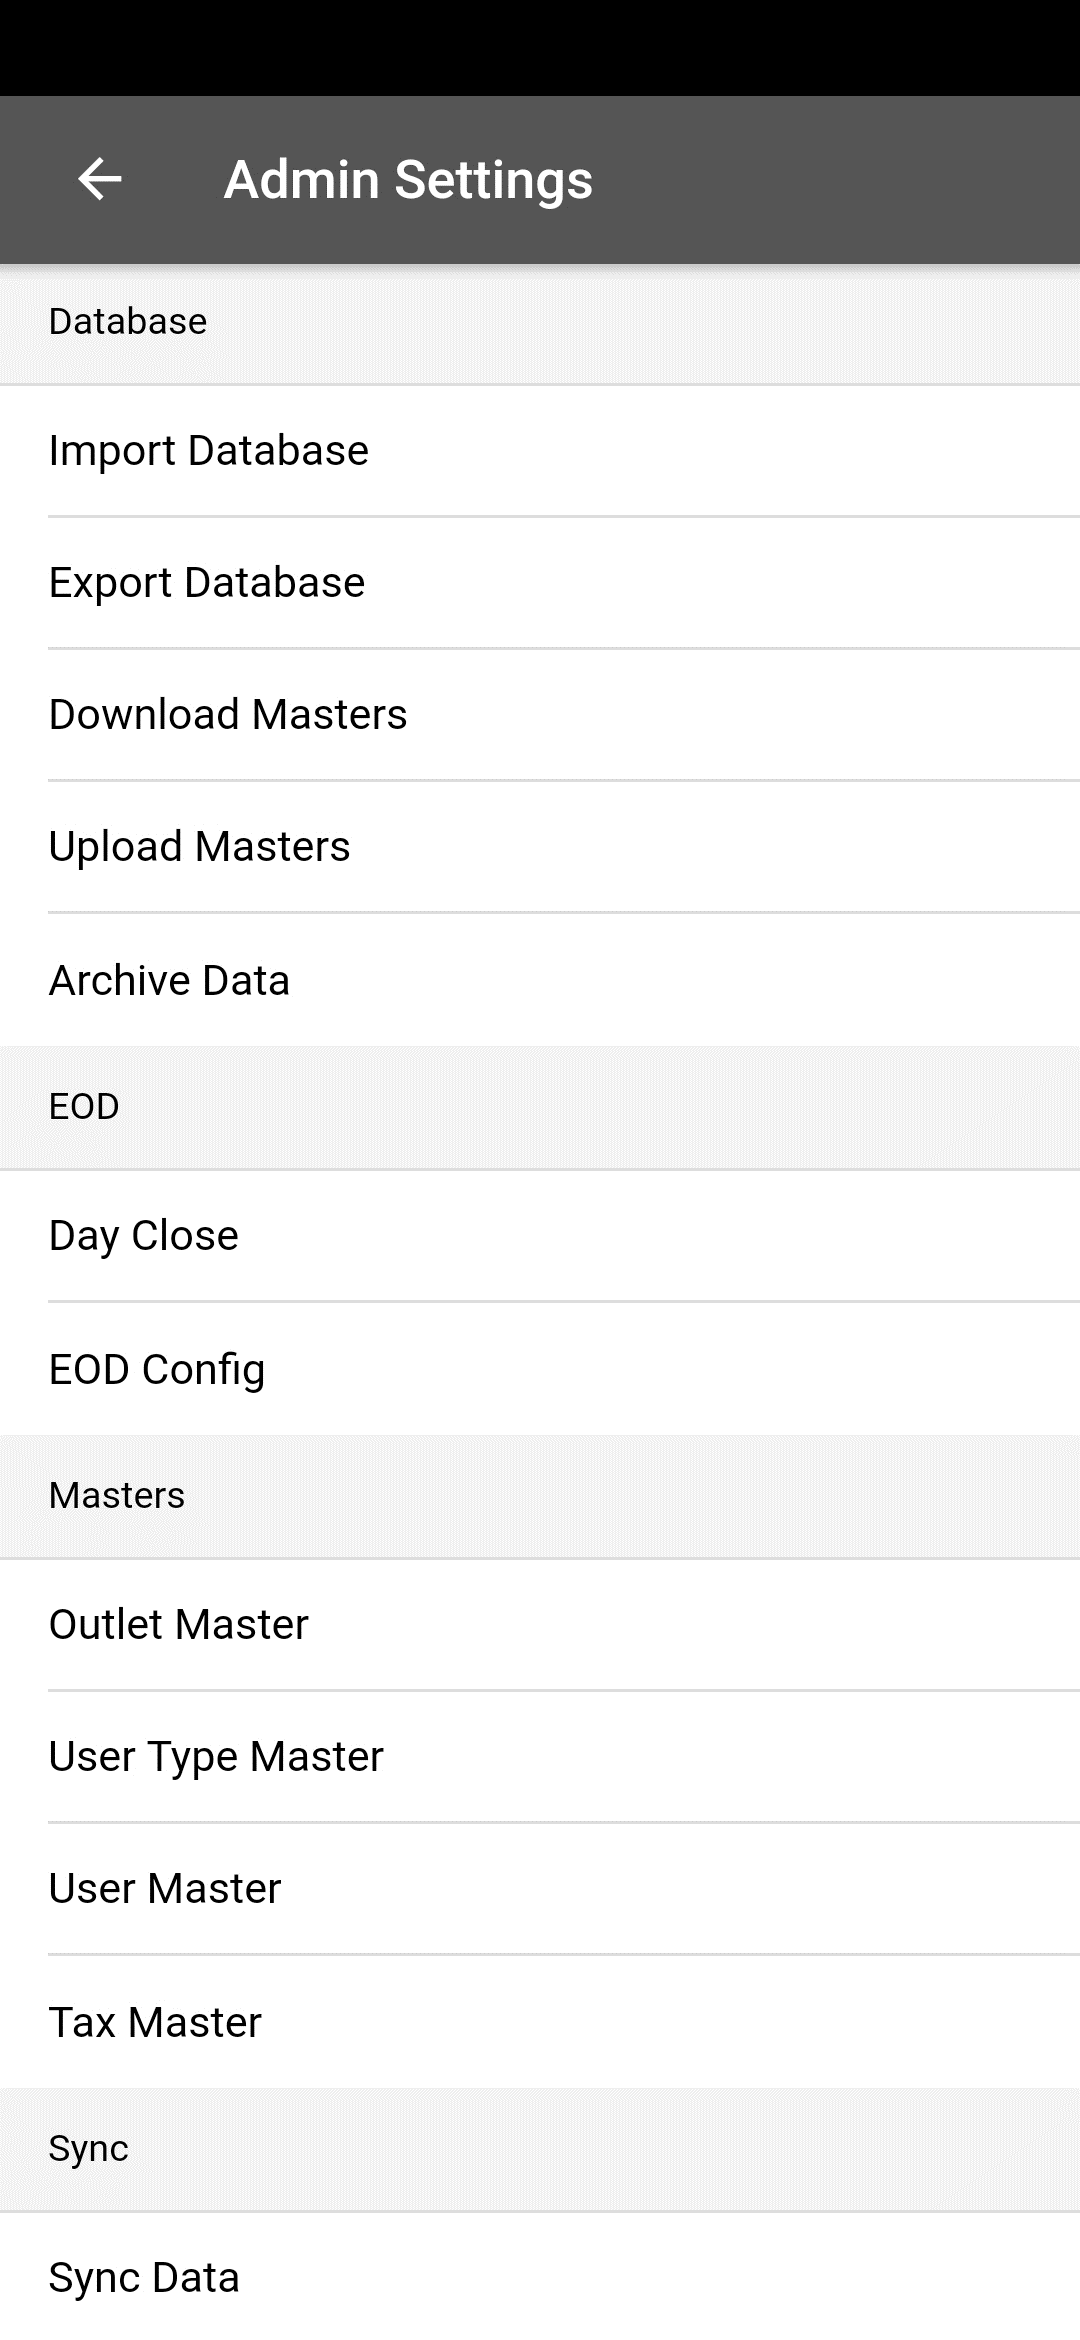
This screen has many options viz. Database, EOD, Masters, and Sync as shown
Database: Click on this option in the screen 'Admin Settings', to view the various sub-options viz. Import Database, Export Database, Download Masters, Upload Masters, and Archive Data.
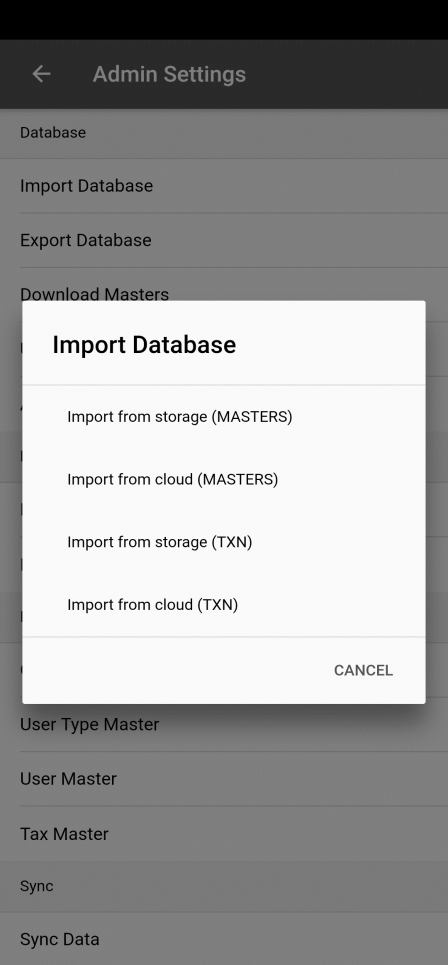
Import Database: Select this option to import a database in different ways.
Import from Storage ( Masters):If the device is formatted or changed, the Master Data can be imported from an external source
Import from Cloud (Masters):If any changes made in the Menu Master or other master from the admin portal needs to be updated.
Import from Storage ( Transaction):If the device is formatted or changed and the Transaction Data needs to be imported from an external source whenthe outlet does not have a cloud license
Import from Cloud (Transaction): If the device is formatted or changed and the Transaction Data needs to be imported from the admin portal when the outlet has a cloud license
Admin Settings are allocated to the Owner or Admins
In the Main menu, select the options tab situated at the top right hand corner on the screen.
From the drop down menu, select 'Admin Settings'
This screen has many options viz. Database, EOD, Masters, and Sync as shown
Database: Click on this option in the screen 'Admin Settings', to view the various sub-options viz. Import Database, Export Database, Download Masters, Upload Masters, and Archive Data.
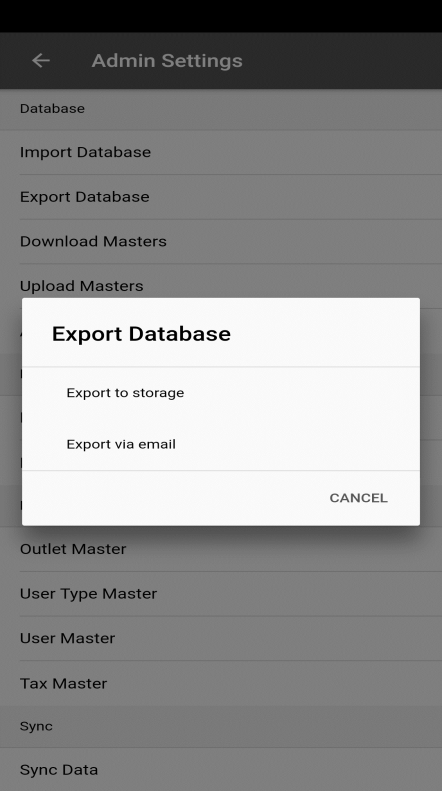
Export Database: Click on this option to export databases in different ways.
Export to storage: Transaction Data can be exported to an external storage device
Export via email:Transaction Data can be exported via Email
Other things that you may need to know :
Download Masters: Click on this option to update Masters by downloading from the admin portal. The device master will be replaced by the Masters Data from the cloud
Upload Masters: Click on this option to update the cloud when the user does some changes to Masters from the device.
Note: This option will not work if there is more than one outlet in the organization.
Archive Data: Click on this option when the device's memory is almost full. Using this option, part of the data can be archived. This can then be accessed if its date range is within the date range of the archived data.
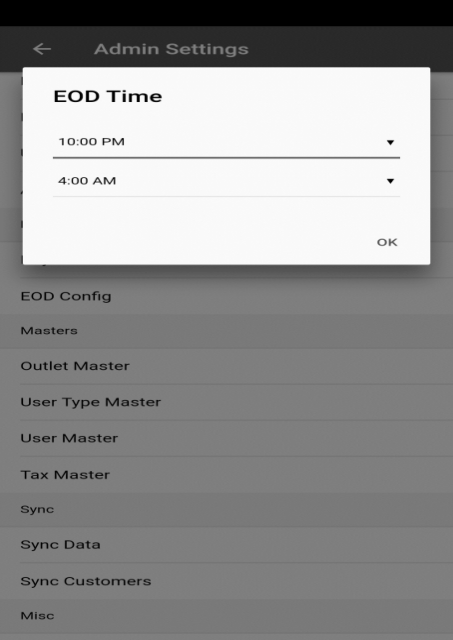
EOD: Click on this option in the screen 'Admin Settings' to view the sub-options, 'Day Close' and 'EOD Config'.
Day Close:Click on 'Day Close' time slot to manually set the EOD time. E.g. Day close can be manually done between 10pm and 4am. After 4am, the PoketPOS app will not allow you to bill unless Day Close is done.
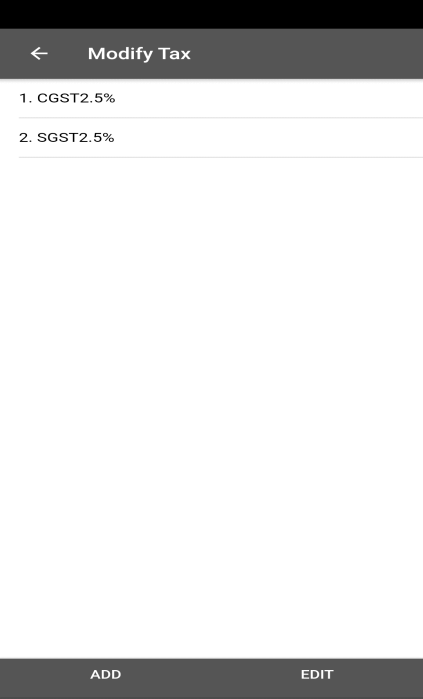
Masters: Click on this option in the screen 'Admin Settings', to view the various sub-options viz. Outlet Master, User Type Master, User Master, and Tax Master.
Outlet Master: Select this option to make changes in the Name and other details of the outlet as these will be printed in the bill.
Outlet name: The name displayed here will be printed in the bill
Header Line 1,2,3 : The details of the address printed here will be displayed in the bill
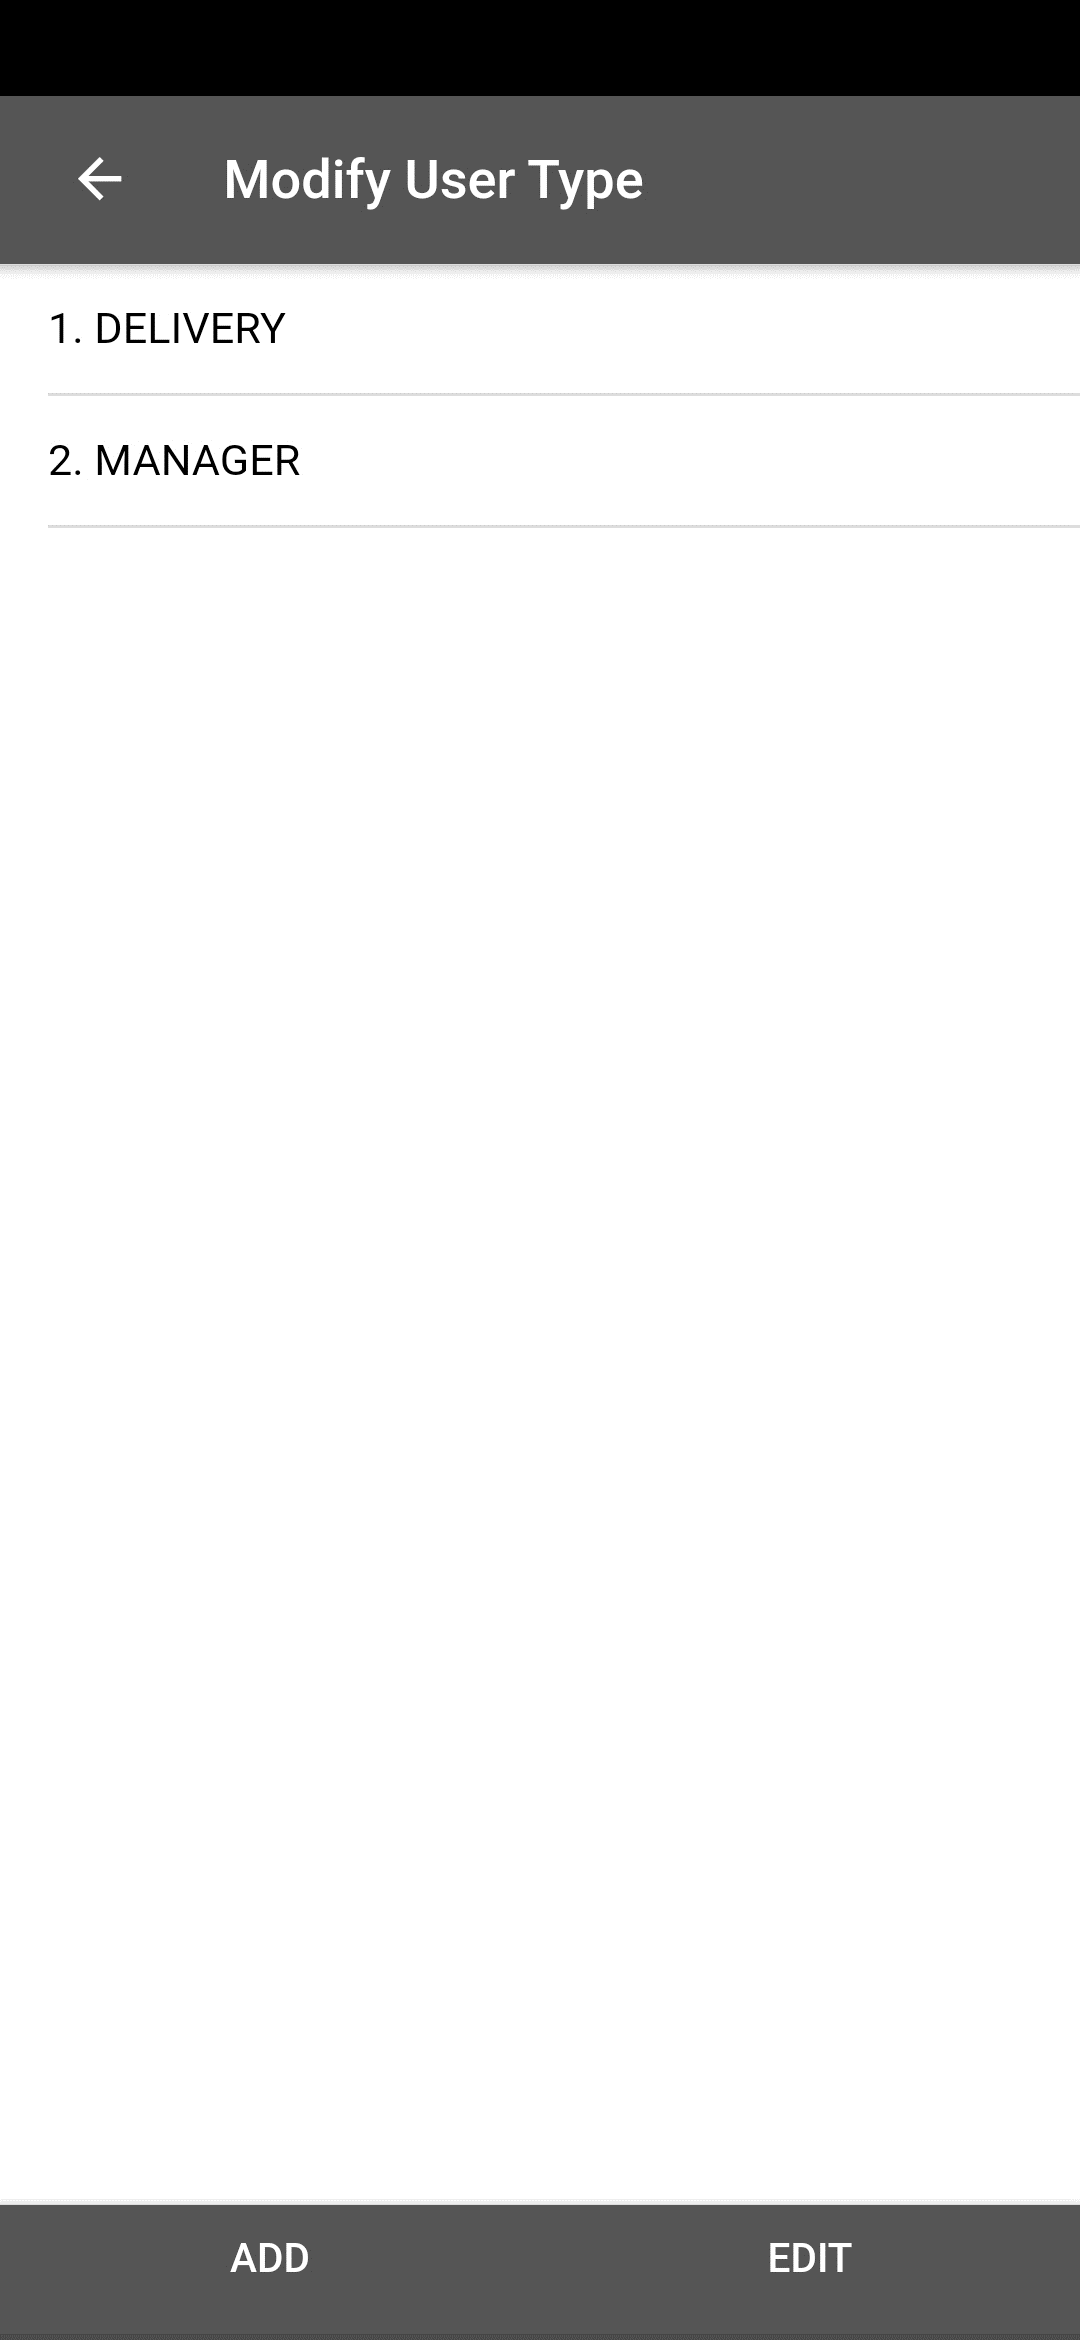
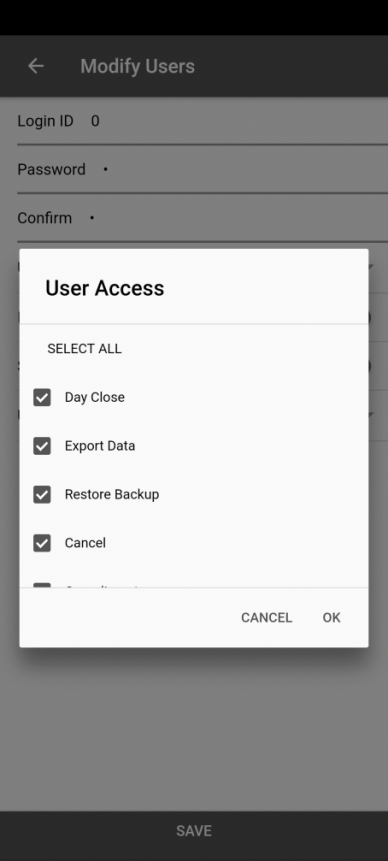
User Type Master: Select this option to create a User Type and allocate different user access.
E.g. User Type i.e. Delivery, Manager, etc. can be created and they can be given appropriate User Access (Day Close, Export Data, Restore Backup, etc. can be ticked as needed)
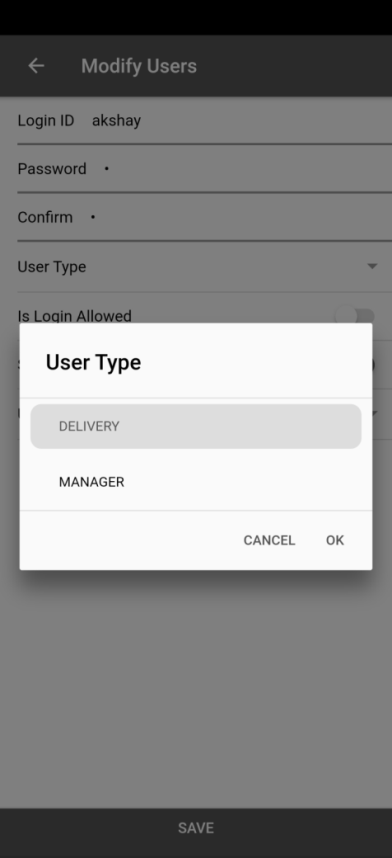
User Master: Click this option to select a User and allocate User Type (e.g. You can add/edit names of people too.)
After allocating the User Type, click on 'OK'
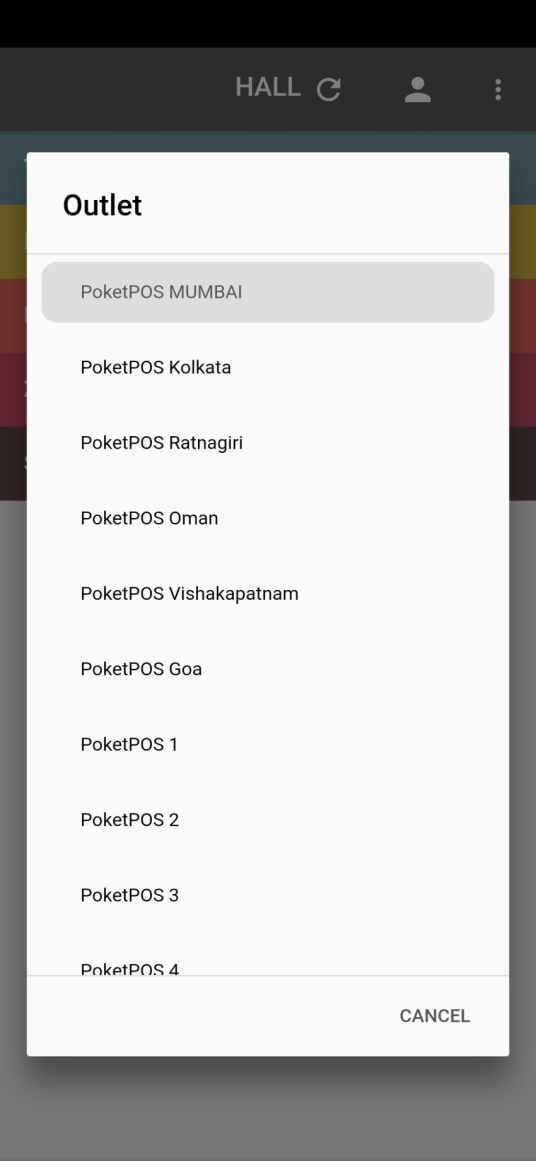
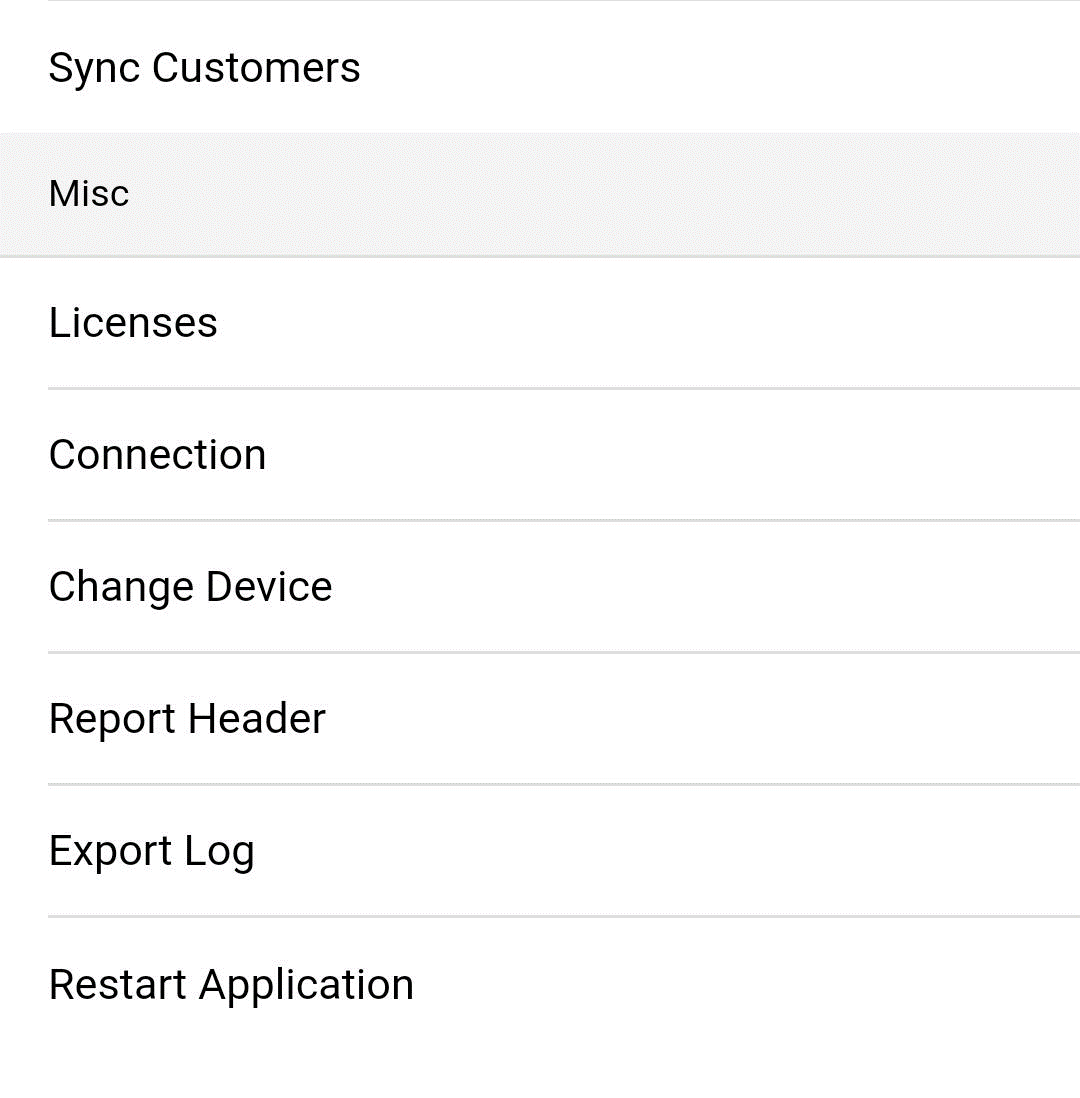
Sync: Click on this option to see the sub-option 'Sync Data'. In this, the data can be manually uploaded to the cloud if the old data has to be synced due to any disruption in the internet connection. The sub-option,' Sync Data', gives a drop down menu with further options viz., Sync Customers, Misc., Licenses, Connection, Change Device, Report Header, Export Log, and Restart App.
Sync Customers:With this option, if the organization has only one outlet then, the Customer Master can be manually uploaded to the cloud. If the organization has more than one outlet then, each outlet should have a cloud license.
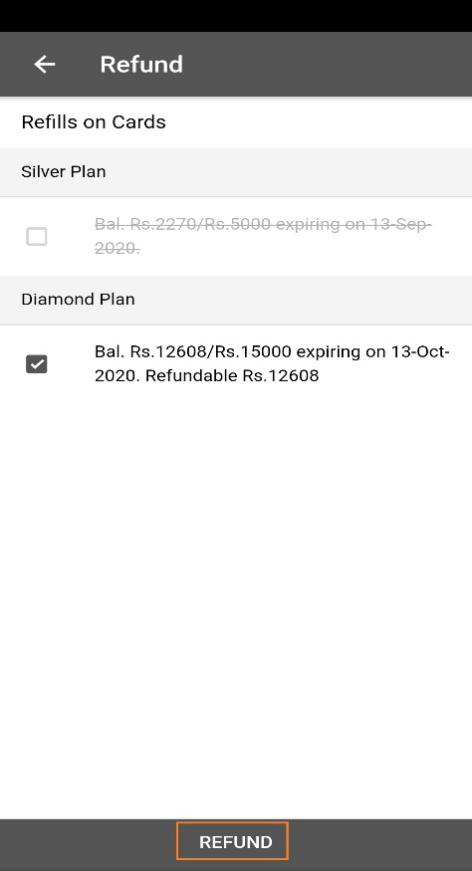
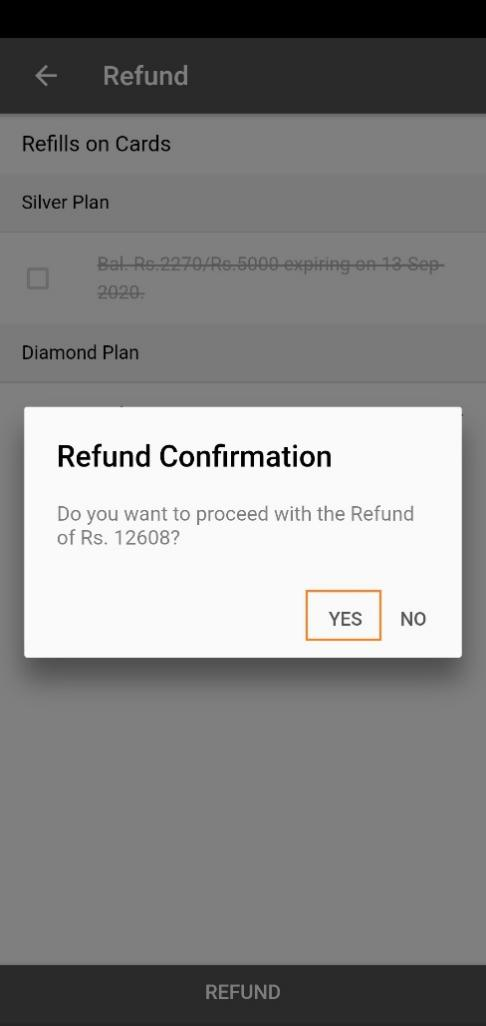
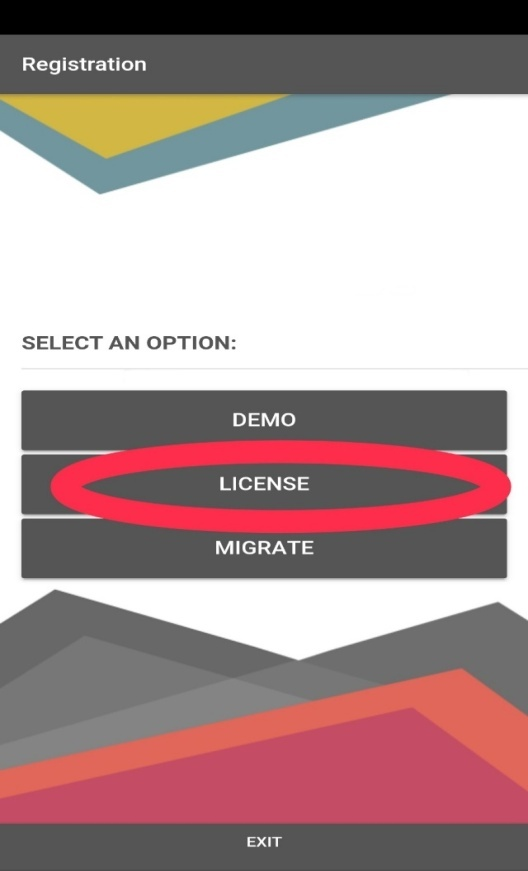
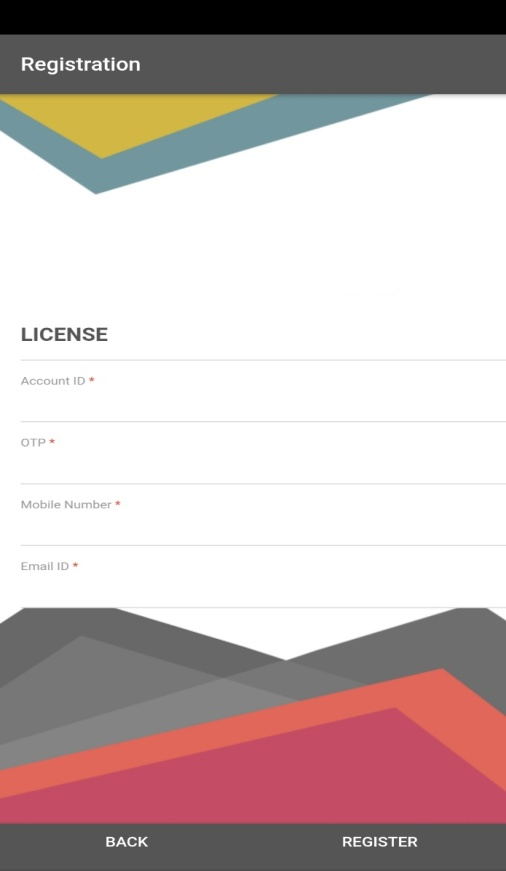
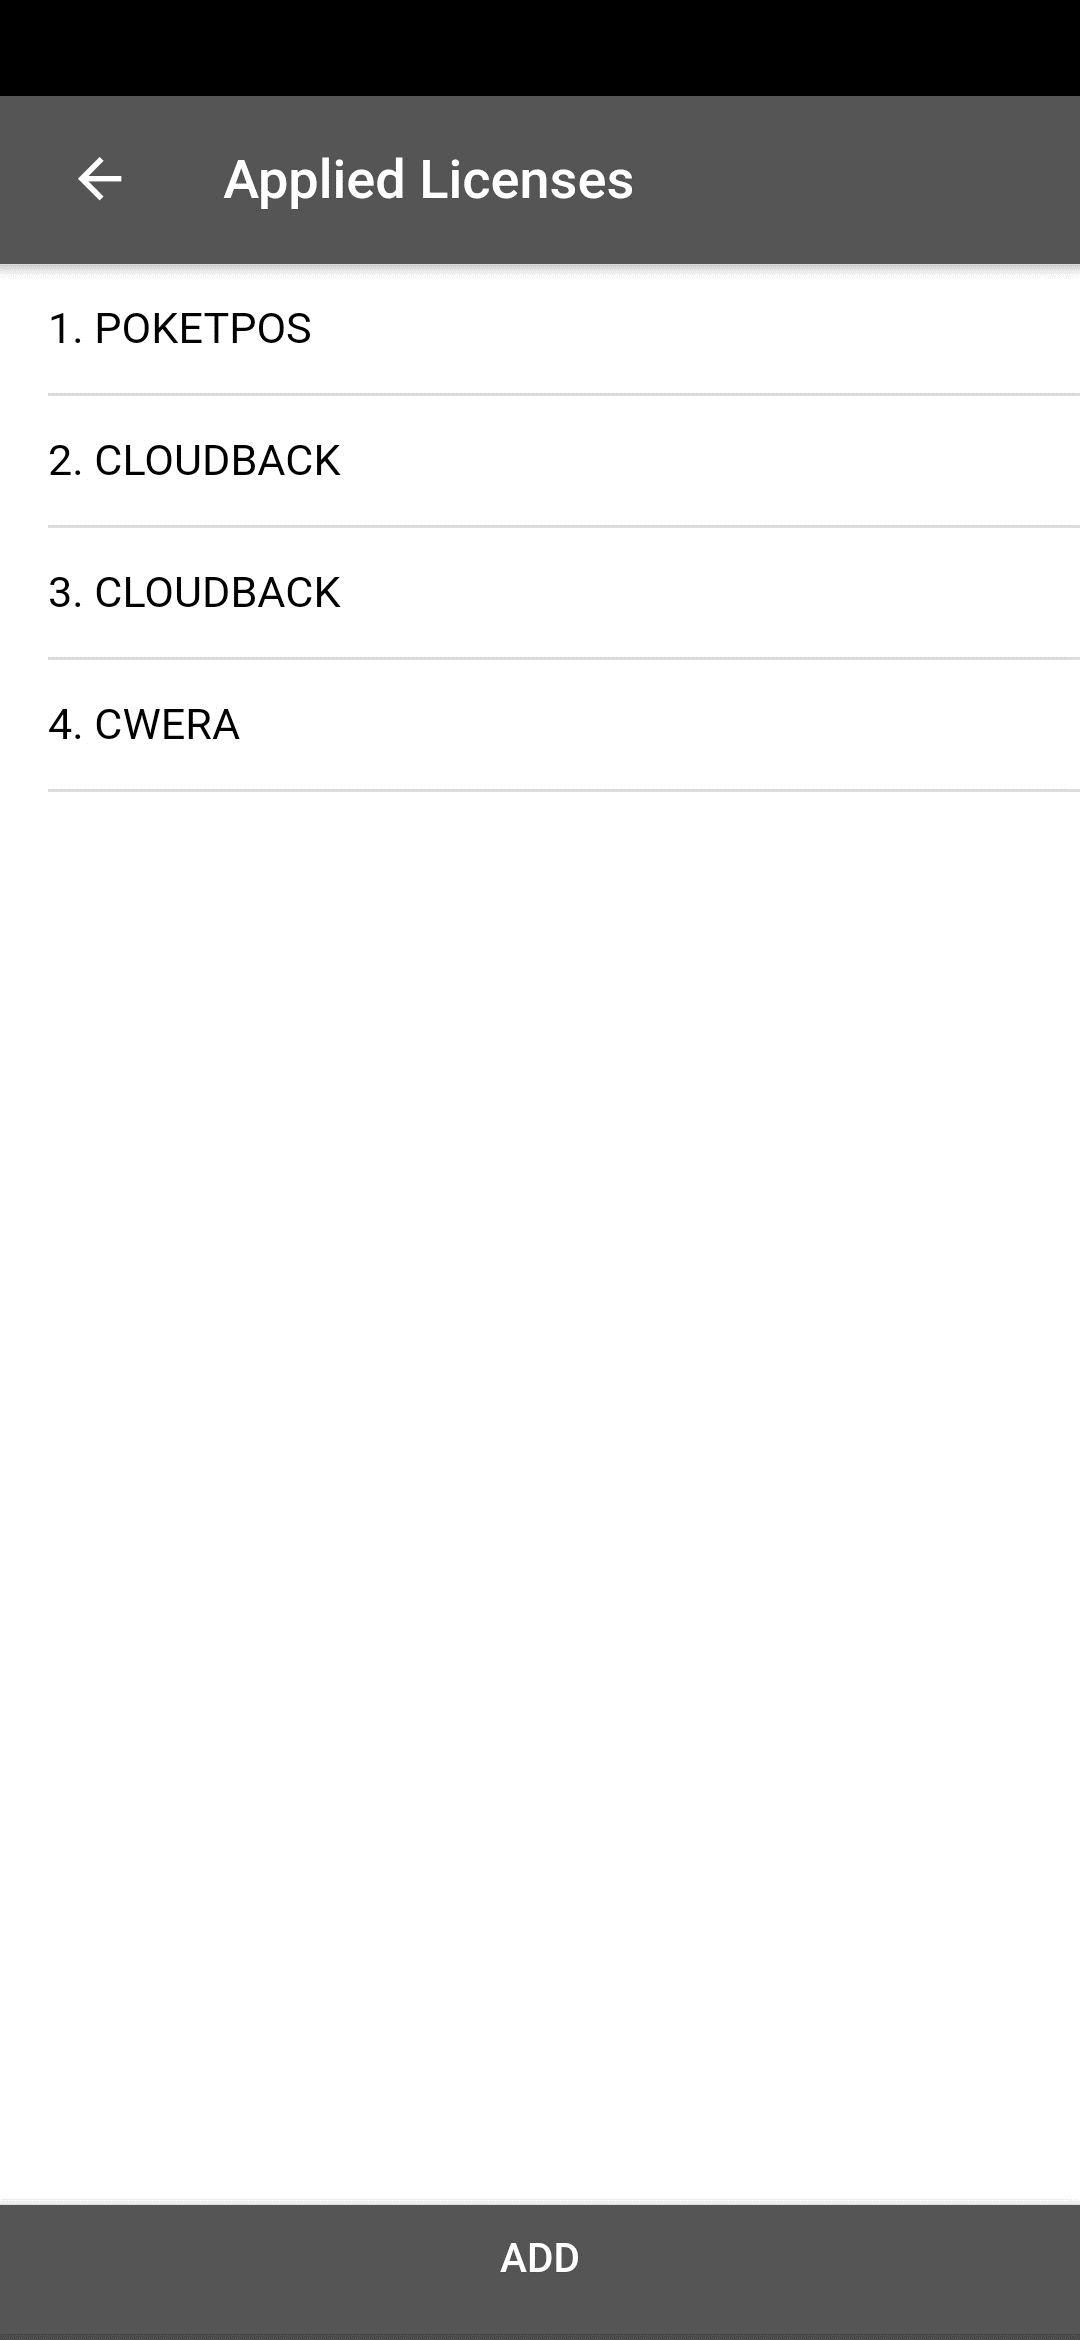
Licenses: Click on this option to update/ enter the License OTP in the below screen.
Connection: Select this option to check the connection for the KDS
Change Device: If the device has to be changed, click on this option to generate an OTP which then has to be entered in the migrated device.
Report Header: Select this option to enter the name that you wish to be printed in the Report Header
Export Log: Select this option to send/ export the file to the PoketPOS Development Team. (Email id: poketpos@gmail.com)
Restart App: Select this option to restart the PoketPOS App
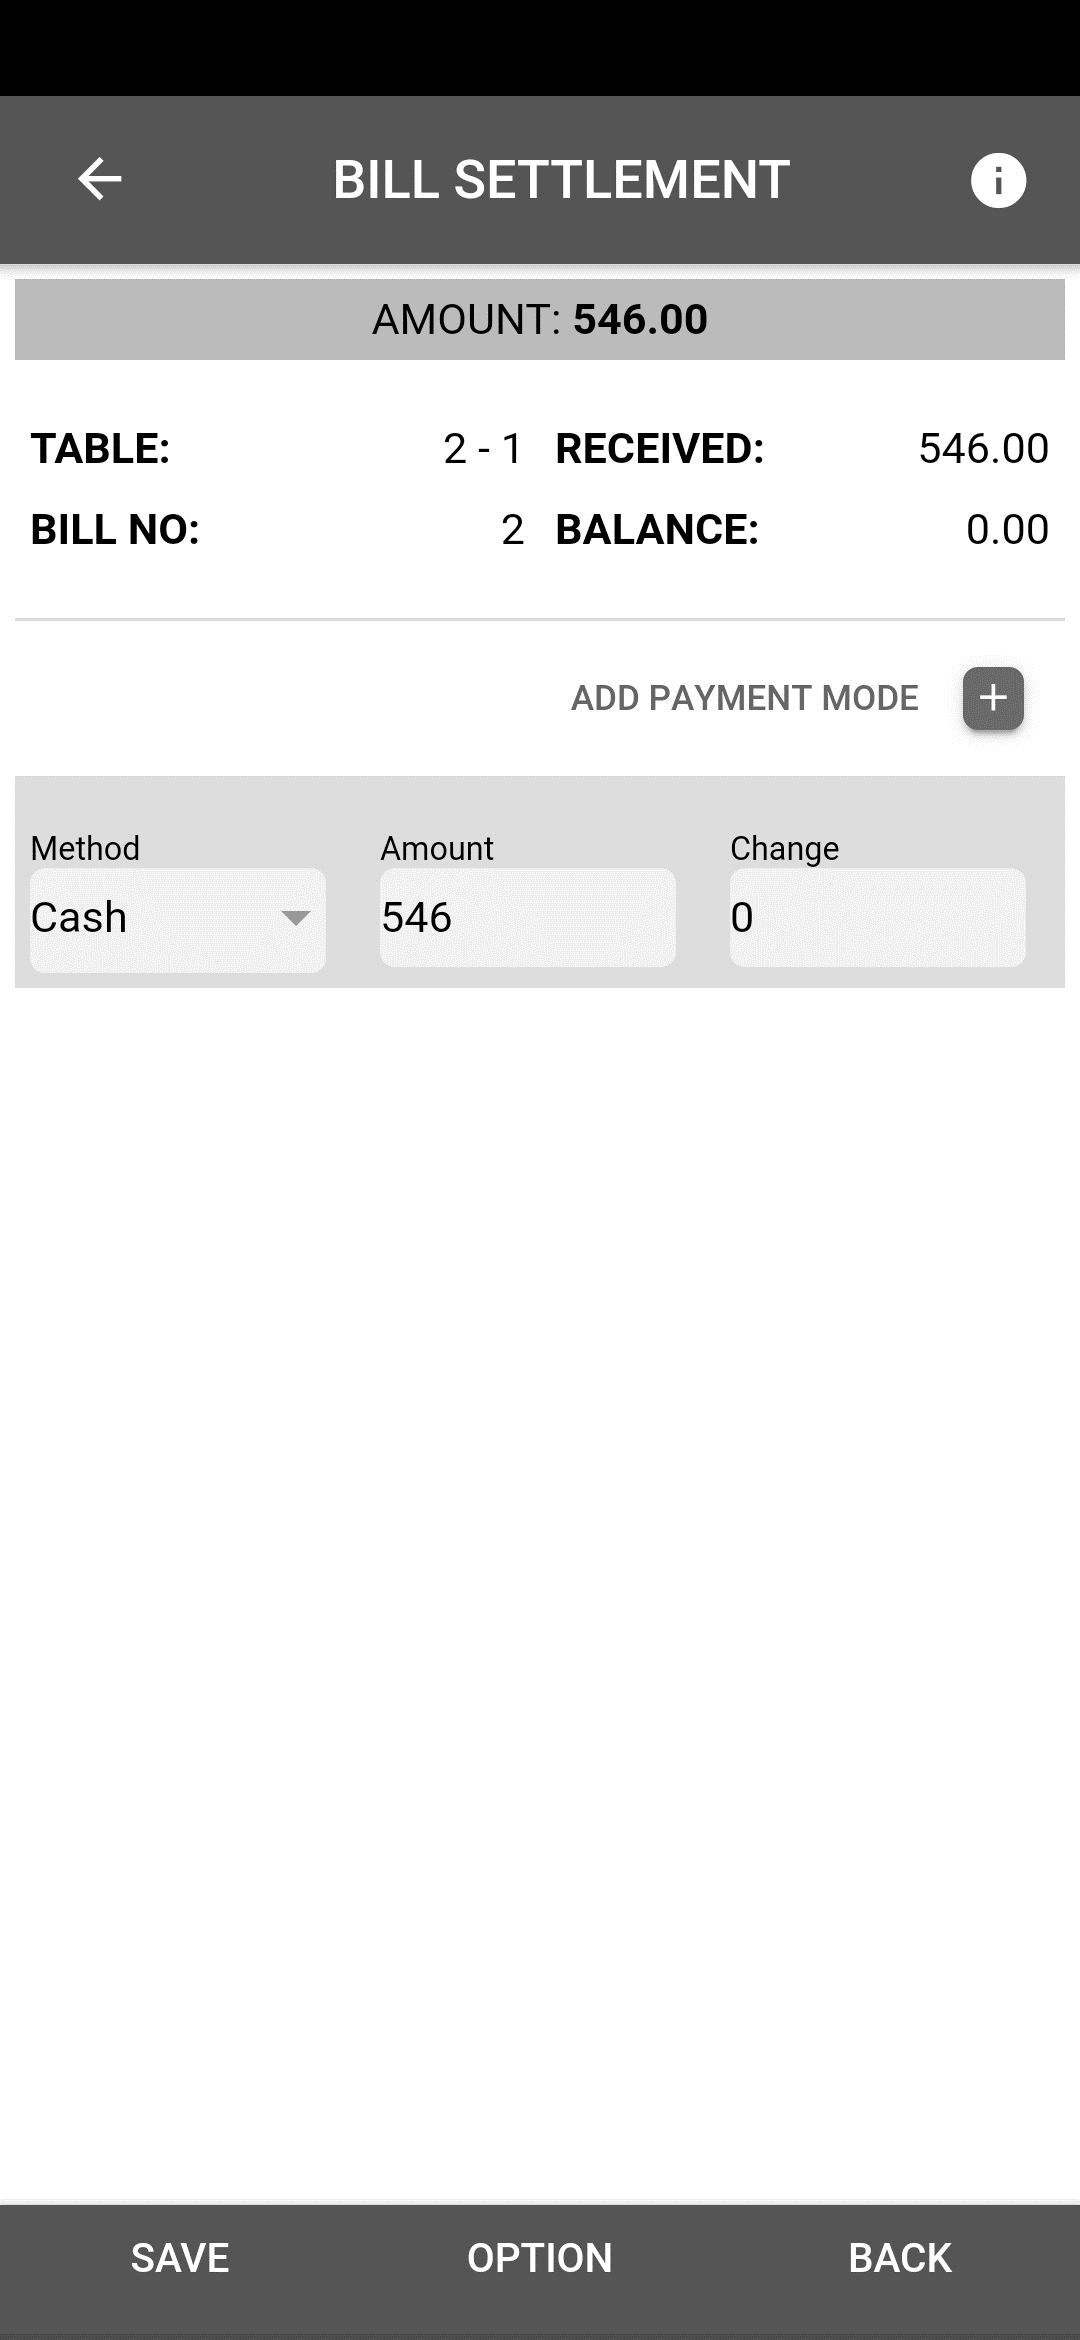
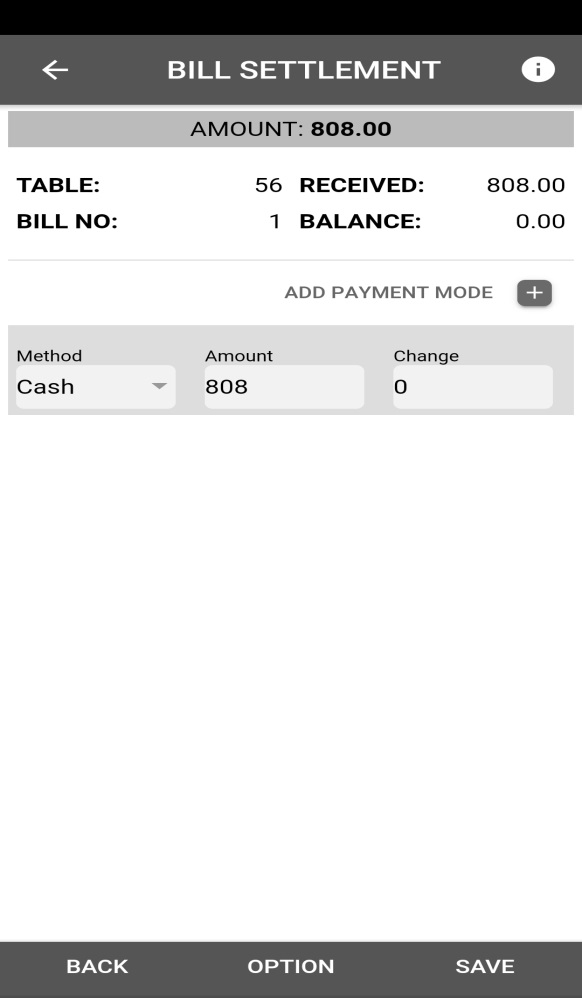
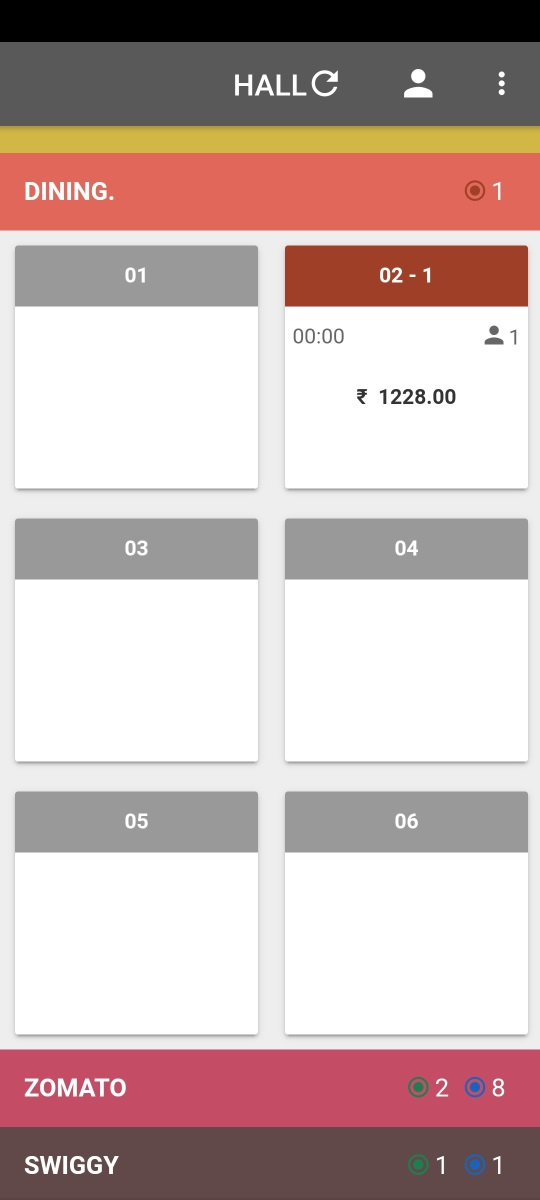
To place and settle a bill via different payment options
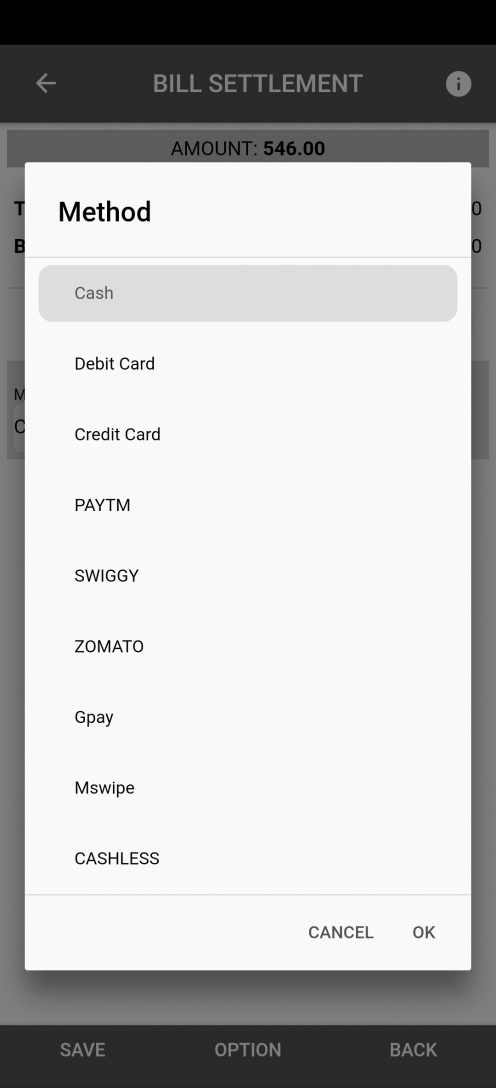
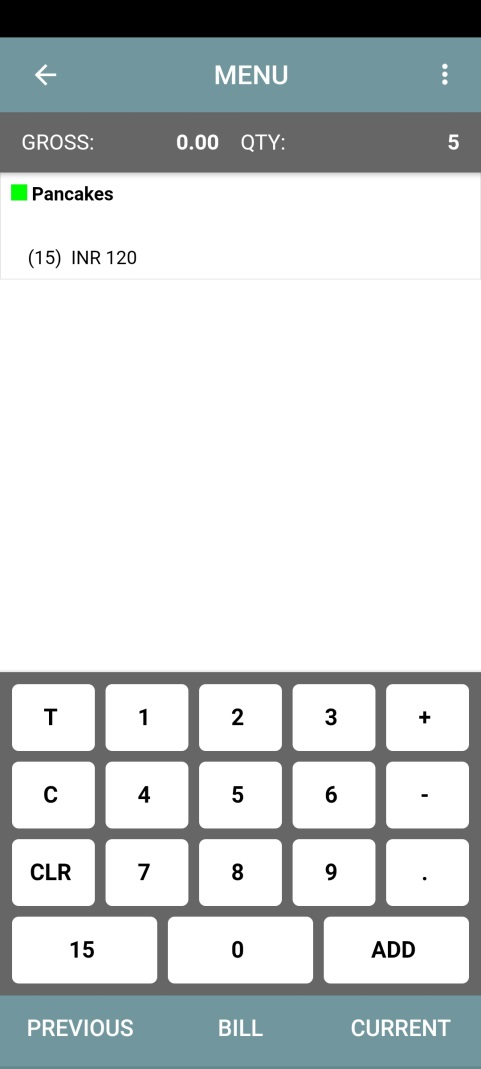
After the items from the menu are selected, click 'Place and Bill'
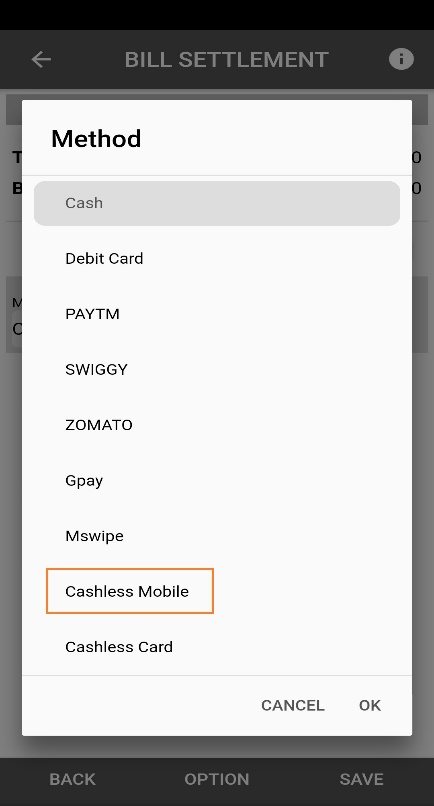
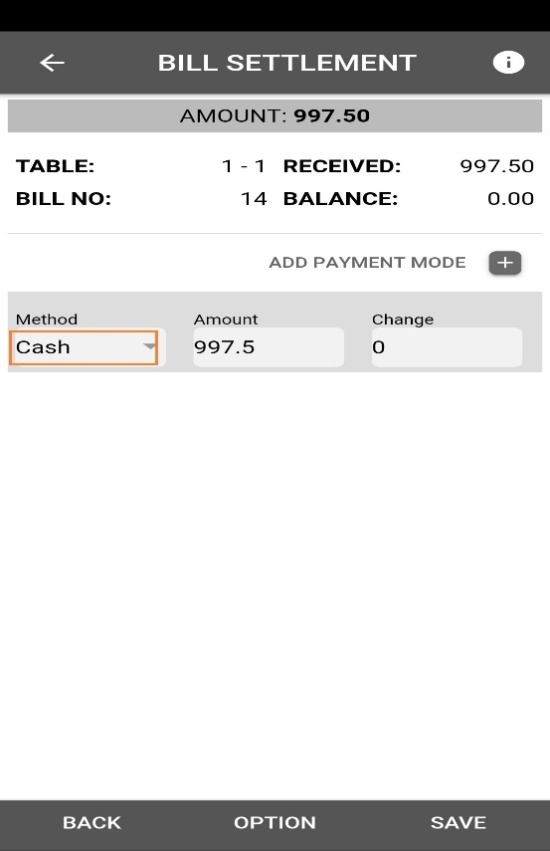
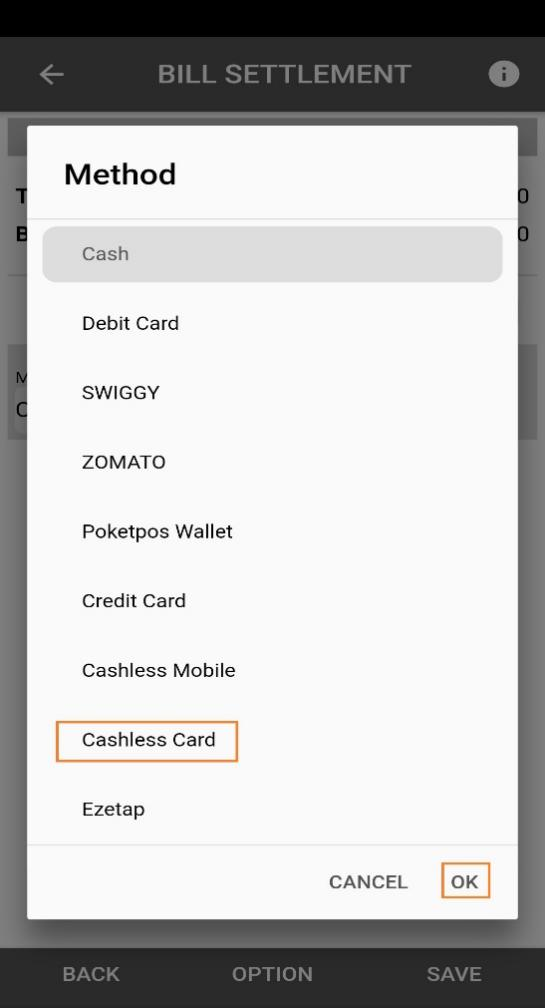
On the Bill settlement screen, select the appropriate option from the drop down menu, 'Method' E.g. Cash if the payment is to be done via cash and click on 'Save'.
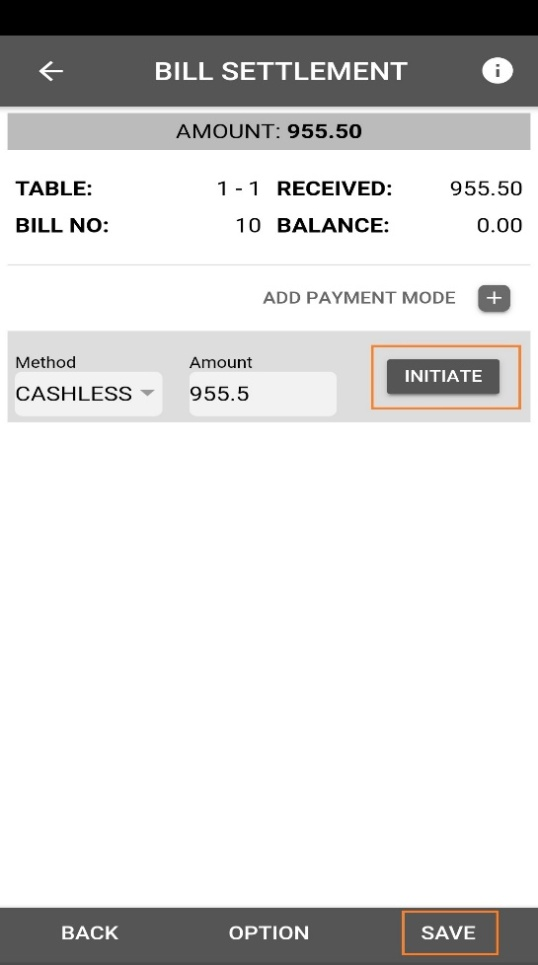
In case of payment using two different options i.e. if part payment is being done by cash and the rest through Credit Card, then, first select 'Cash'
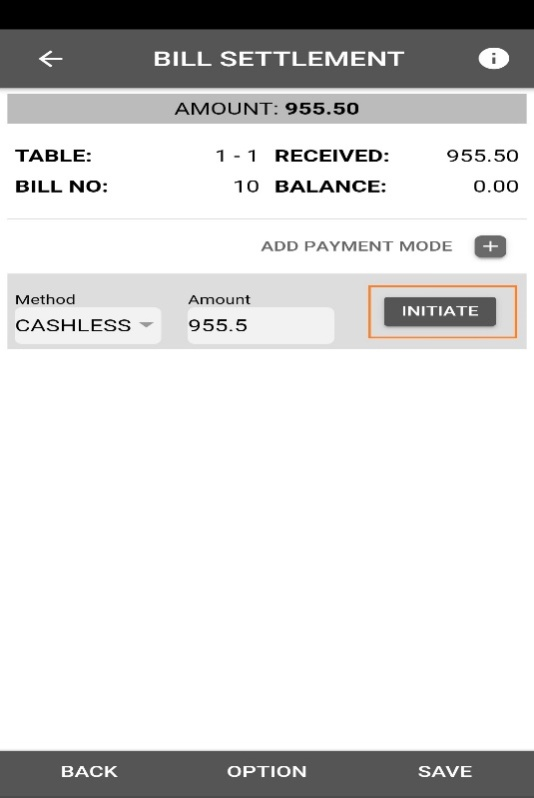
Change the amount to the remaining balance and select '+' in 'Add Payment Mode'
Select the next other option e.g. Credit Card for the balance amount and select Save to settle the bill
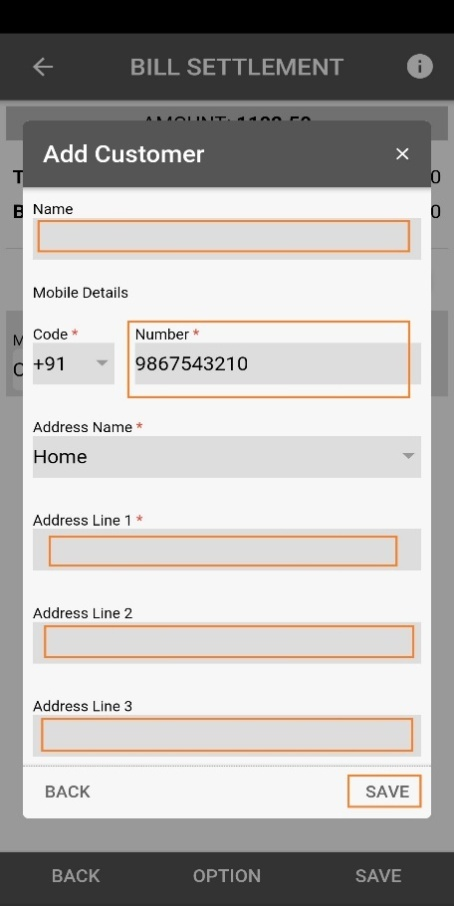
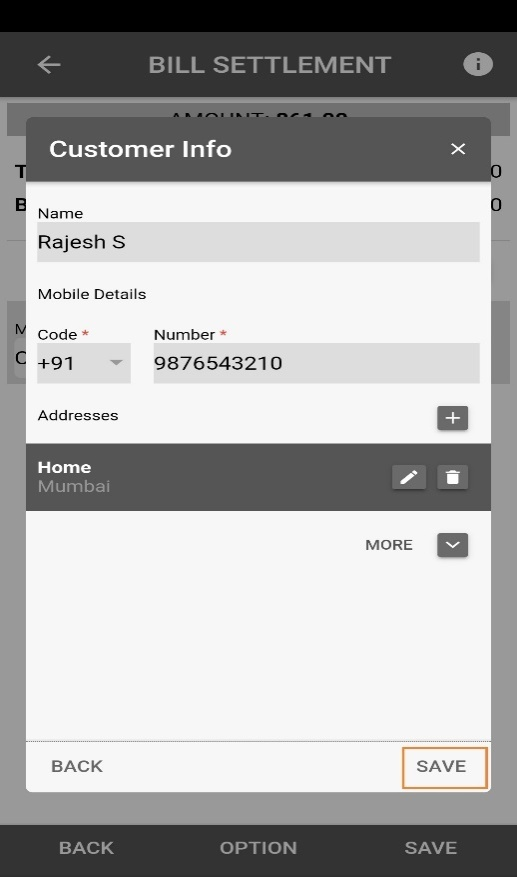
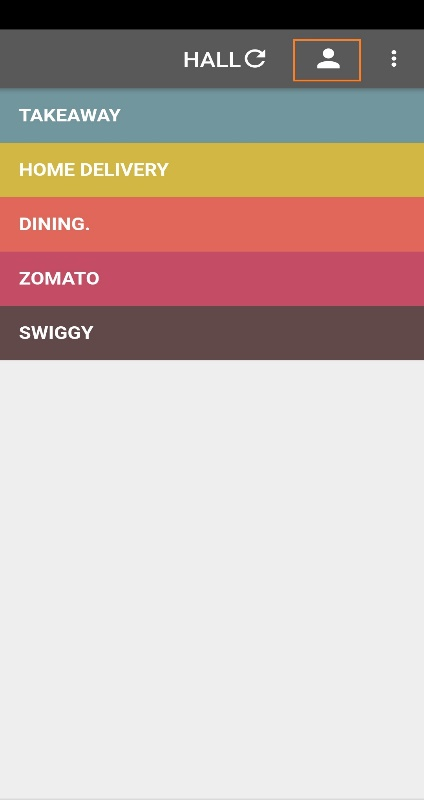
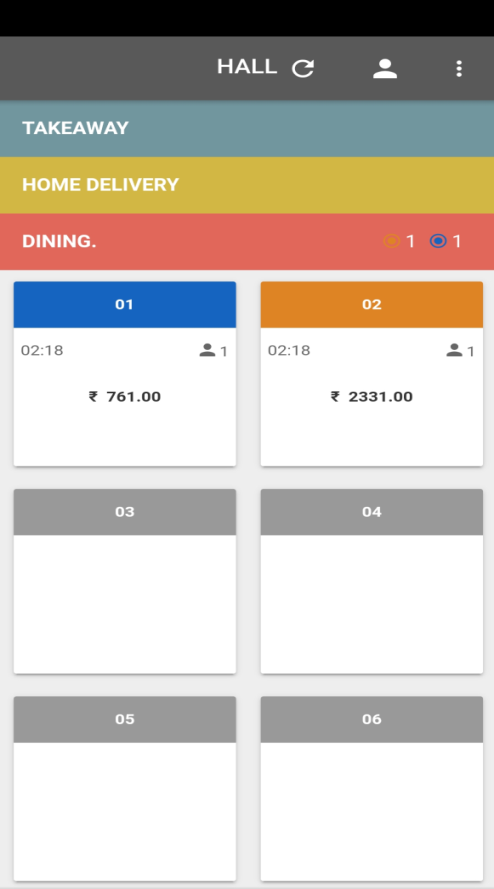
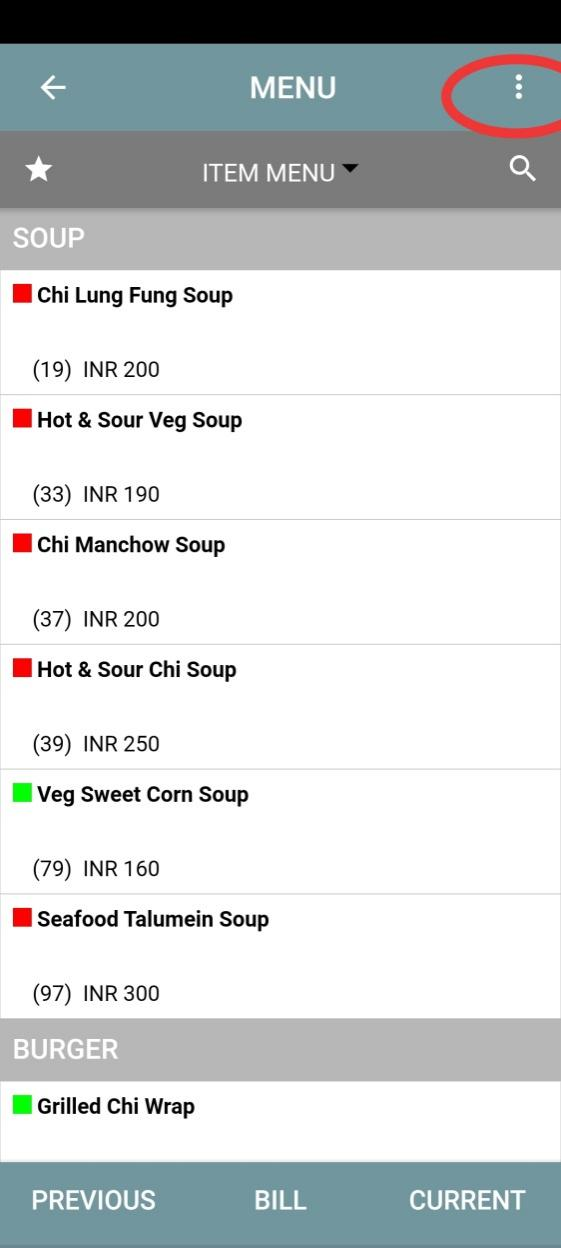
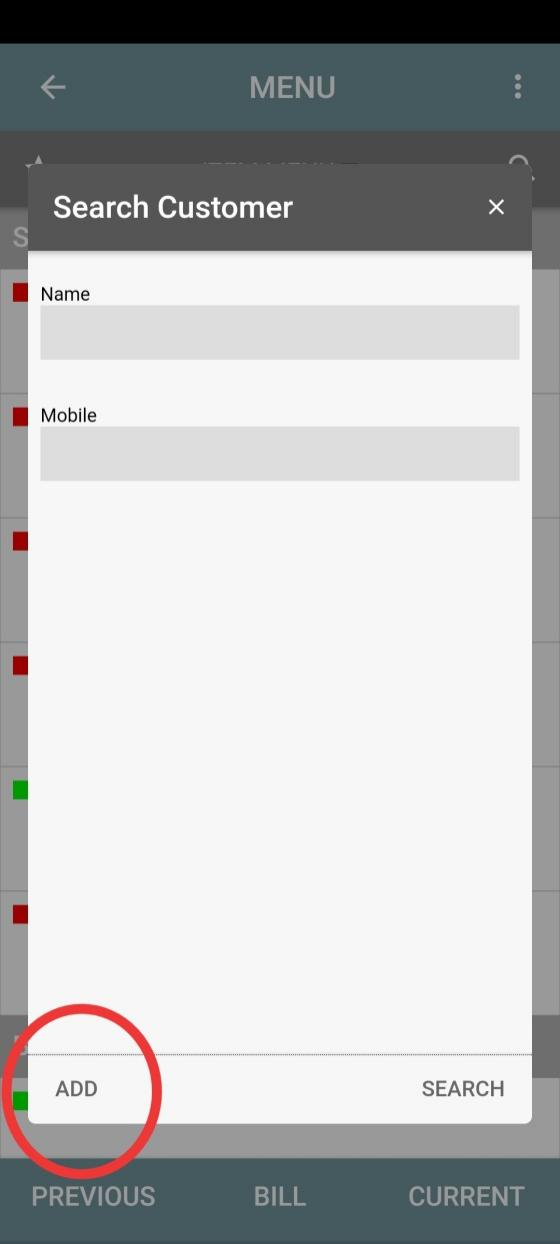
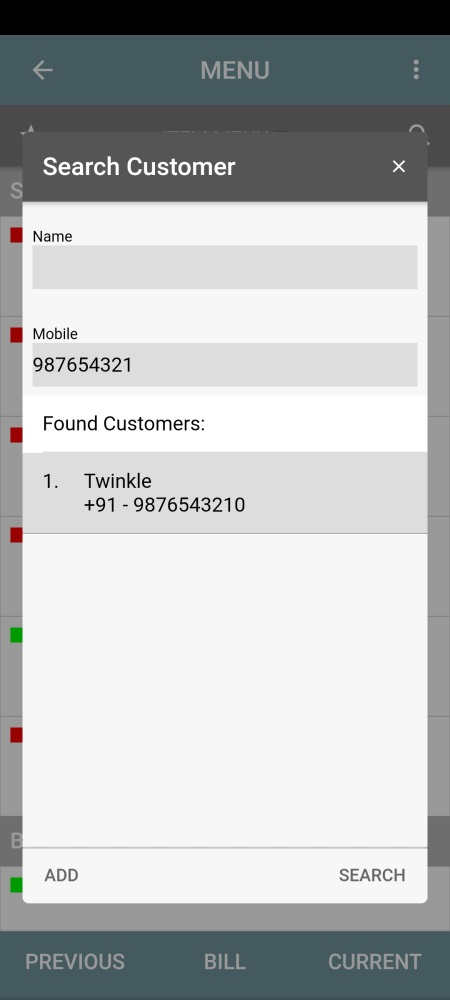
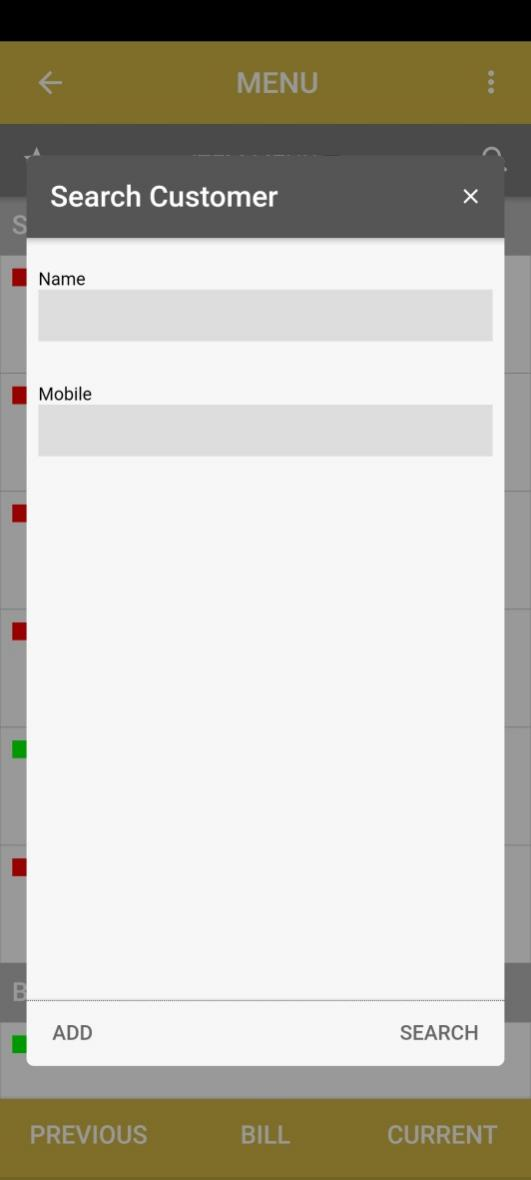
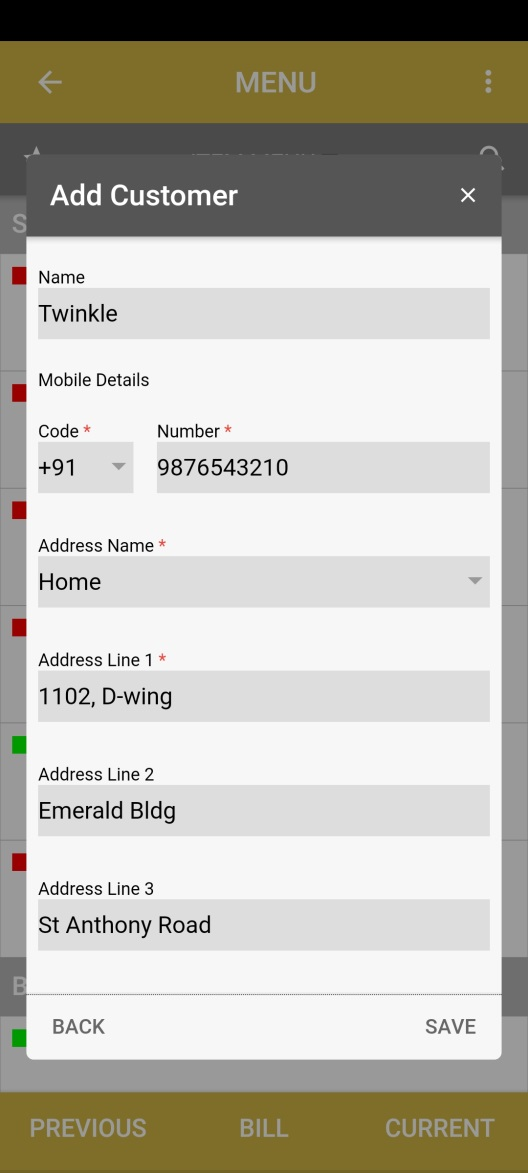
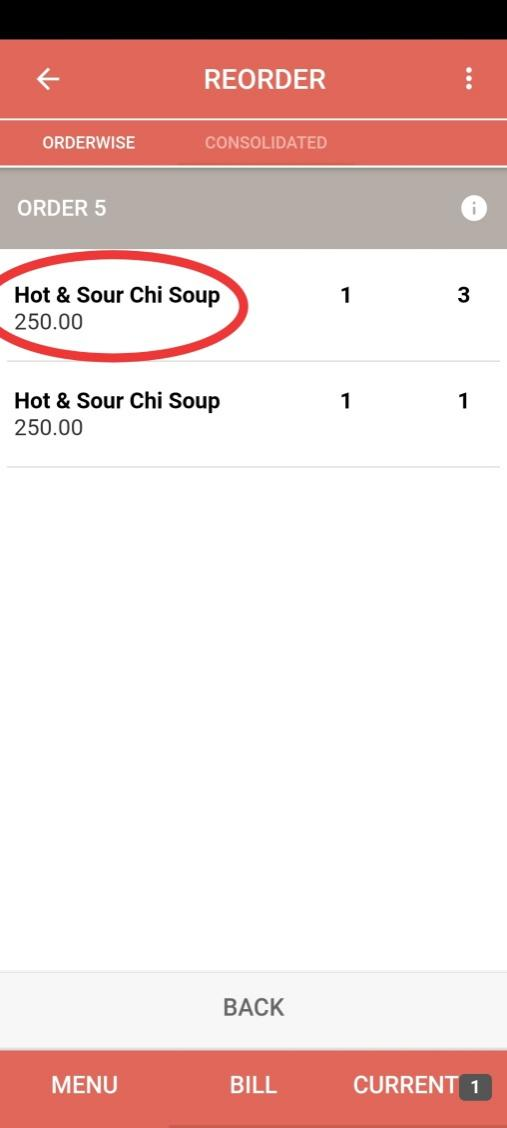
In the Hall Screen, select 'Home Delivery'. Type the contact number or name of the customer. In the Search Customer screen, if the details of the customer is not displayed, click 'Add'
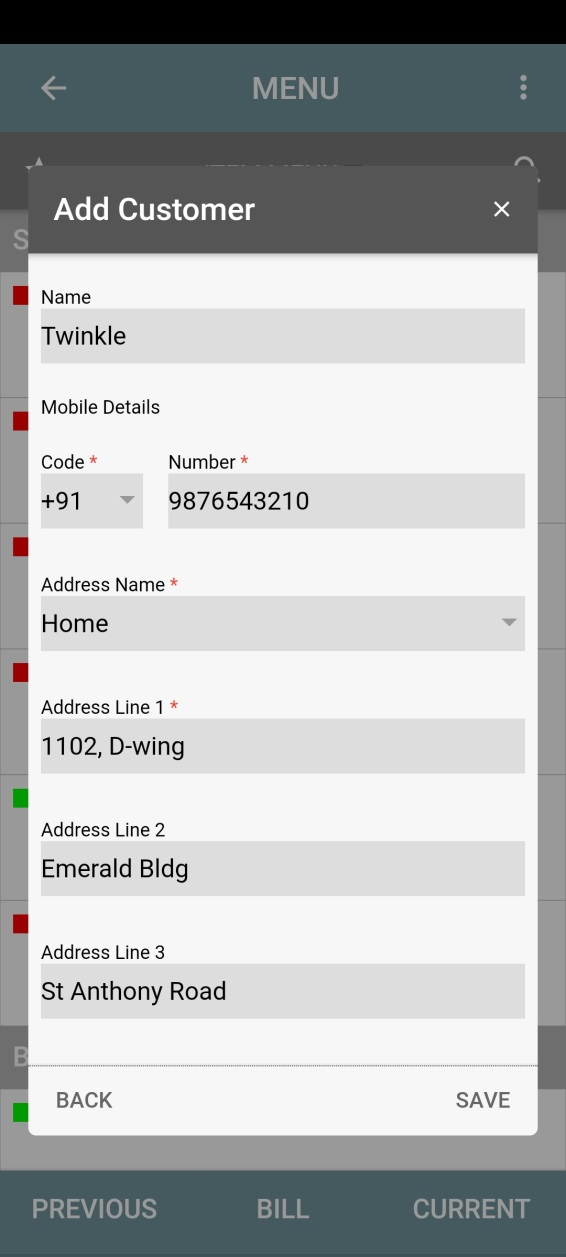
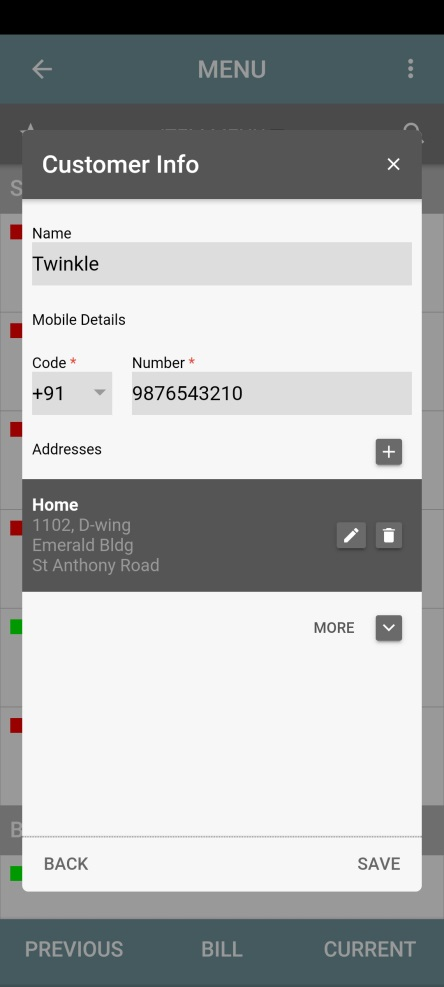
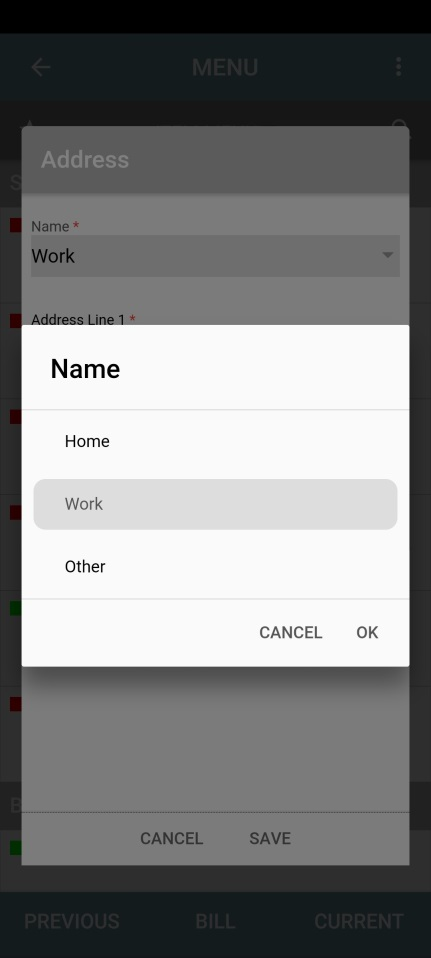
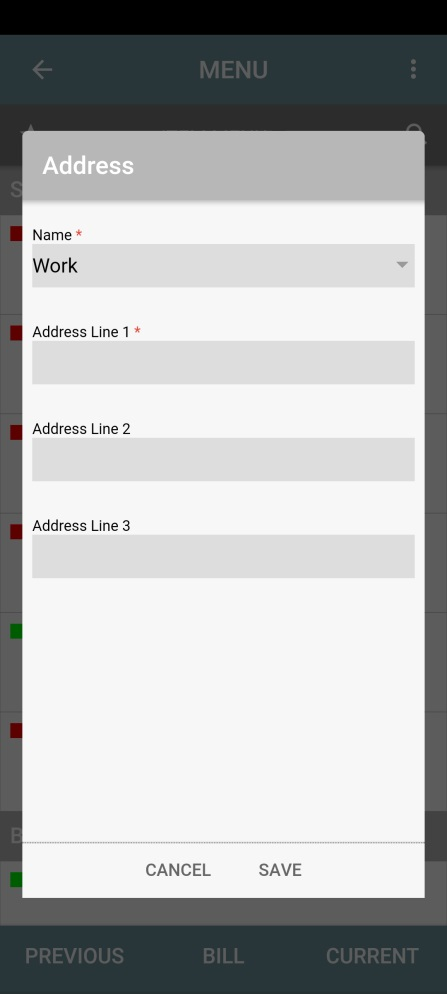
Add the details of the customer and click on 'Save'
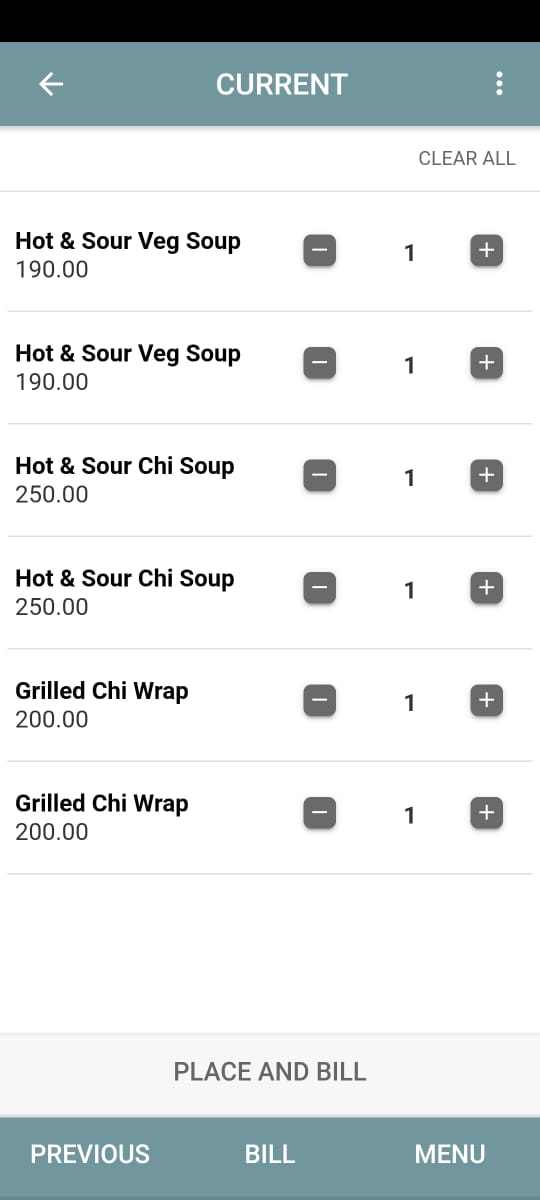
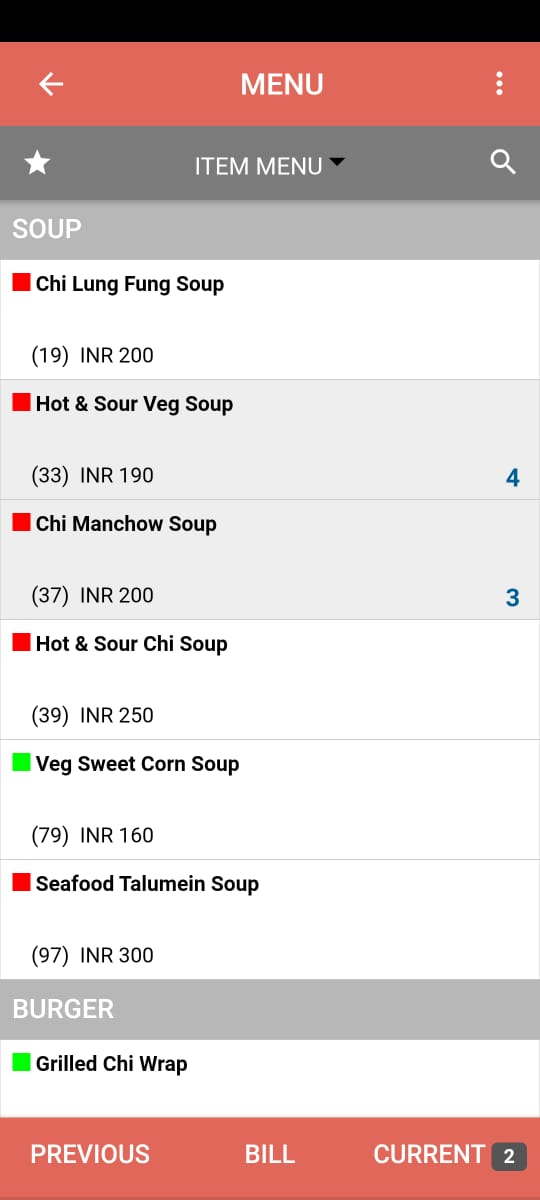
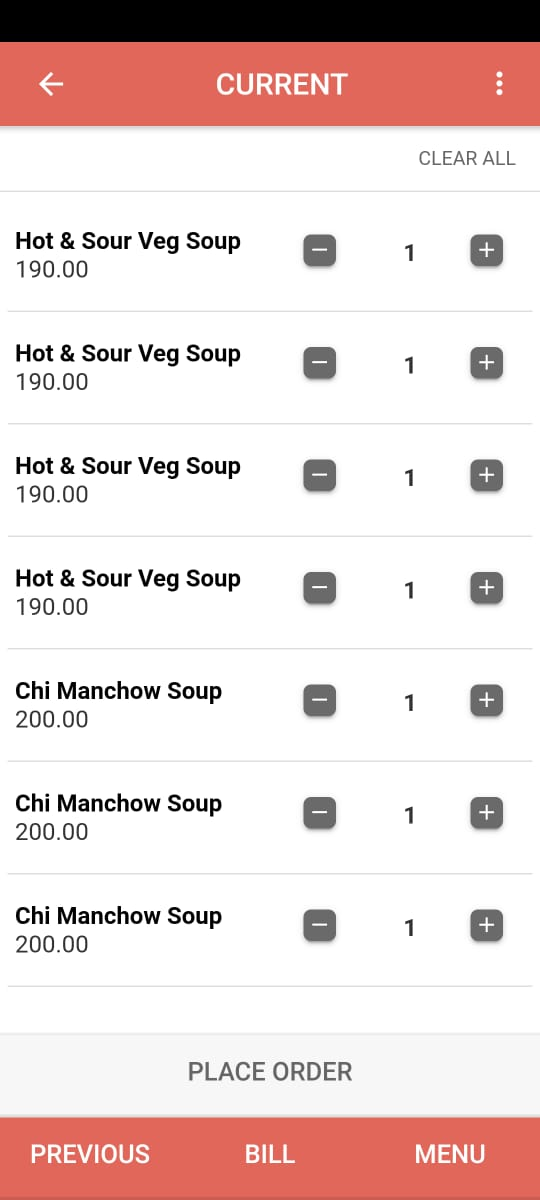
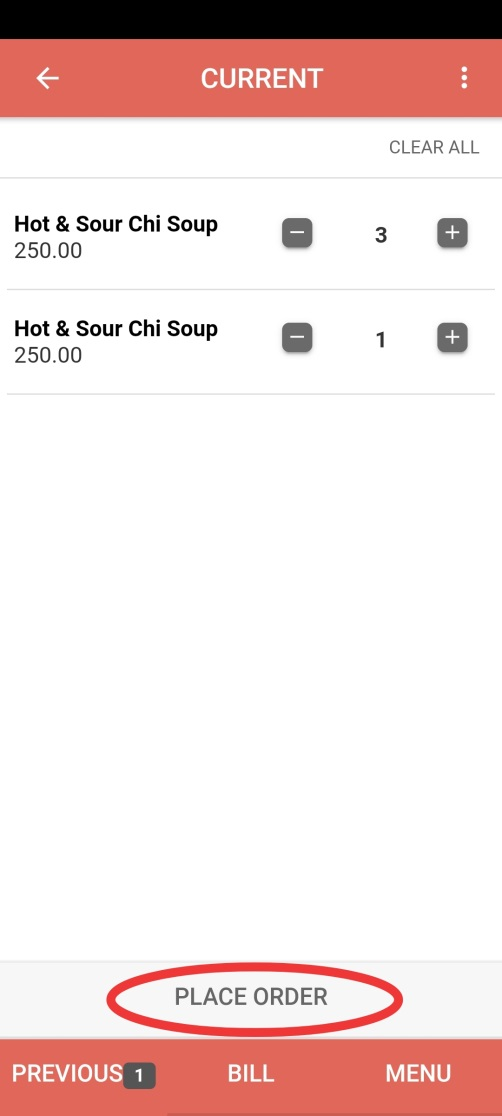
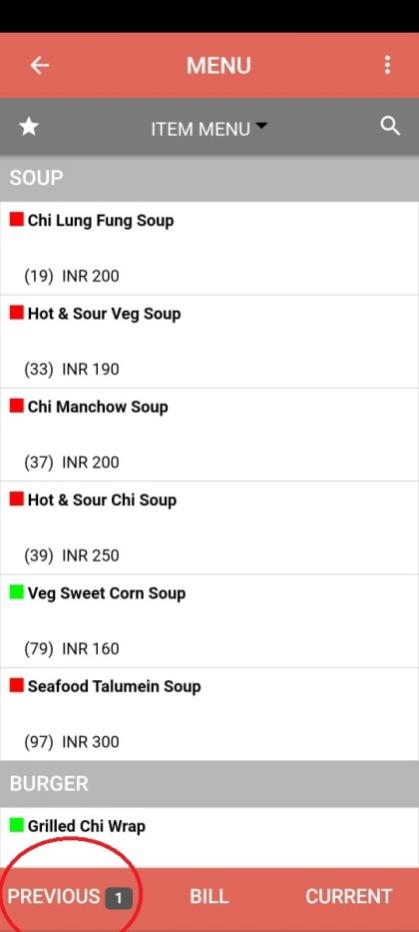
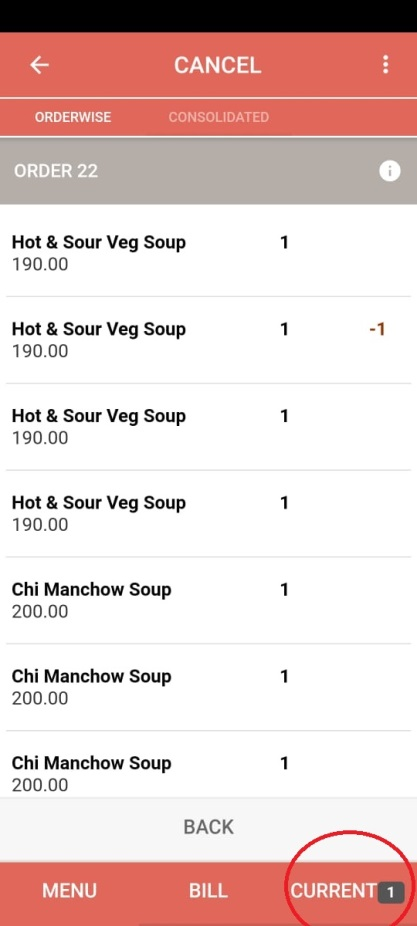
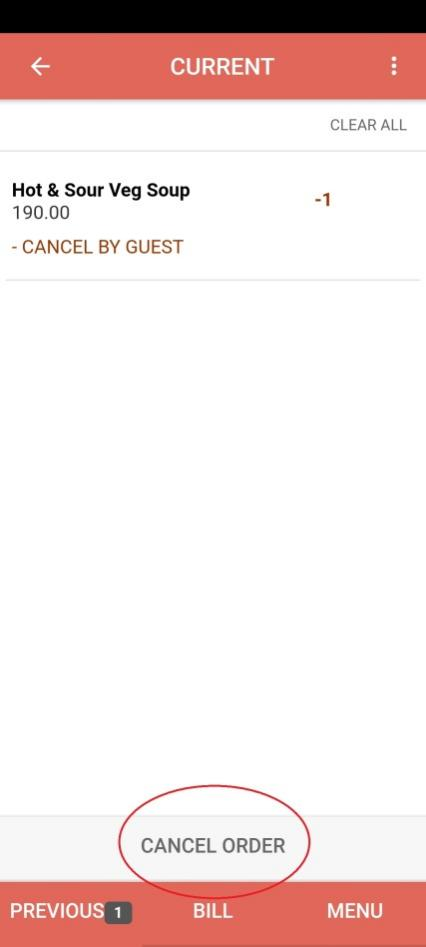
Select the menu items for this customer and click on 'Current' at the bottom right hand side
The current order for the customer will be displayed. Click on 'Place Order'
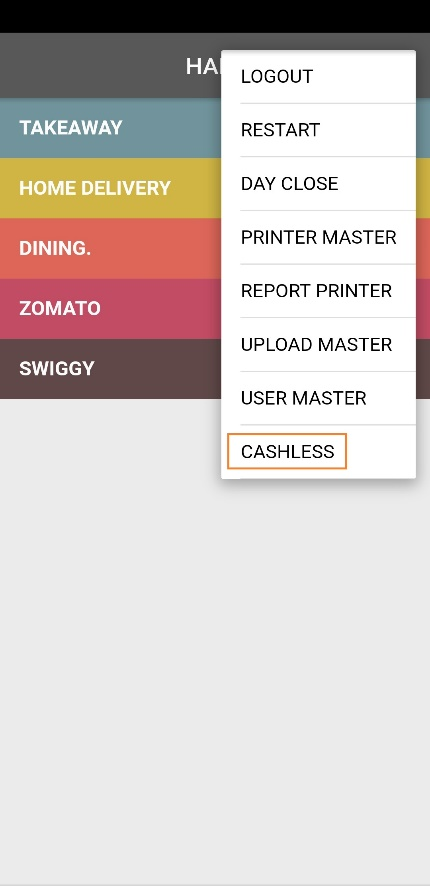
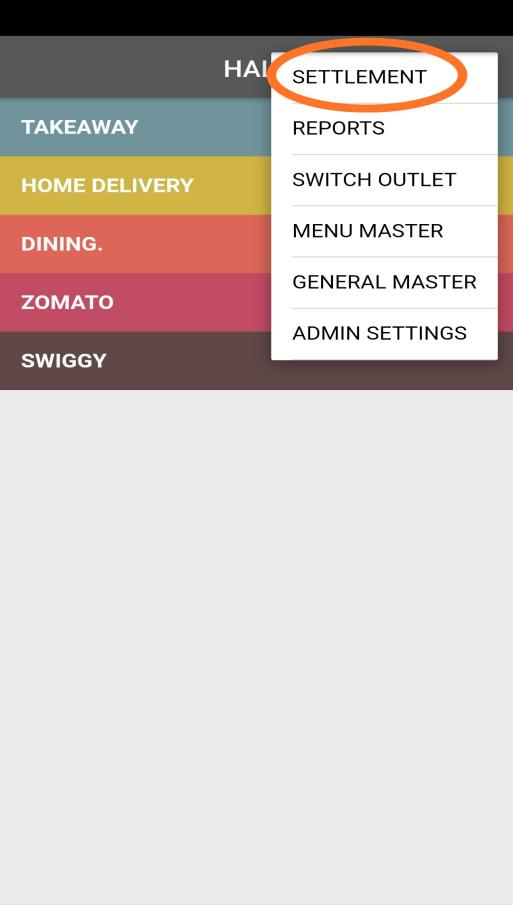
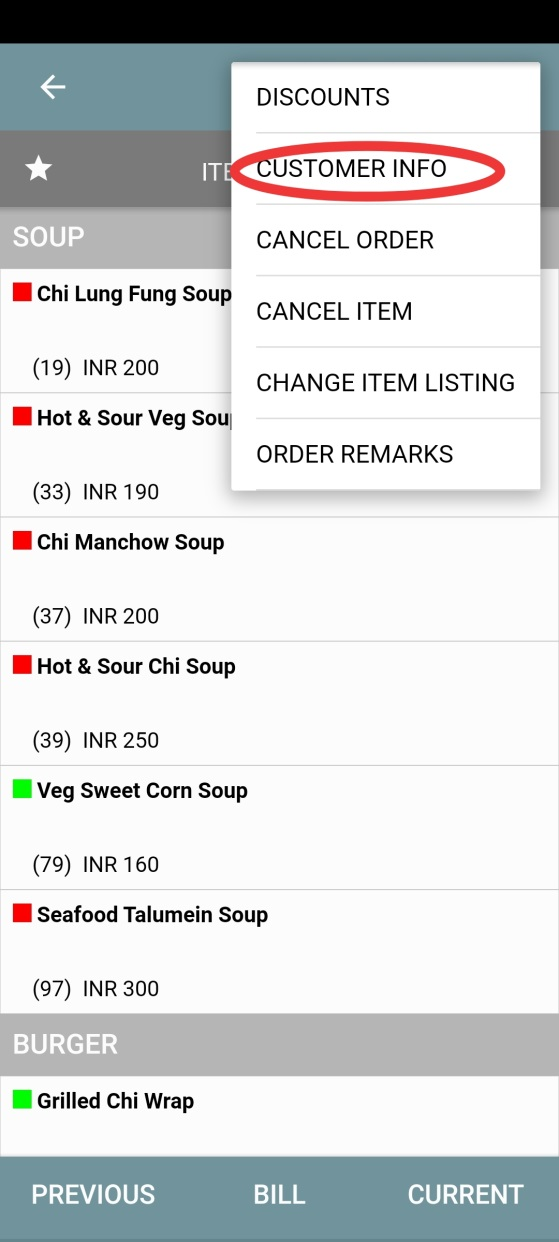
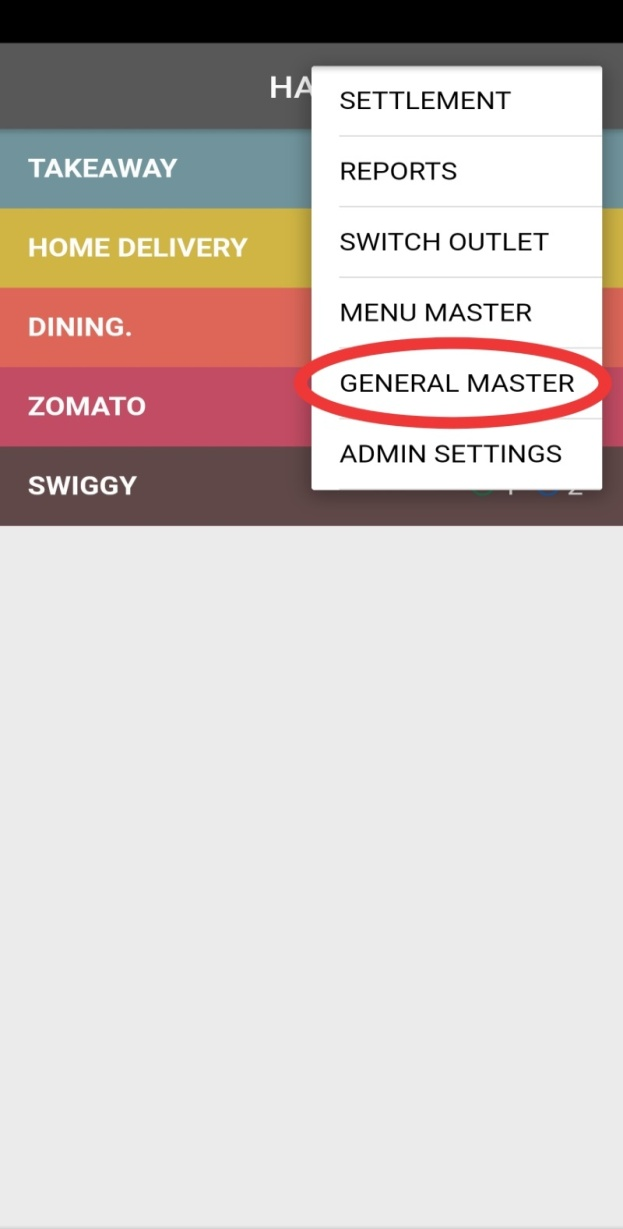
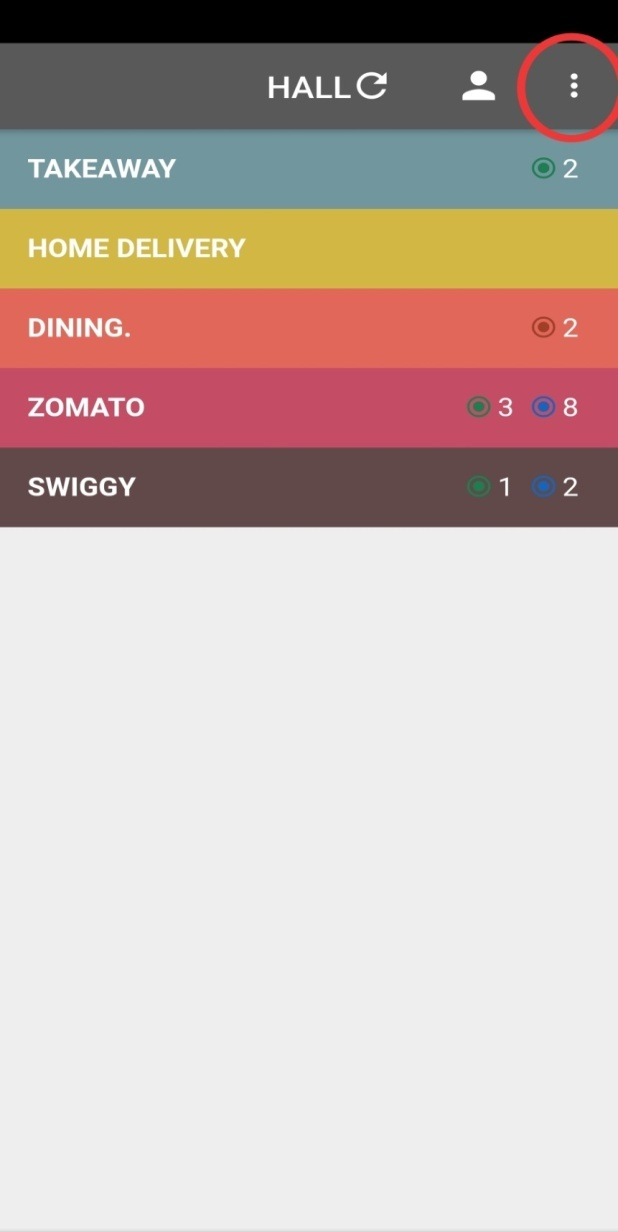
On logging in to PoketPos app, the top right hand corner shows three vertical dots or the options tab.
Click on it to see the drop down menu that has the option of 'General Master'
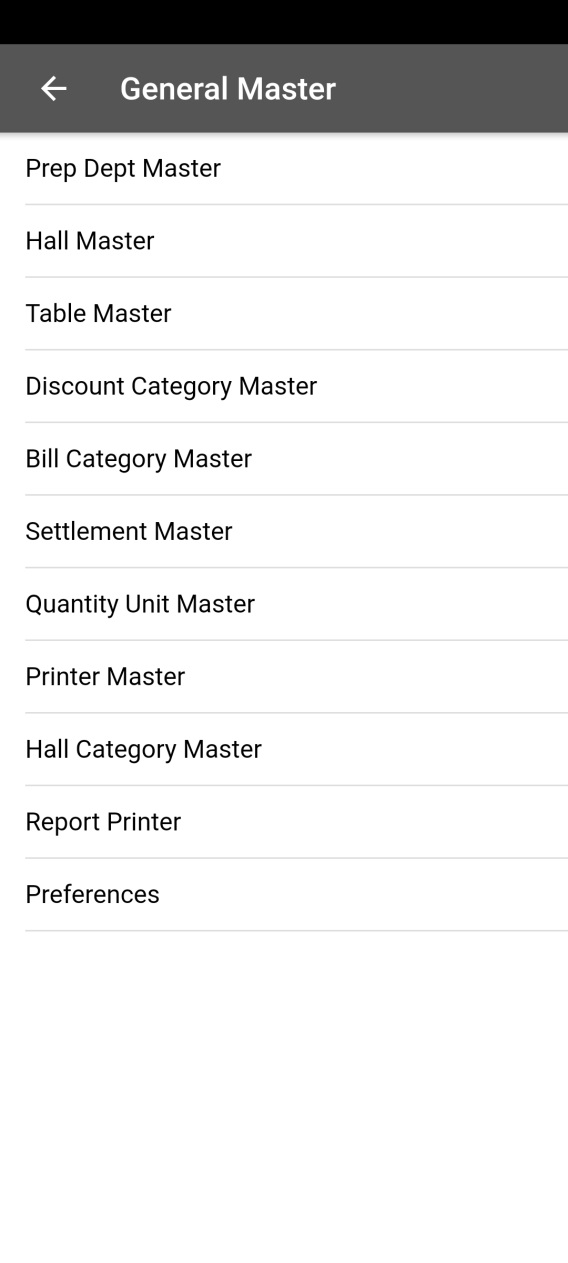
General Master further has the following options.
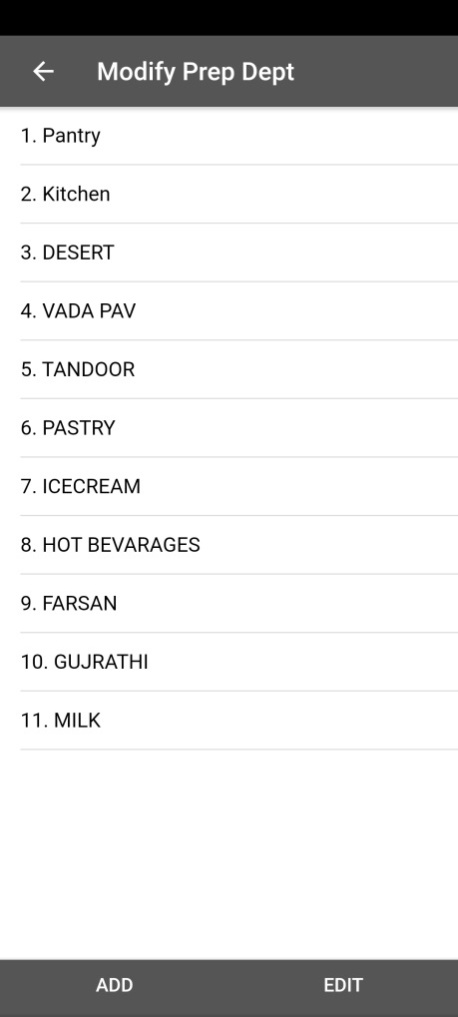
Prep Dept Master (Here you can add or edit the preparation department)
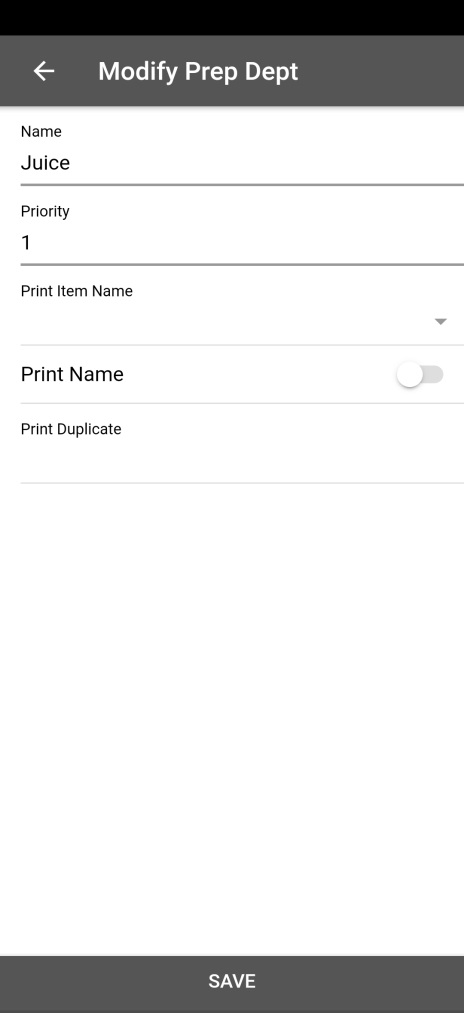
From the General Master drop down menu, select, 'Prep Dept Master'
Click on 'Add' to add a new department or click on an existing department and then click on 'Edit' if you want to edit it.
Enter the name of the department and the Priority number and click on 'Save'
On logging in to PoketPos app, the top right hand corner shows three vertical dots or the options tab.
Click on it to see the drop down menu that has the option of 'General Master'
General Master further has the following options.
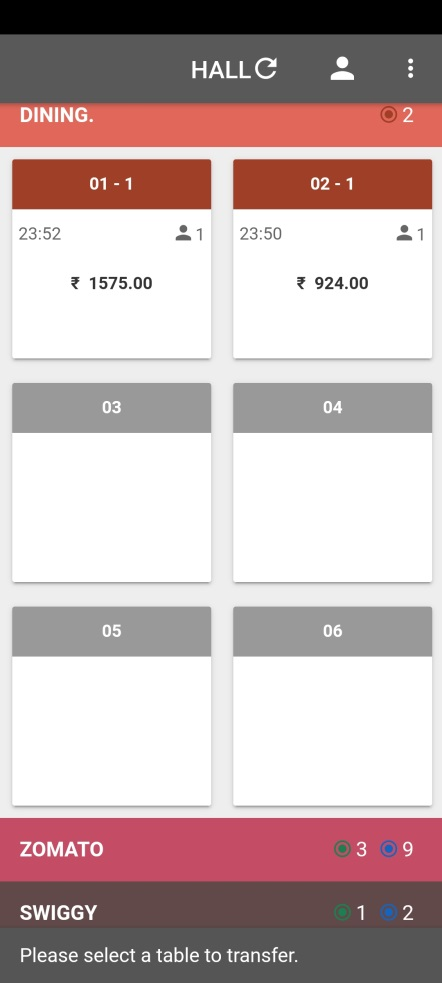
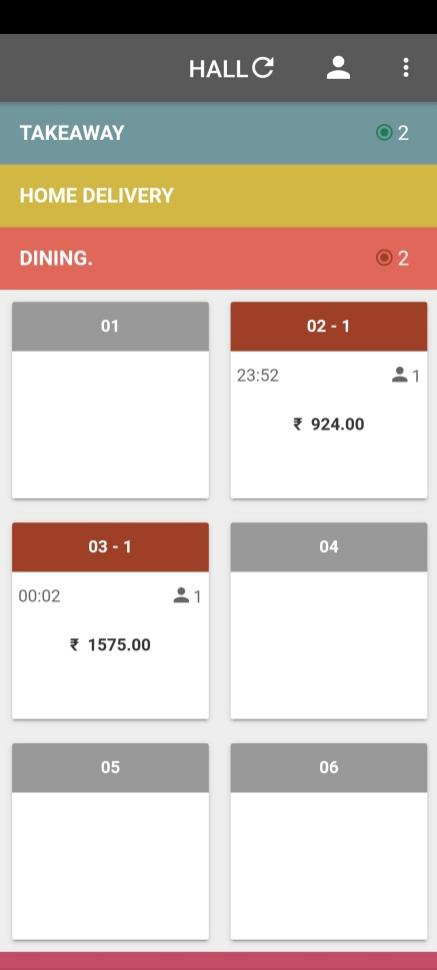
Hall Master (Here you can add or edit the halls as per your requirement)
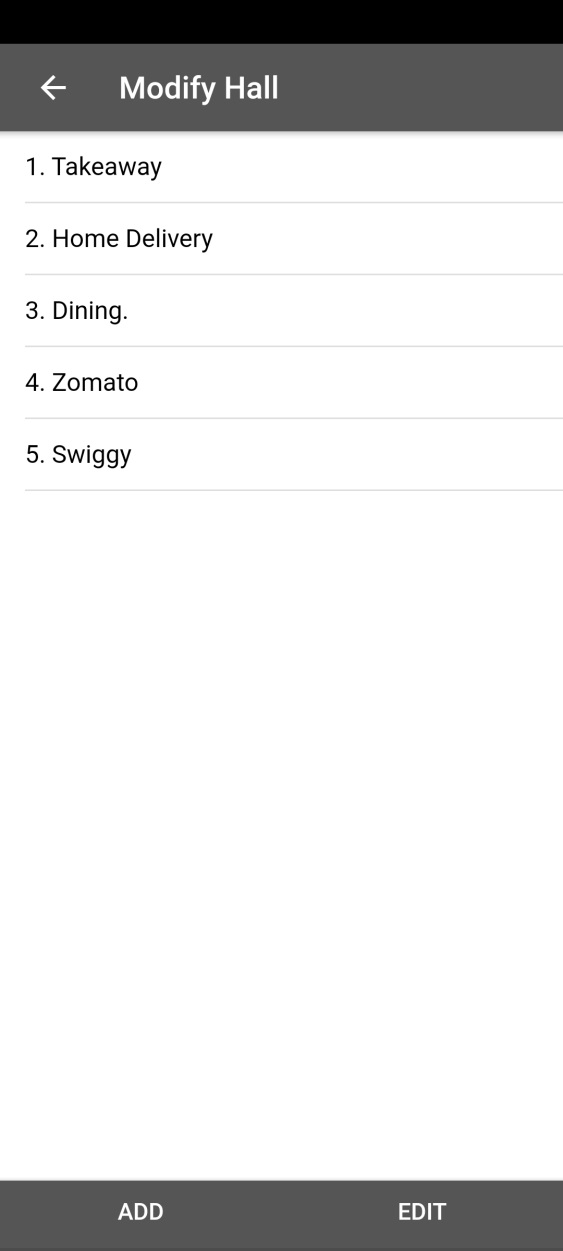
From the General Master drop down menu, select, 'Hall Master'
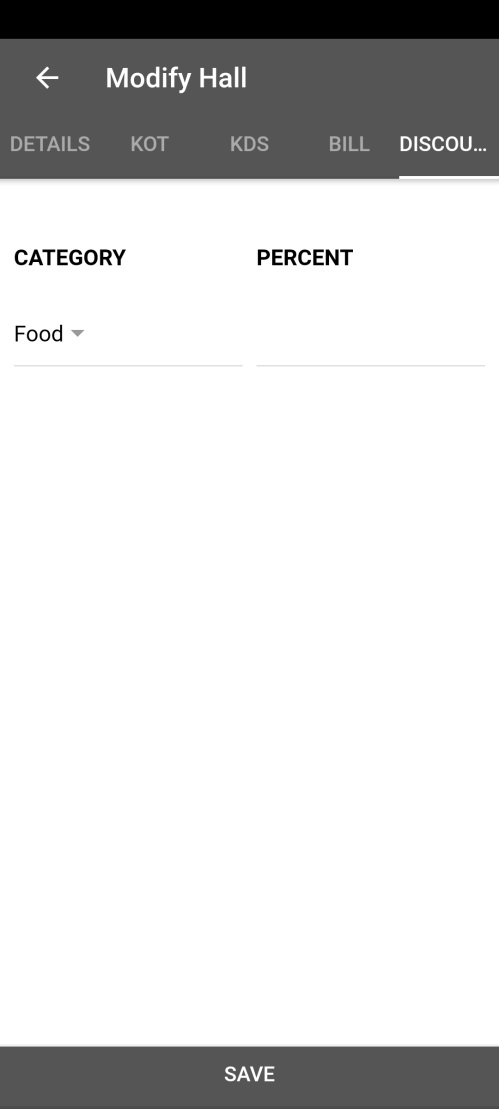
Click on 'Add' to add a new hall or click on an existing hall and then click on 'Edit' if you want to edit it. You can make the additions/changes accordingly
Enter the name of the hall
Select the type of the hall (Takeaway/ Dining etc.)
Select the settlement type that you want
Select the settlement method
Select the print configuration
Select the rate card that you want to assign to the hall
Enable the following as per your choice: Table Sharing, Auto show keyboard, Print Hall name, Print Duplicate orders, Print remarks, Print Customization (bill).
Click on 'Save'
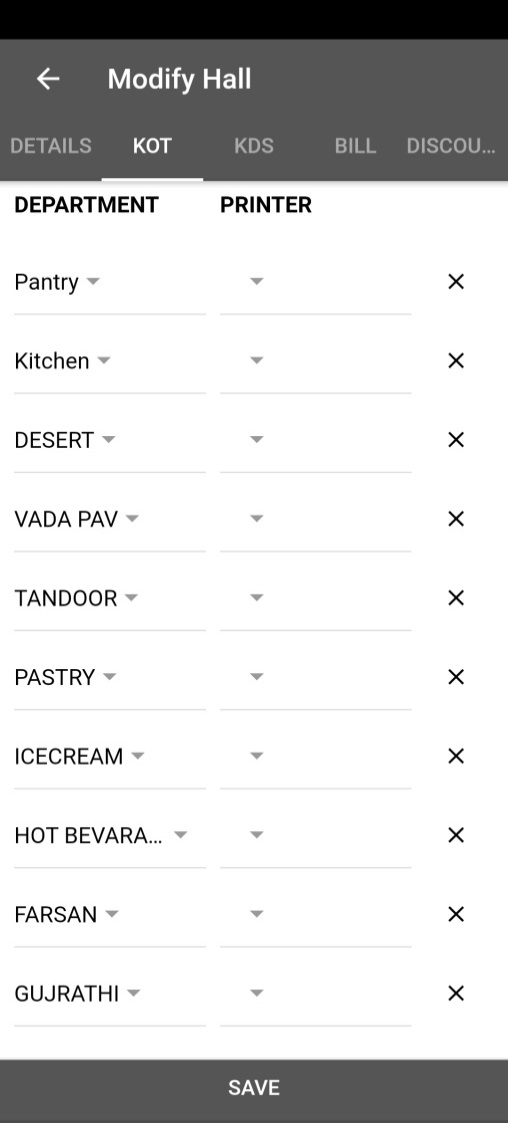
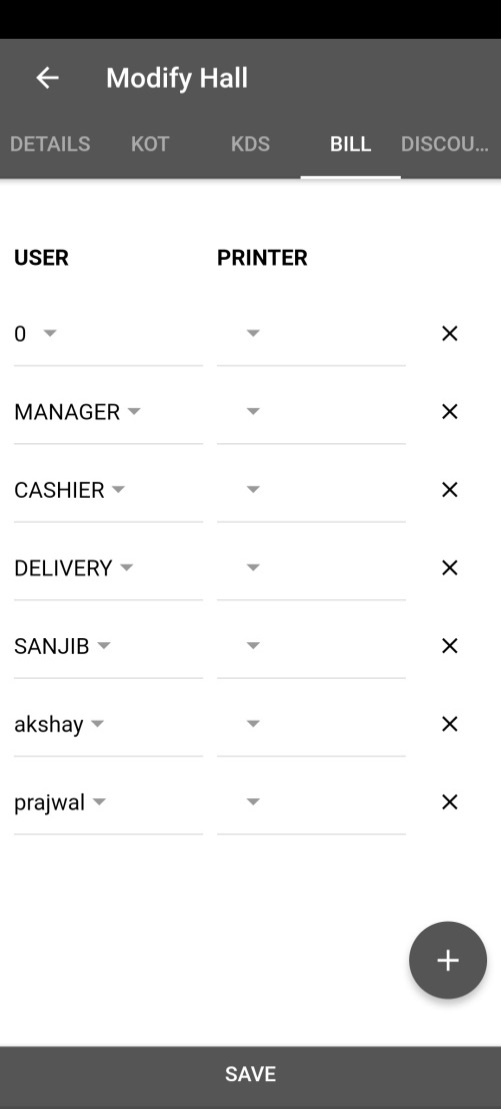
Assign printer into the KOT and bill columns (to every department and user) and Click on 'Save'
You can also enter the discount amount and click on 'Save'
On logging in to PoketPos app, the top right hand corner shows three vertical dots or the options tab.
Click on it to see the drop down menu that has the option of 'General Master'
General Master further has the following options.
Table Master (Here you can add or edit the number of tables in a particular hall)
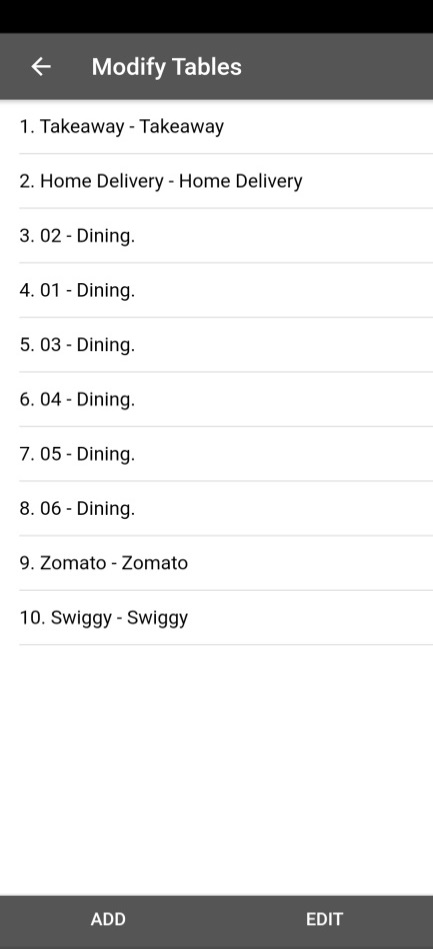
From the General Master drop down menu, select, 'Table Master'
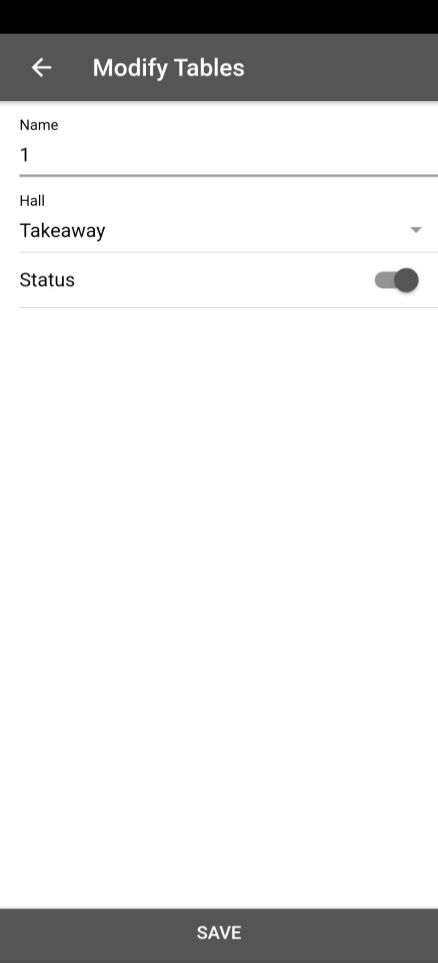
Click on 'Add' to add a new table or click on an existing table and then click on 'Edit' if you want to edit it. You can make the additions/changes accordingly
Enter the name or number of the table.
Select the hall in which you want to add/ edit the table
Check on the status of the table. It can be changed to on
On logging in to PoketPos app, the top right hand corner shows three vertical dots or the options tab.
Click on it to see the drop down menu that has the option of 'General Master'
General Master further has the following options.
Discount Category Master (Here you can add/ edit the discount category as per your choice)
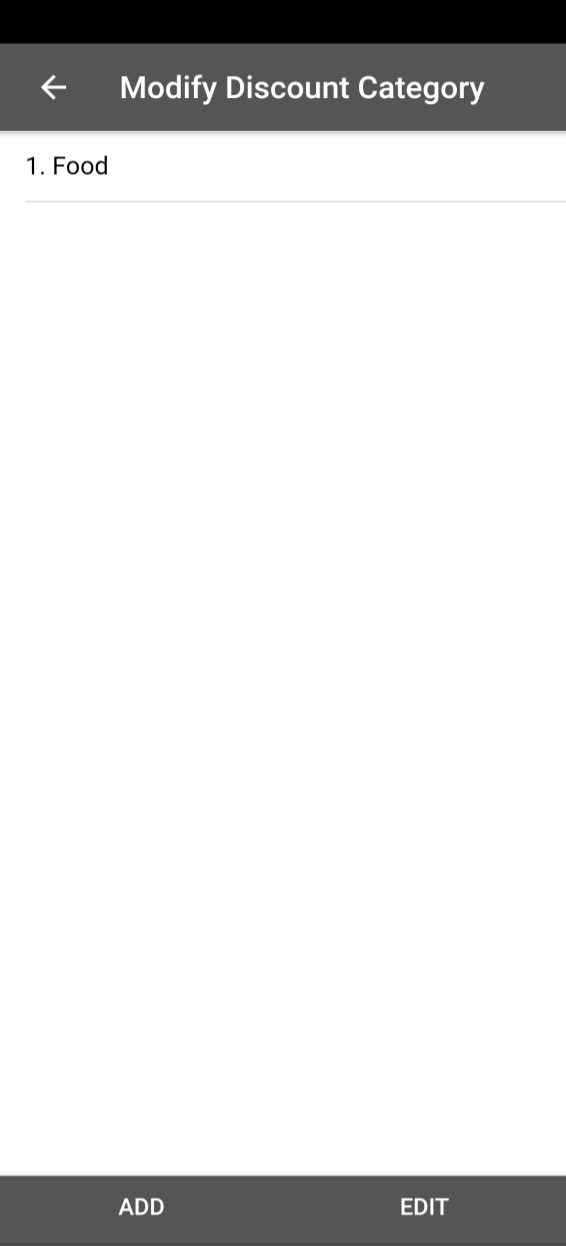
From the General Master drop down menu, select, 'Discount Category Master'
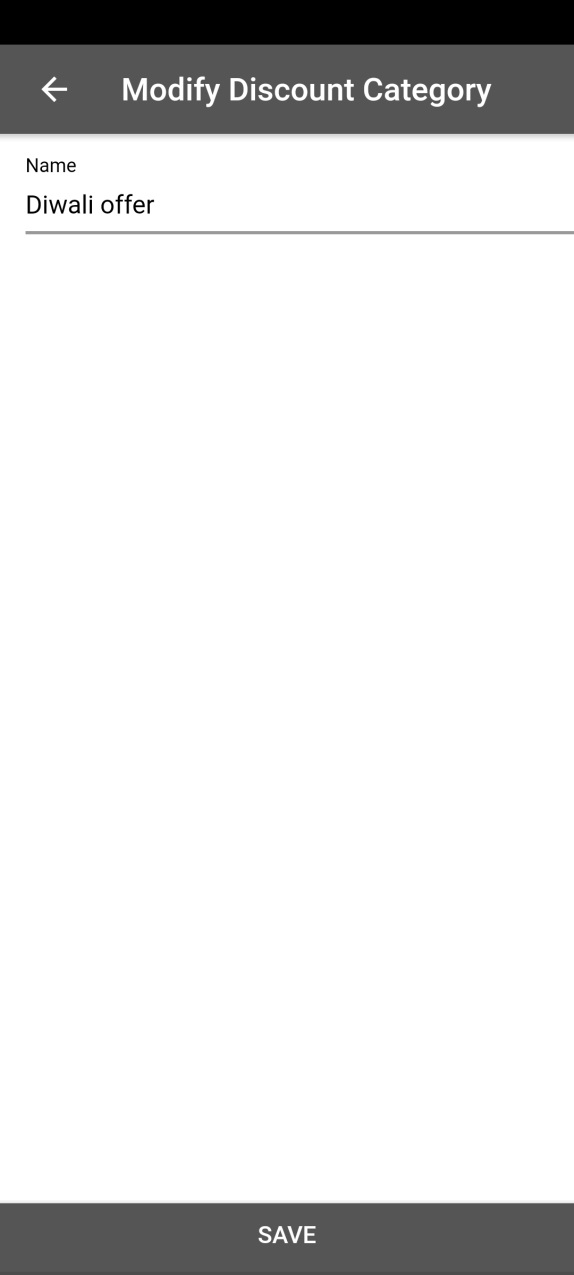
Click on 'Add' to add a new discount category or click on an existing category and then click on 'Edit' if you want to edit it.
Enter a name for a new discount category or make appropriate changes to an existing one and click on 'Save'
On logging in to PoketPos app, the top right hand corner shows three vertical dots or the options tab.
Click on it to see the drop down menu that has the option of 'General Master'
General Master further has the following options.
Bill Category Master (Here you can add/ edit the bill category master as per your choice)
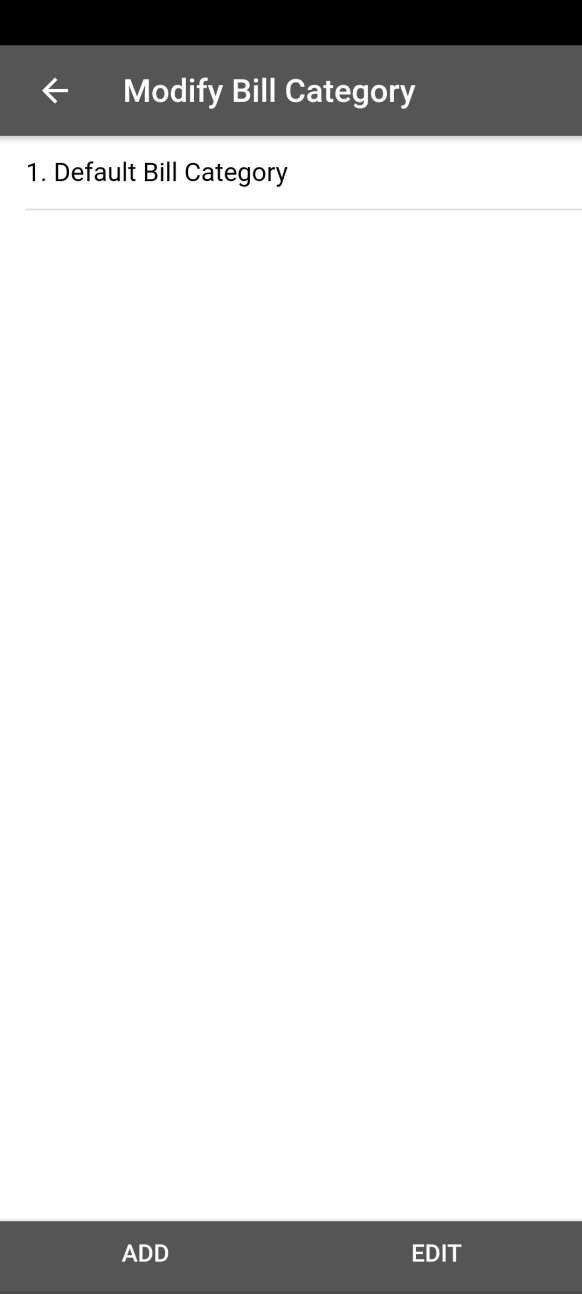
From the General Master drop down menu, select, 'Bill Category Master'
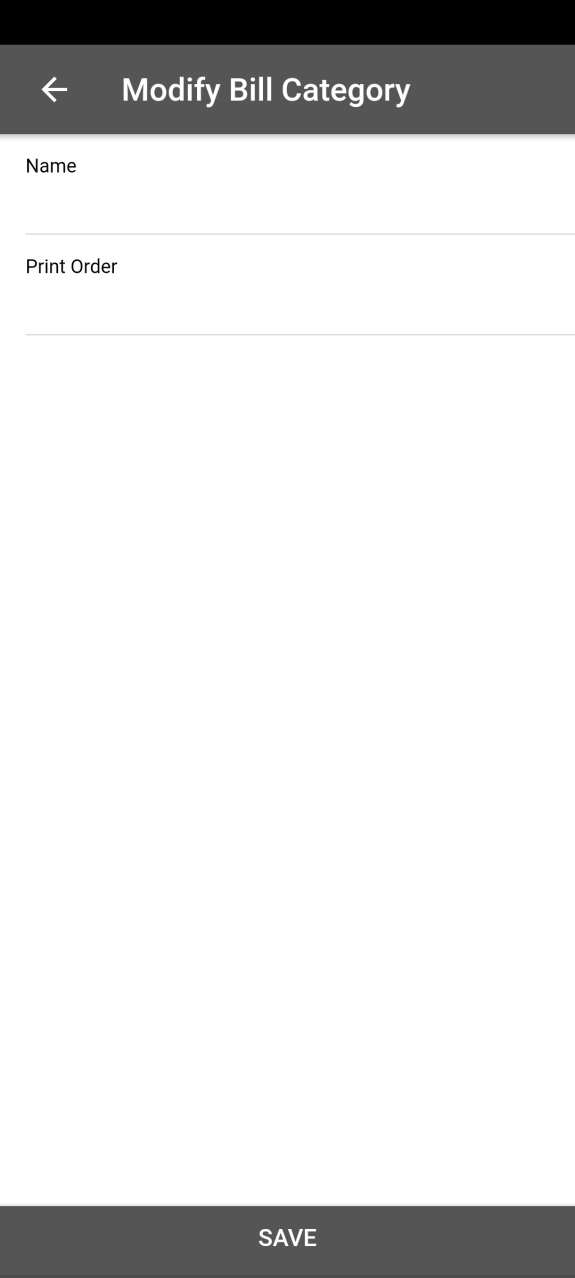
Click on 'Add' to add a new bill category or click on an existing category and then click on 'Edit' if you want to edit it.
Enter a name for a new bill category or make appropriate changes to an existing one.
On logging in to PoketPos app, the top right hand corner shows three vertical dots or the options tab.
Click on it to see the drop down menu that has the option of 'General Master'
General Master further has the following options.
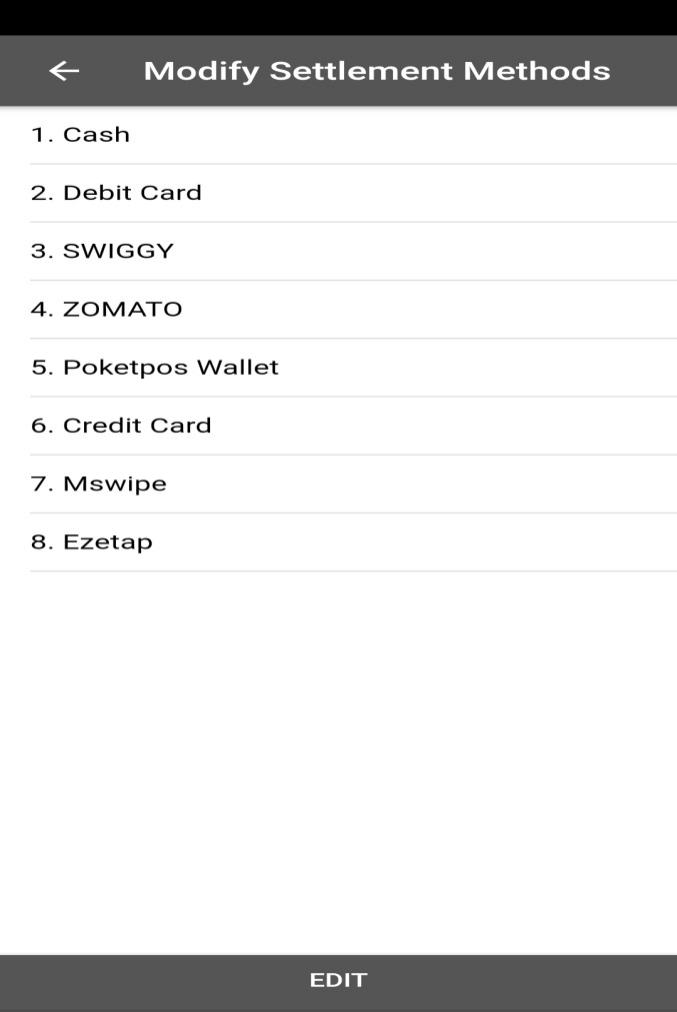
Settlement Master (Here you can add/ edit the Settlement method as per your choice)
From the General Master drop down menu, select, 'Settlement Master'
Click on 'Add' to add a new settlement method or click on an existing one and then click on 'Edit' if you want to edit it.
Enter a name for a new method or make appropriate changes to an existing one and click on 'Save'.
On logging in to PoketPos app, the top right hand corner shows three vertical dots or the options tab.
Click on it to see the drop down menu that has the option of 'General Master'
General Master further has the following options.
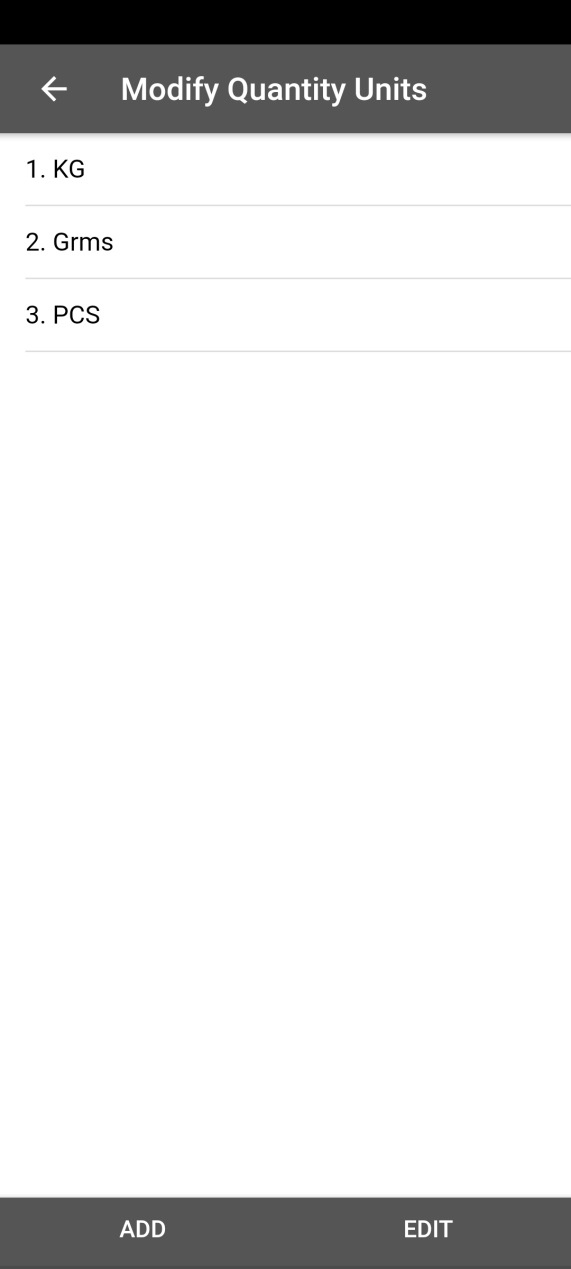
Quantity Unit Master (Here you can add/ edit the quantity unit as per your choice)
From the General Master drop down menu, select, 'Quantity Unit Master'
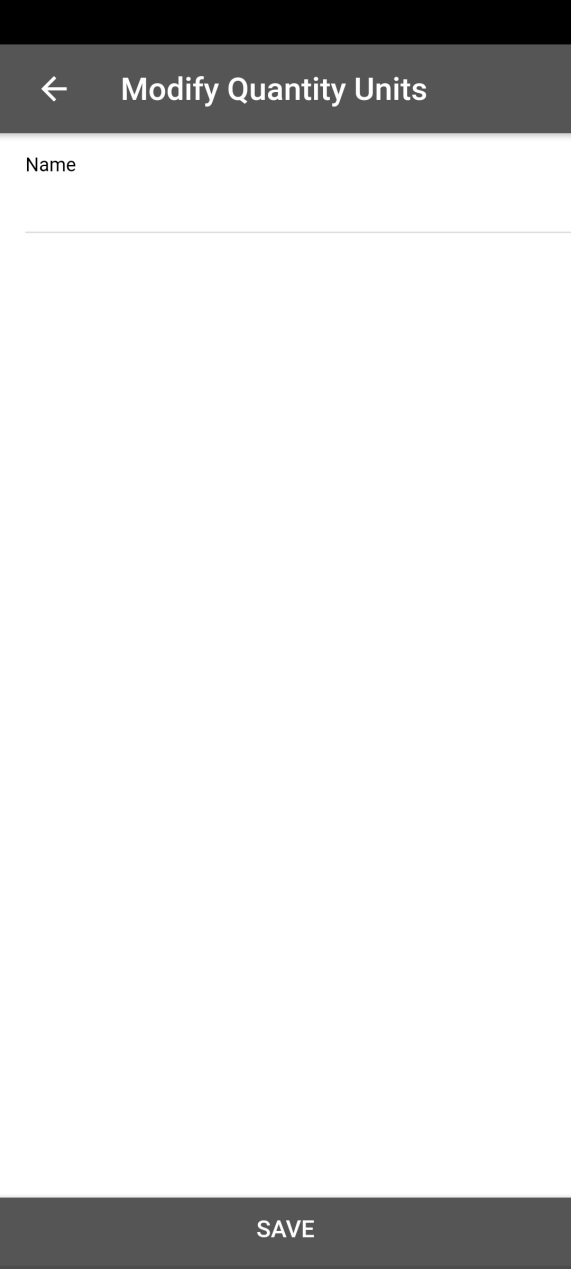
Click on 'Add' to add a new quantity or click on an existing quantity unit and then click on 'Edit' if you want to edit it.
Enter a name for a new quantity unit or make appropriate changes to an existing one and click on 'Save'
On logging in to PoketPos app, the top right hand corner shows three vertical dots or the options tab.
Click on it to see the drop down menu that has the option of 'General Master'
General Master further has the following options.
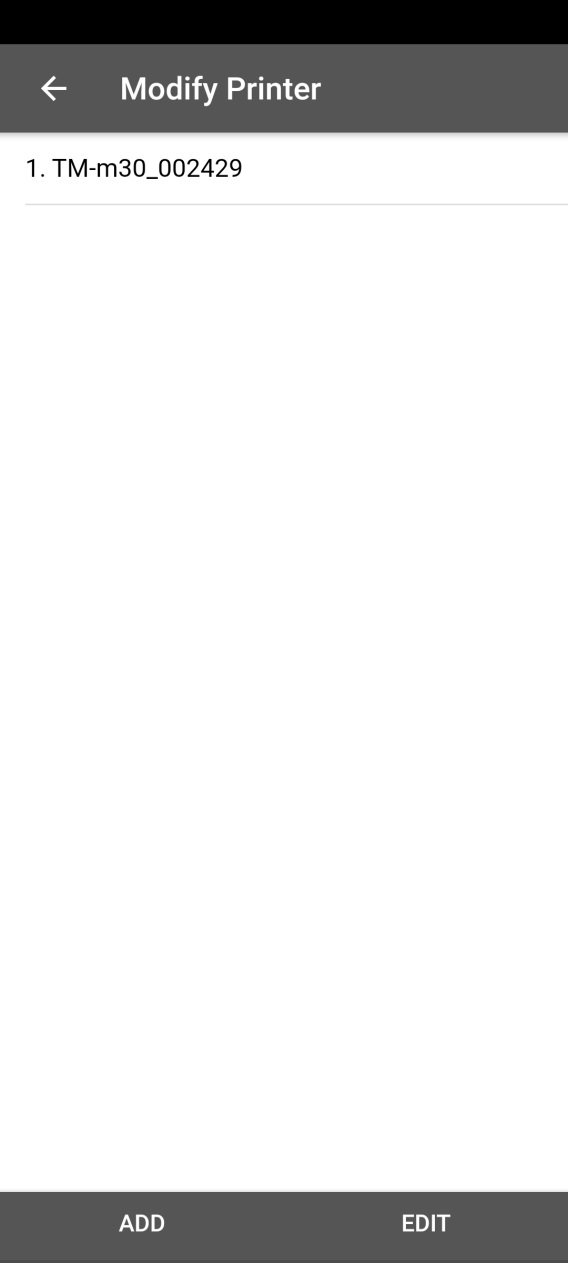
Printer Master (Here you can add or edit a printer as per your requirement)
From the General Master drop down menu, select, 'Printer Master'
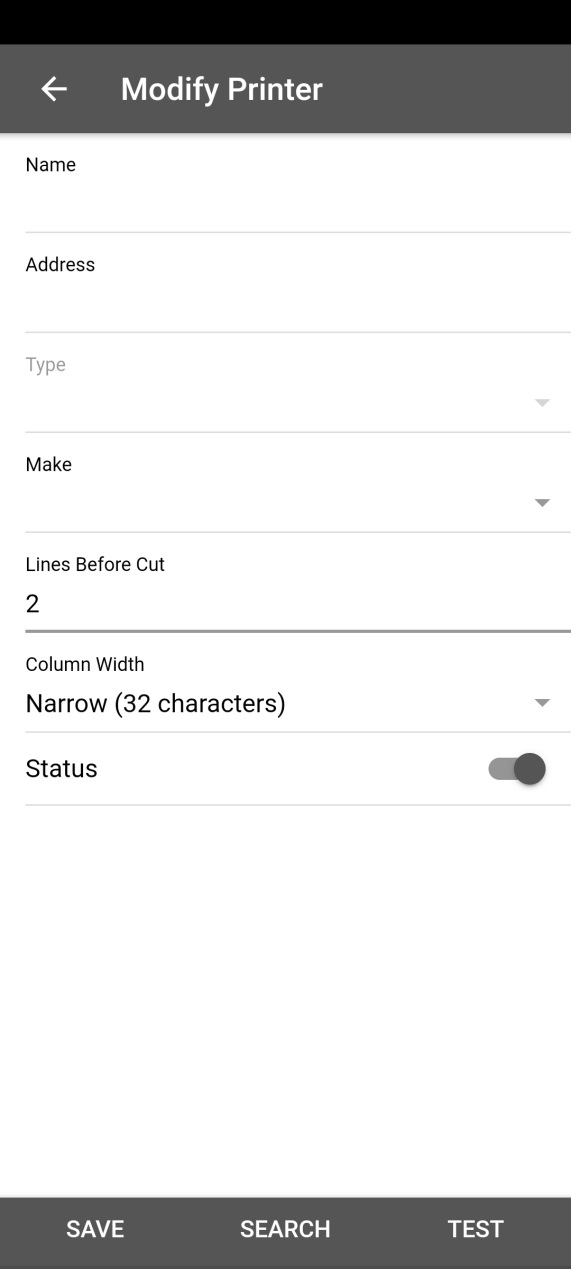
Click on 'Add' to add a new printer
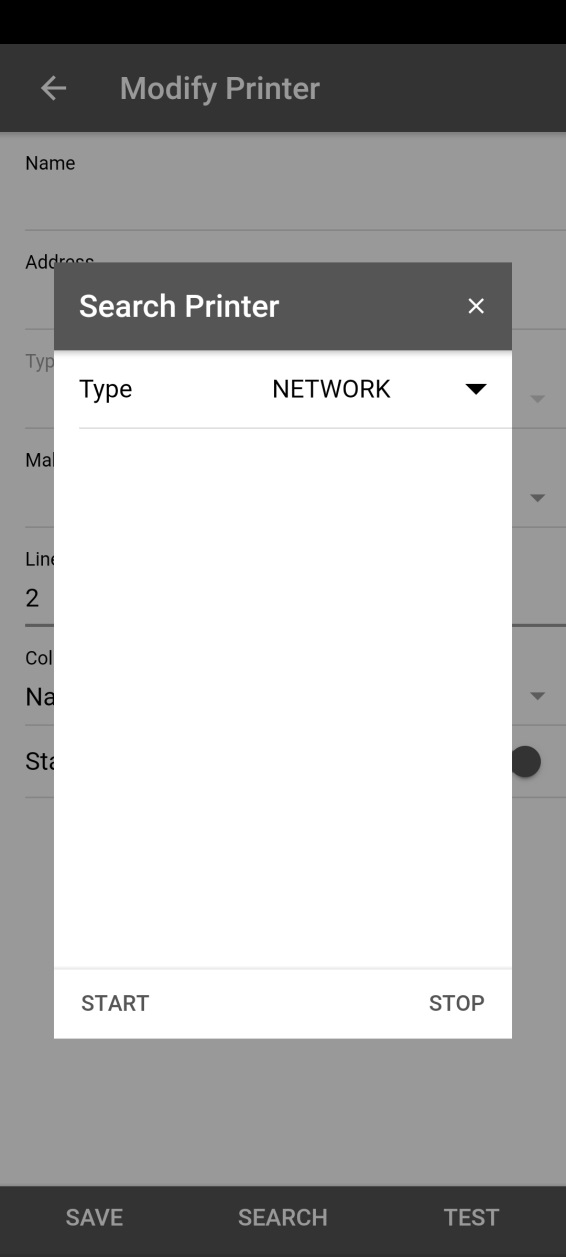
Click on 'Search'
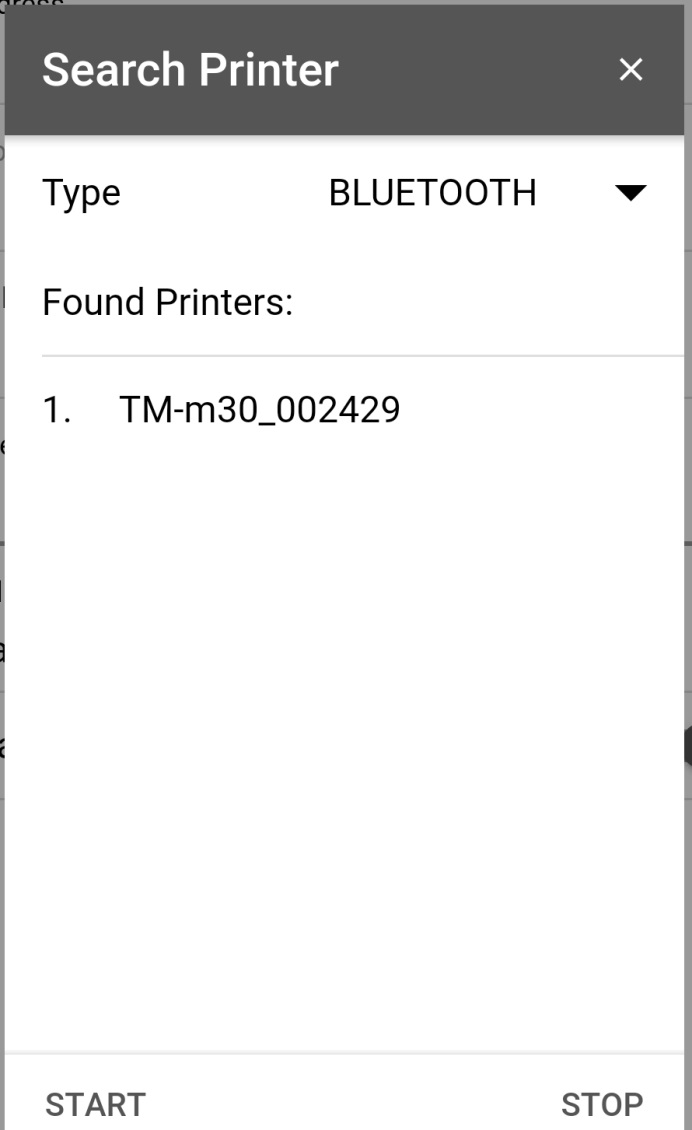
Select the printer type. Click on 'Start'
Select the printer
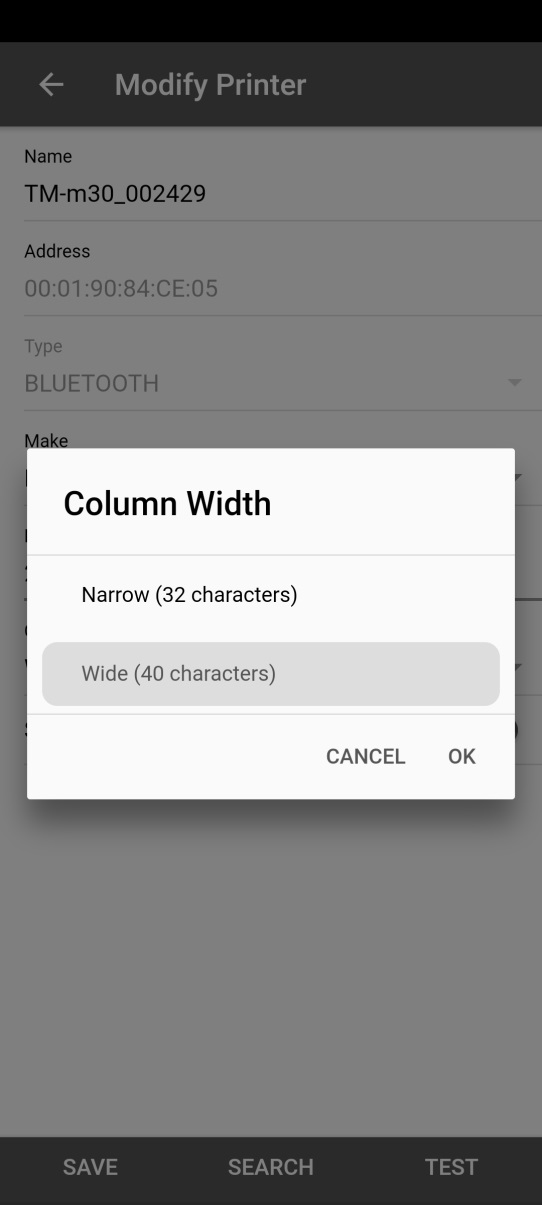
Select the column width
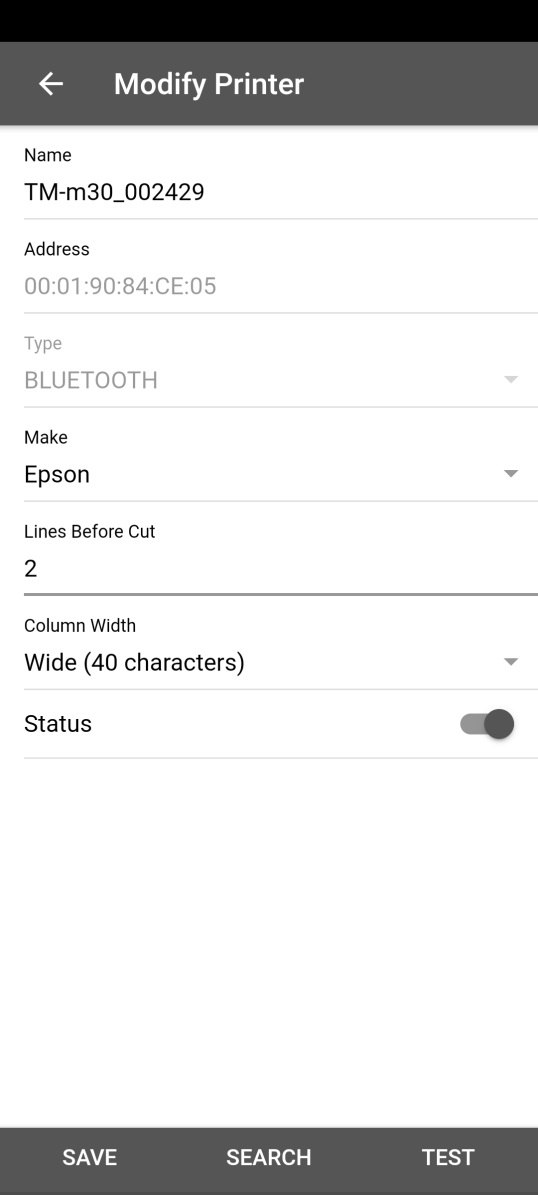
You can test if the printer is connected by clicking on 'Test'
Click on 'Save'
Restart the application
To edit, select the printer name and click on 'Edit'
Make the appropriate changes
Click on 'Save' and restart the application.
Preference (Here you can change the Table Columns, the Menu Columns, set the Rounding Off, decide on the number of Blank Lines. You can also decide on the Menu Category Type, the Orientation of the Screen, decide on the Period to Reset the Bill Number, and the KOT Number)
On logging in to PoketPos app, the top right hand corner shows three vertical dots or the options tab.
Click on it to see the drop down menu that has the option of 'Menu Master'
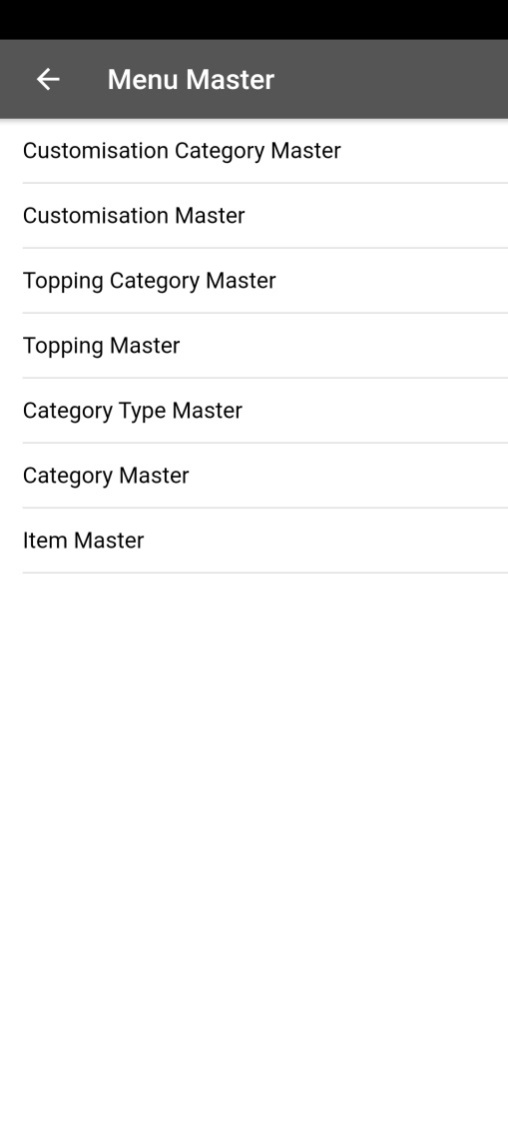
Menu Master further has the following options.
Customization Category Master (Here you can add or edit a customization category as per your requirement)
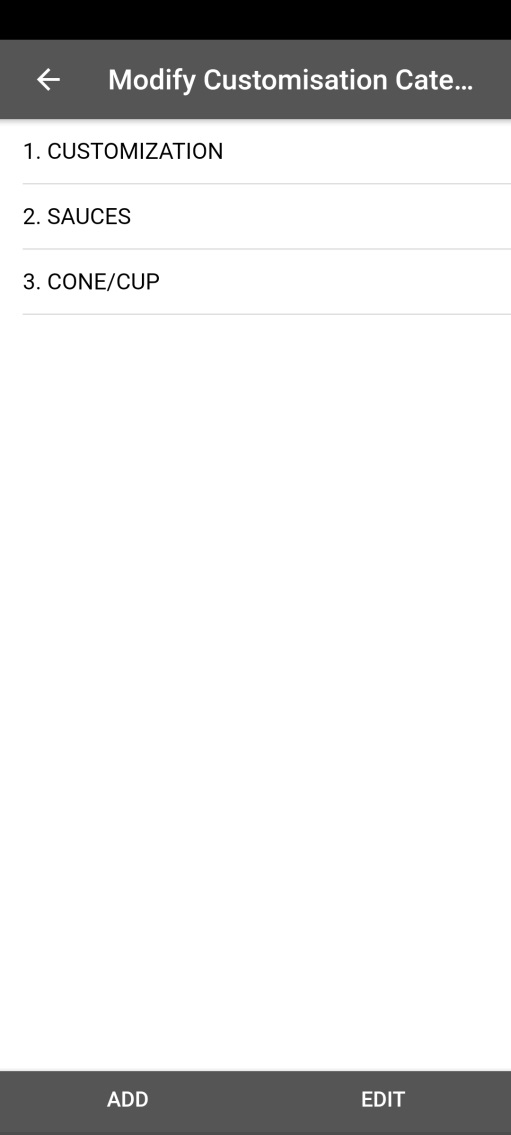
From the Menu Master drop down menu, select, 'Customization Category Master'
Click on 'Add' to add a new category or click on an existing category and then click on 'Edit' if you want to edit it.
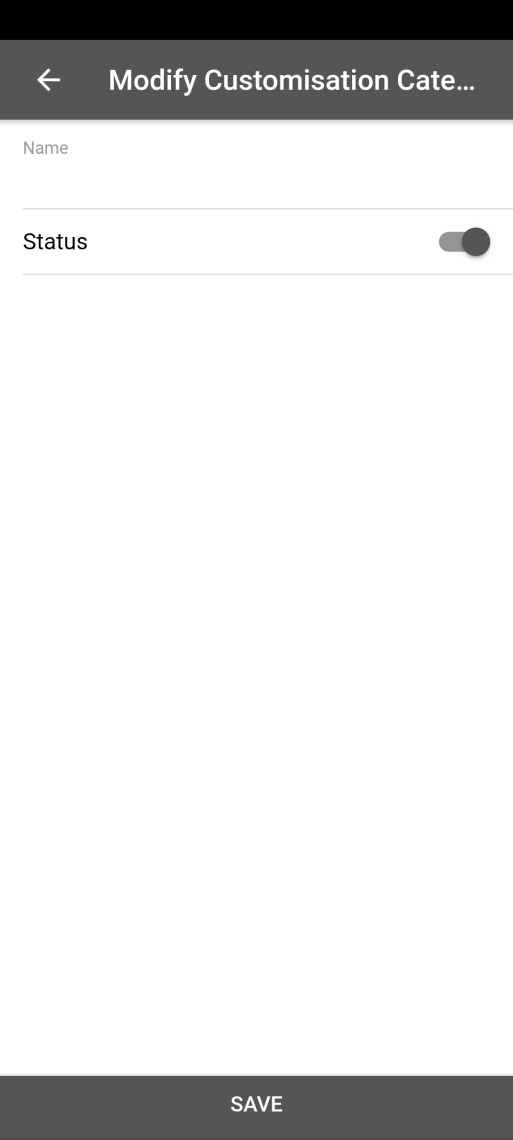
Enter a name for a new category or make appropriate changes to an existing one and click on 'Save'
On logging in to PoketPos app, the top right hand corner shows three vertical dots or the options tab.
Click on it to see the drop down menu that has the option of 'Menu Master'
Menu Master further has the following options.
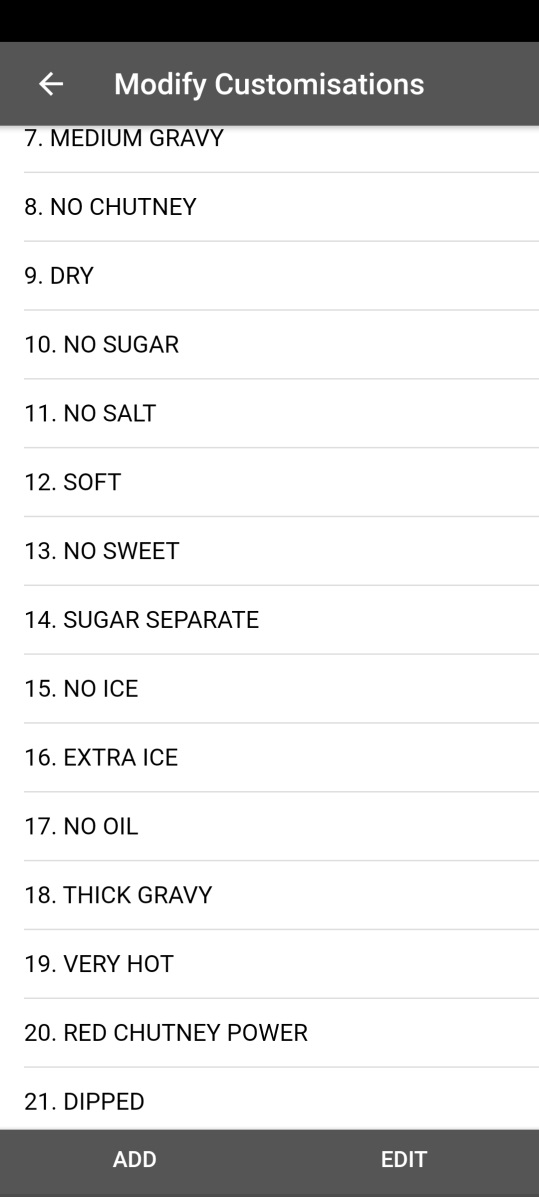
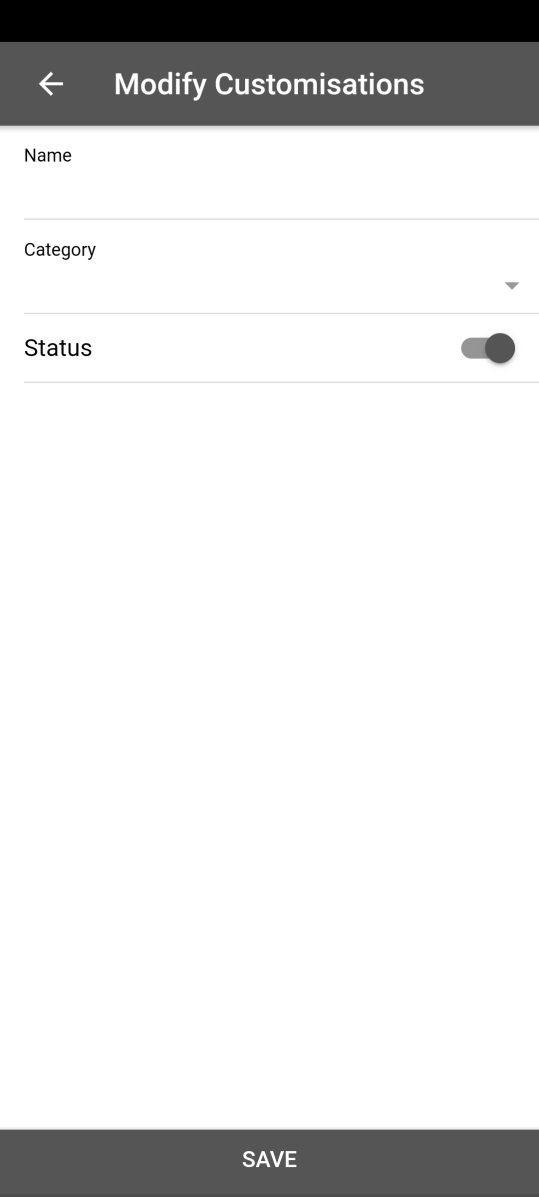
Customization Master (Here you can add or edit a customization as per your choice)
From the Menu Master drop down menu, select, 'Customization Master'
Click on 'Add' to add a new customization or click on an existing customization and then click on 'Edit' if you want to edit it.
Enter a name and select the category for a new customization or make appropriate changes to an existing one and click on 'Save'
On logging in to PoketPos app, the top right hand corner shows three vertical dots or the options tab.
Click on it to see the drop down menu that has the option of 'Menu Master'
Menu Master further has the following options.
Topping Category Master (Here you can add or edit a Topping Category as per your choice)
From the Menu Master drop down menu, select, 'Topping Category Master'
Click on 'Add' to add a new category or click on an existing category and then click on 'Edit' if you want to edit it.
Enter a name for a new topping category or make appropriate changes to an existing one and click on 'Save'
On logging in to PoketPos app, the top right hand corner shows three vertical dots or the options tab.
Click on it to see the drop down menu that has the option of 'Menu Master'
Menu Master further has the following options.
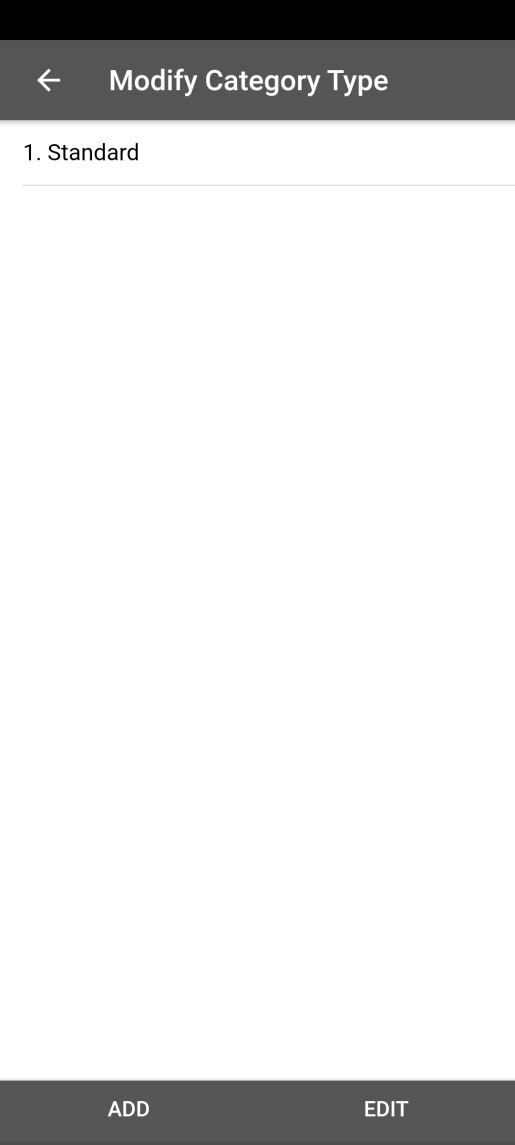
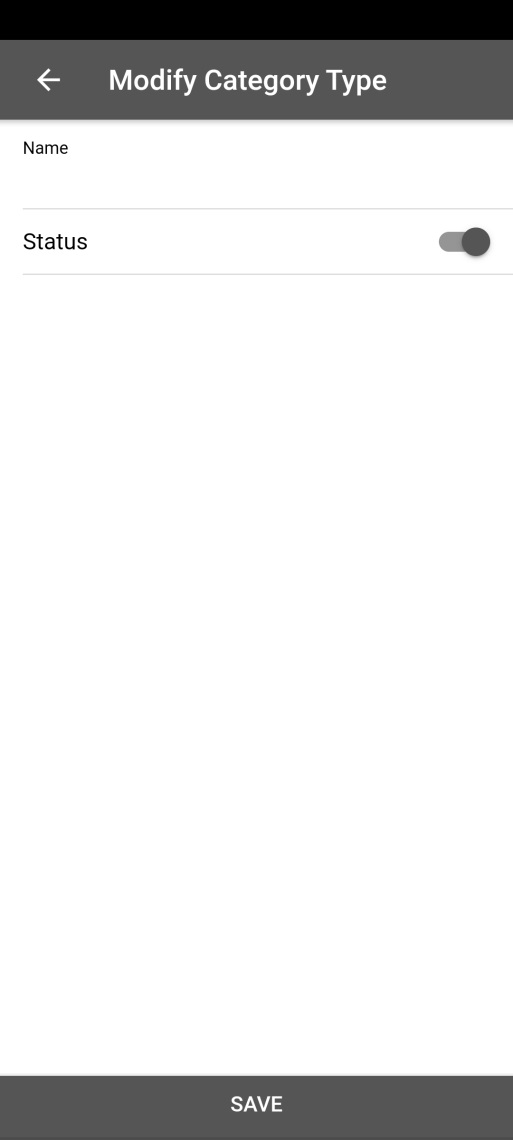
Category Type Master (Here you can add or edit a Category Type as per your requirement)
From the Menu Master drop down menu, select, 'Category Type Master'
Click on 'Add' to add a new category or click on an existing category and then click on 'Edit' if you want to edit it.
Enter a name for a new category type or make appropriate changes to an existing one and click on 'Save'
On logging in to PoketPos app, the top right hand corner shows three vertical dots or the options tab.
Click on it to see the drop down menu that has the option of 'Menu Master'
Menu Master further has the following options.
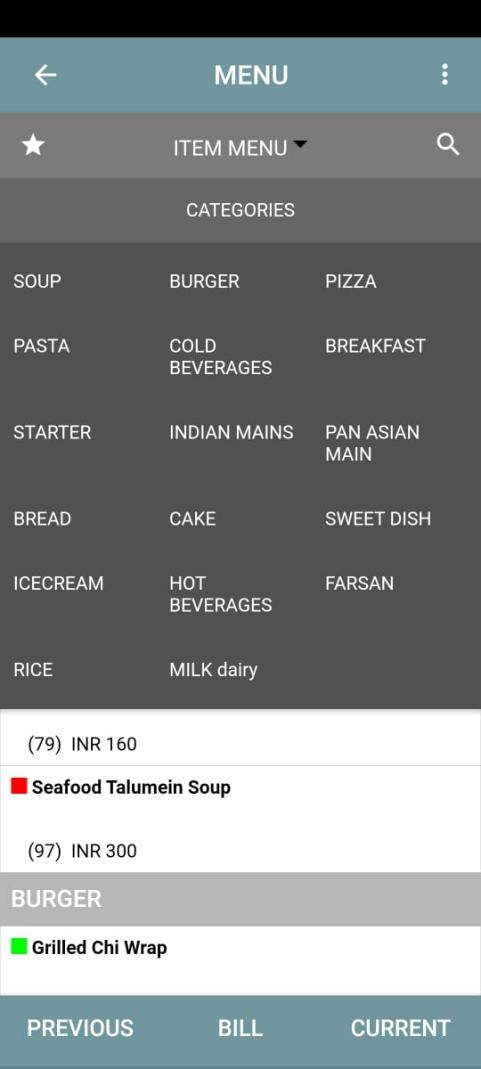
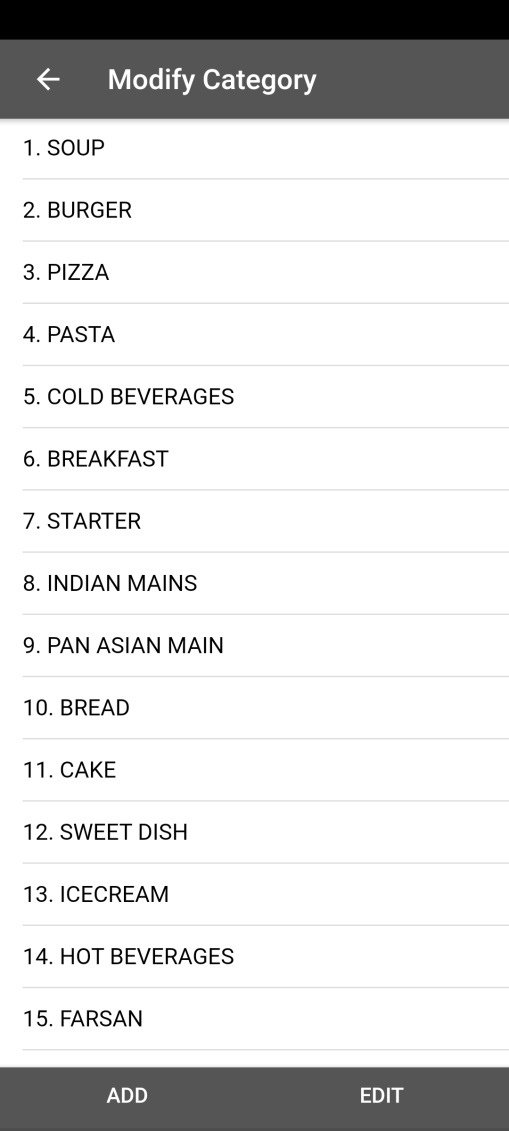
Category Master (These are the categories that get displayed in your menu)
From the Menu Master drop down menu, select, 'Category Master'
Click on 'Add' to add a new category or click on an existing category and then click on 'Edit' if you want to edit it.
Enter a name and select the type of category for a new category or make appropriate changes to an existing one and click on 'Save'
On logging in to PoketPos app, the top right hand corner shows three vertical dots or the options tab.
Click on it to see the drop down menu that has the option of 'Menu Master'
Menu Master further has the following options.
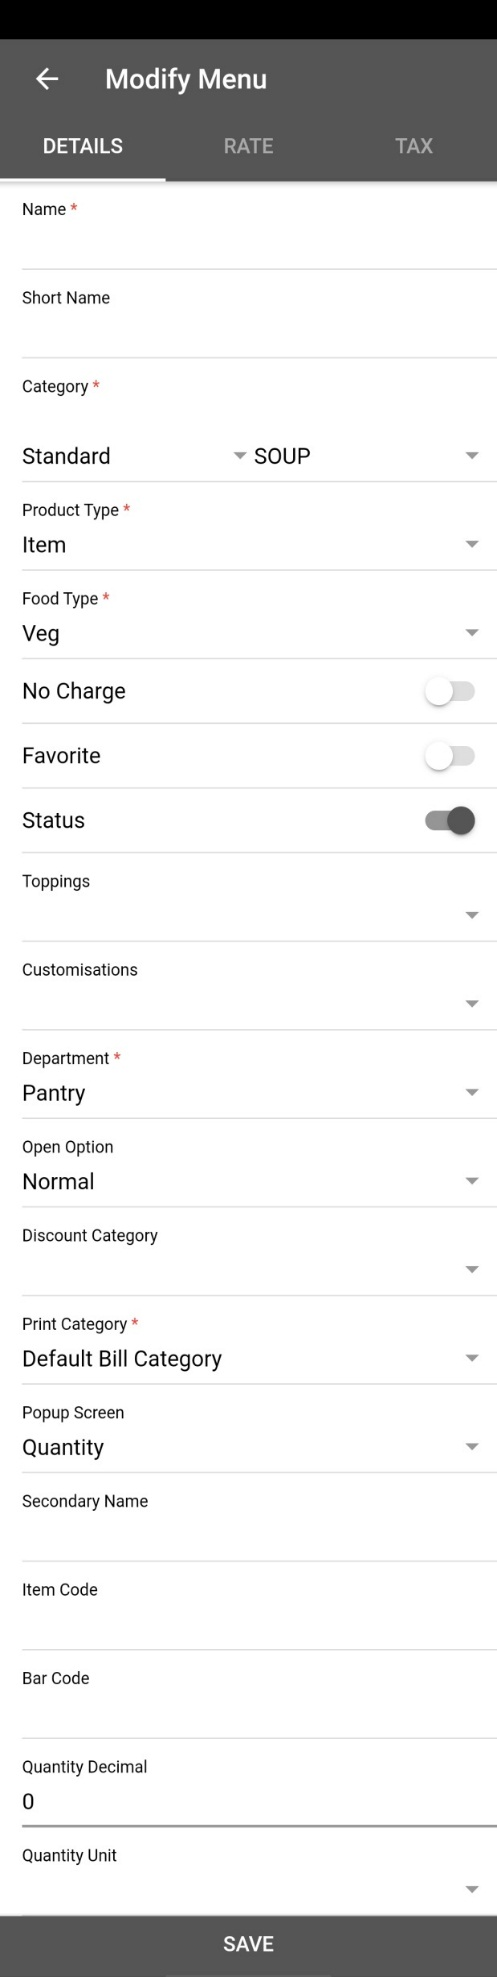
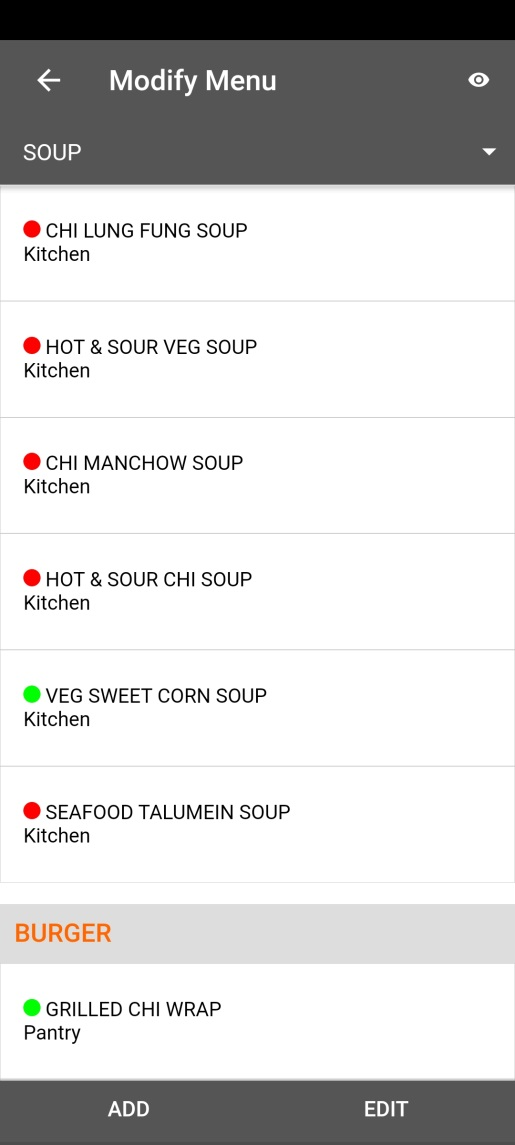
Item Master (This has the list of items that get displayed in the menu)
From the Menu Master drop down menu, select, 'Item Master'
Click on 'Add' to add a new item.
In the 'Details' tab, enter the Name
Select the Category
Select the Product Type
Select the Food Type
Enable 'No Charge' if needed
Enable 'Favorite' if needed
Select Toppings if any
Select Customization if any
Select the Department
Select the appropriate Open Option
Select the Discount Category
Enter the Item Code if needed
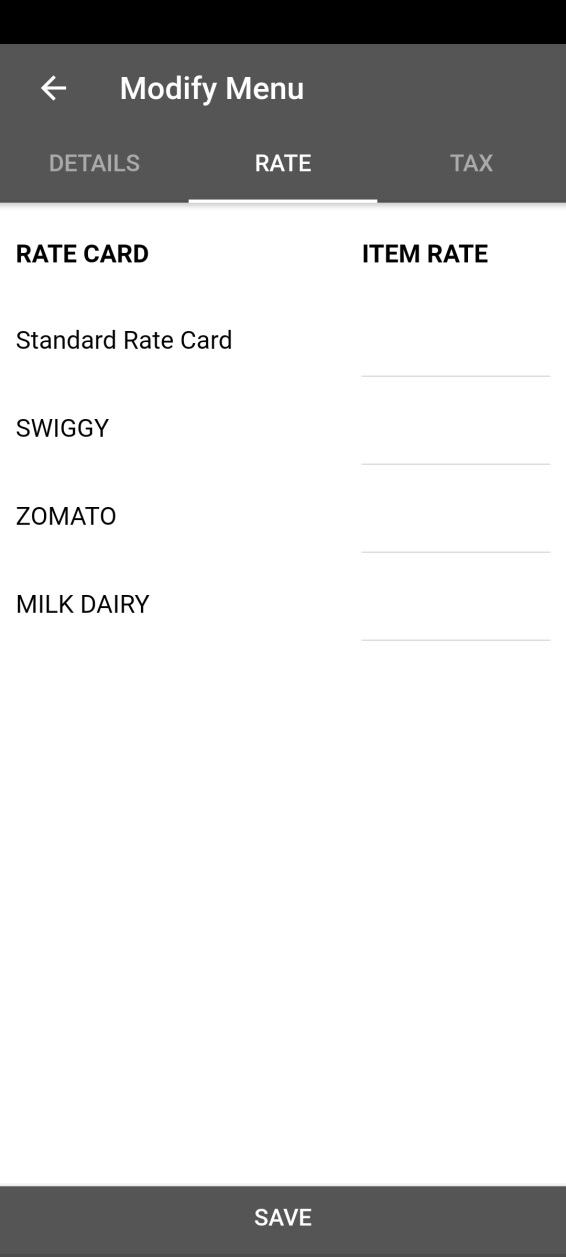
In the 'Rate' Tab, enter the rate for specific rate cards
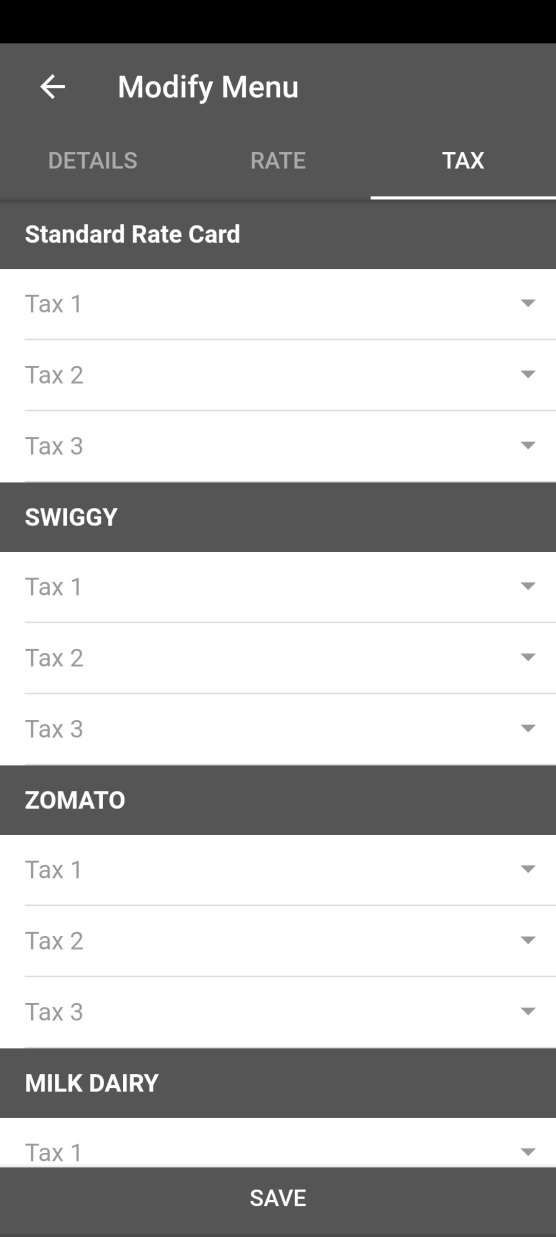
In the 'Tax' tab, enter the taxes if any and click on 'Save'
Restart the application
To edit an item, select the item and click on 'Edit'